

Rocking Chair DIY Makeover
Mama needs a new rocking chair. Or, should I say, mama needs a rocking chair makeover!
Don’t you agree…rocking chairs are such special chairs. Whether rocking a child to sleep, cuddling up with a good book, or lounging on a front porch, rocking chairs are symbols of relaxed time and familial connections.
I received my rocking chair as a gift when I was expecting my twin daughters. It was an incredibly special and thoughtful gift from the girls in the treble choir I was teaching at the time. They threw me a baby shower in class and presented me with my new rocking chair. Let the grateful tears roll! I loved those girls and still think of them as my “baby shower girls!”
As you might guess, this rocking chair was used…a LOT! Oh, how many hours were spent reading, cuddling, comforting and cooing with our babies. I look at this rocker and the memories come flooding back.
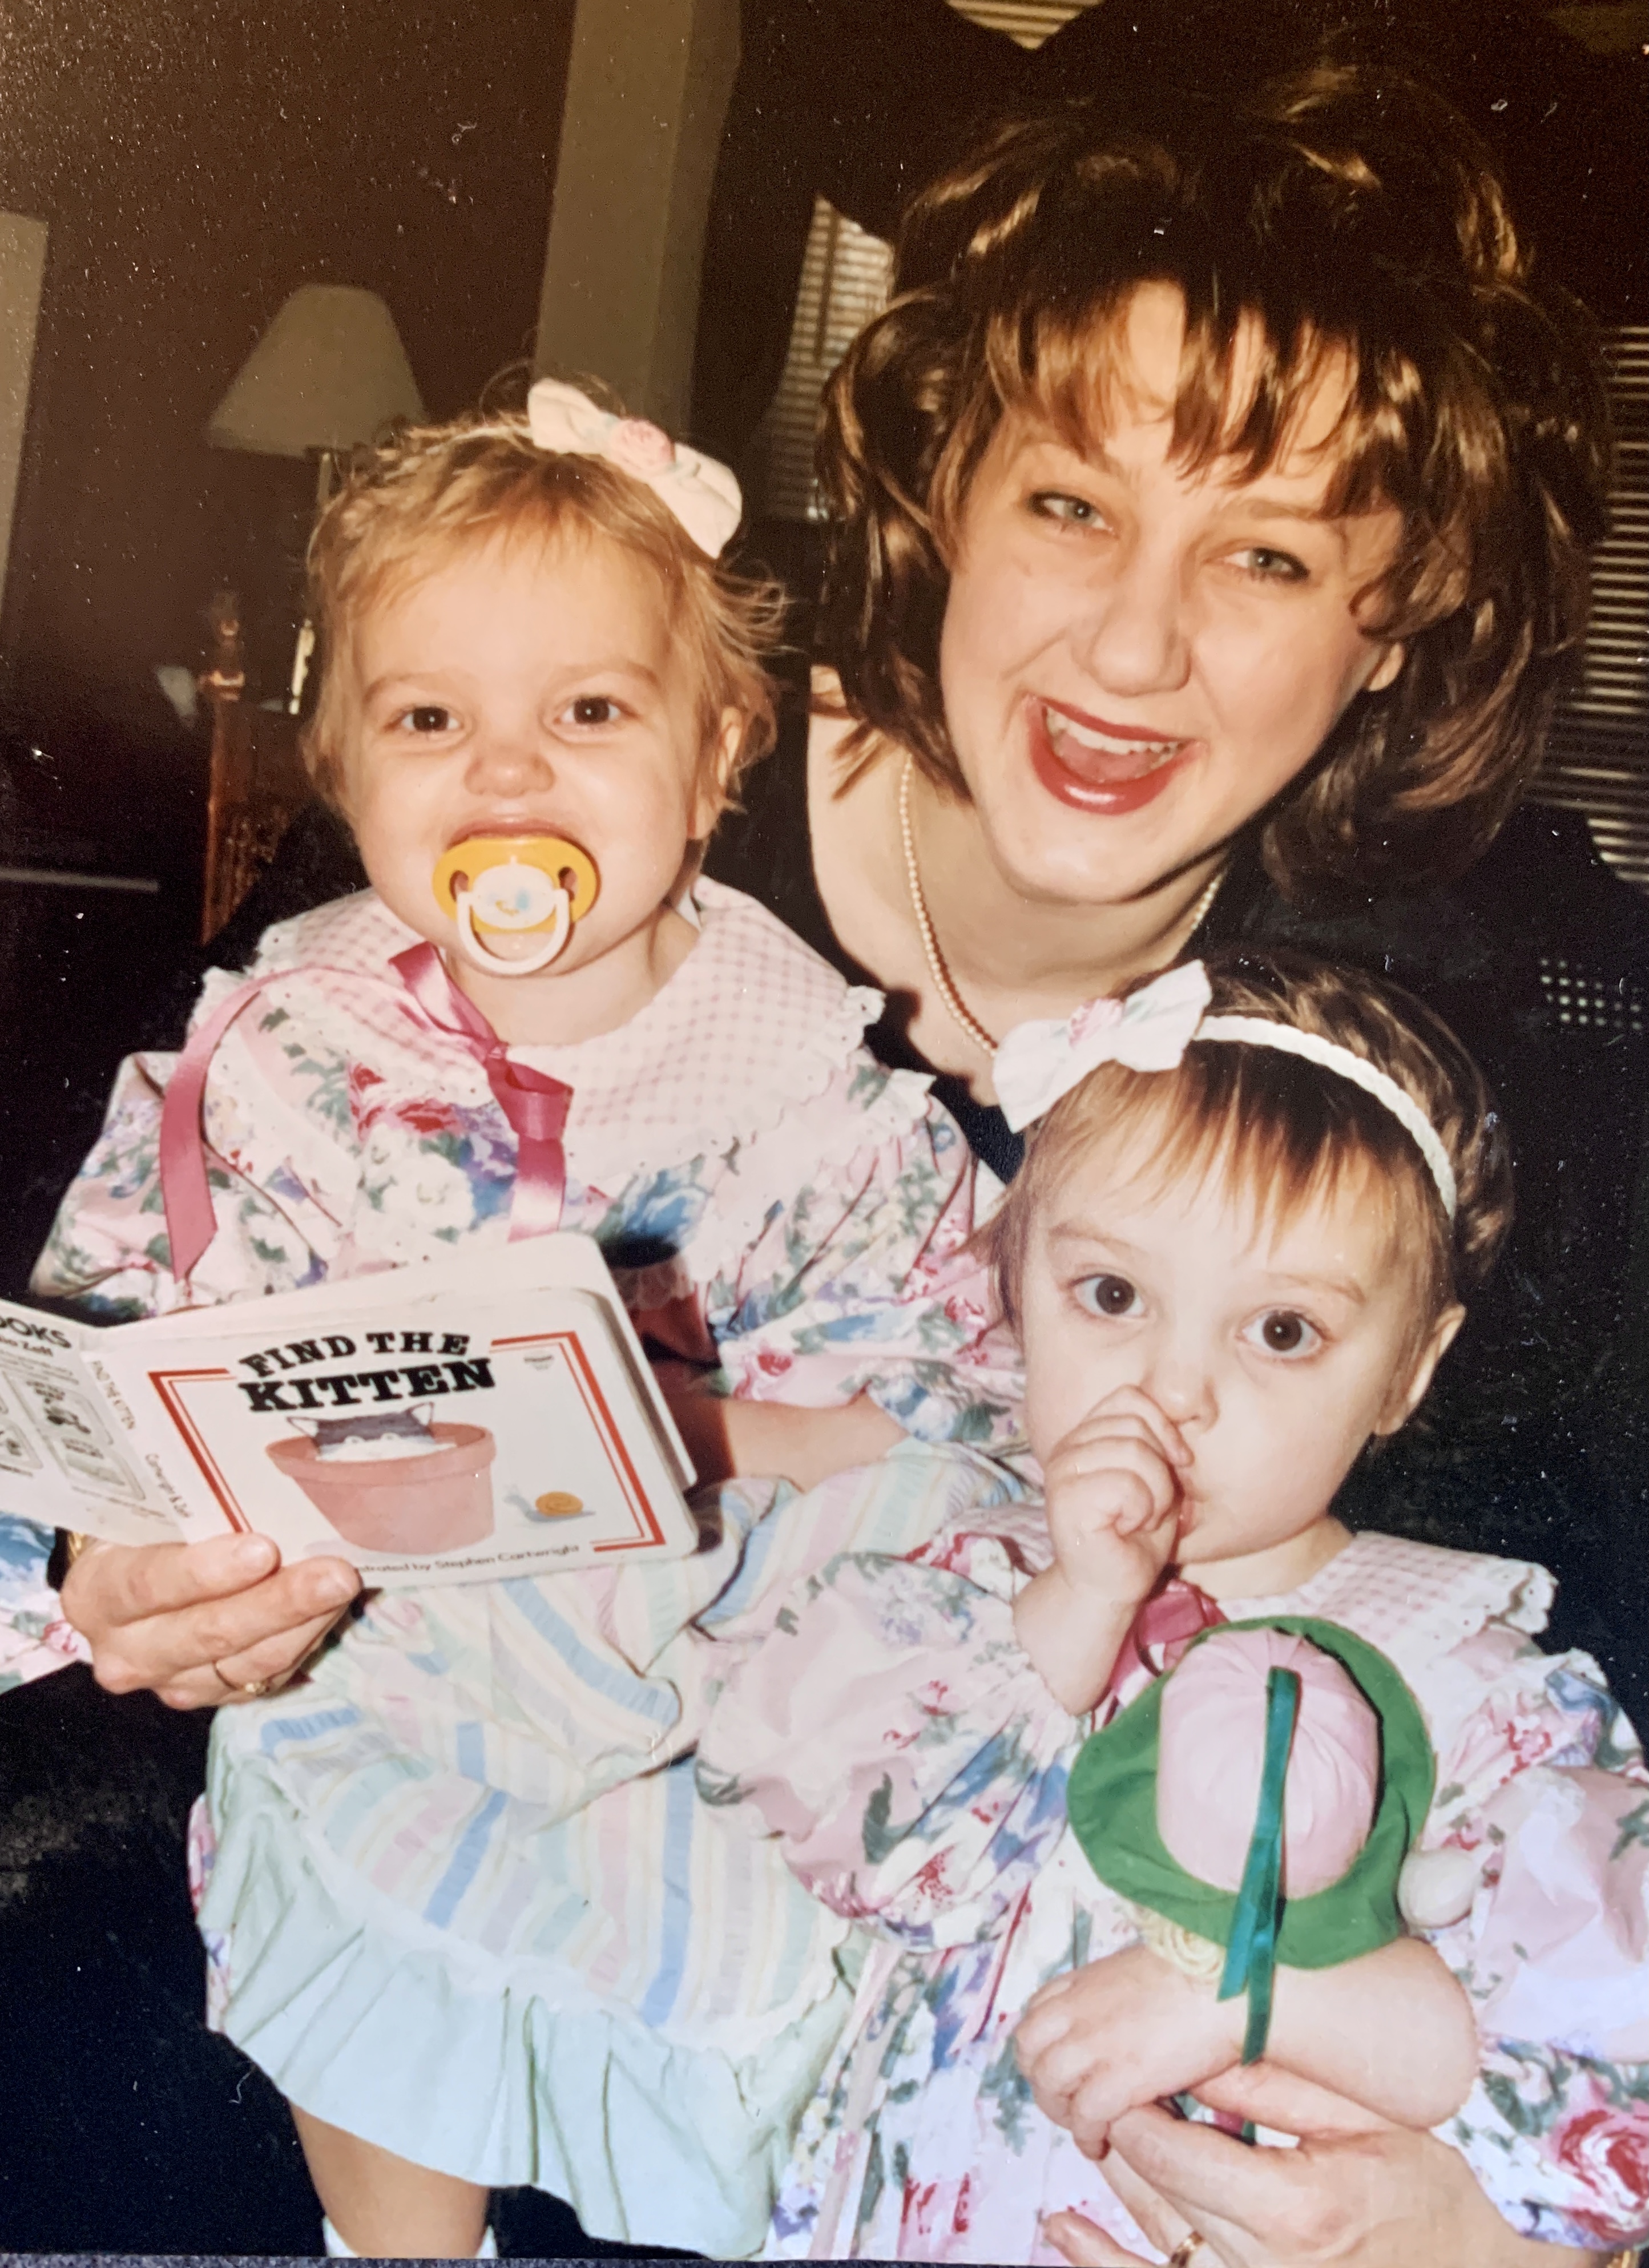
I rediscovered my rocking chair as we were organizing our dusty basement back room. In the 26 years that I have owned it (Are our girls really 26 years old?), we have changed homes twice and changed home decor exponentially more.
Time for a rocking chair makeover!
I love a good furniture makeover. It reminds me of a few other easy makeover projects:
Fun and Easy Wallpaper Drawers
How to Create Your Own Plant Throne
The Simplest Dining Chair Makeover
I want to keep my beloved chair but want to incorporate it into the guest room refresh I am currently working on.
Sidebar…I’ve decided the guest room will also function as my “get away from it all reading room.” Perfect for my “new” rocking chair!
A Classic
My rocking chair is pretty classic.
The size has always been perfect. Not too big and not too small. Fits my tush just right!

With this rocking chair makeover, I am not planning any structural changes. Just a change of color and a little personalized surprise at the end! Keep reading…you don’t want to miss this!
Materials I Used
-Rocking Chair (Mine was a gift but you can find a similar one here.)
-Sandpaper block/Hand sander
-Paint (Behr “Inked” – Satin finish)
-Vinyl Monogram Decal (I found mine on a fantastic Etsy shop called Jens Custom Printing Co!)
-Painters Tape
-Scissors
-Squeegee (or credit card)
-Clean Cloth
Prep Time
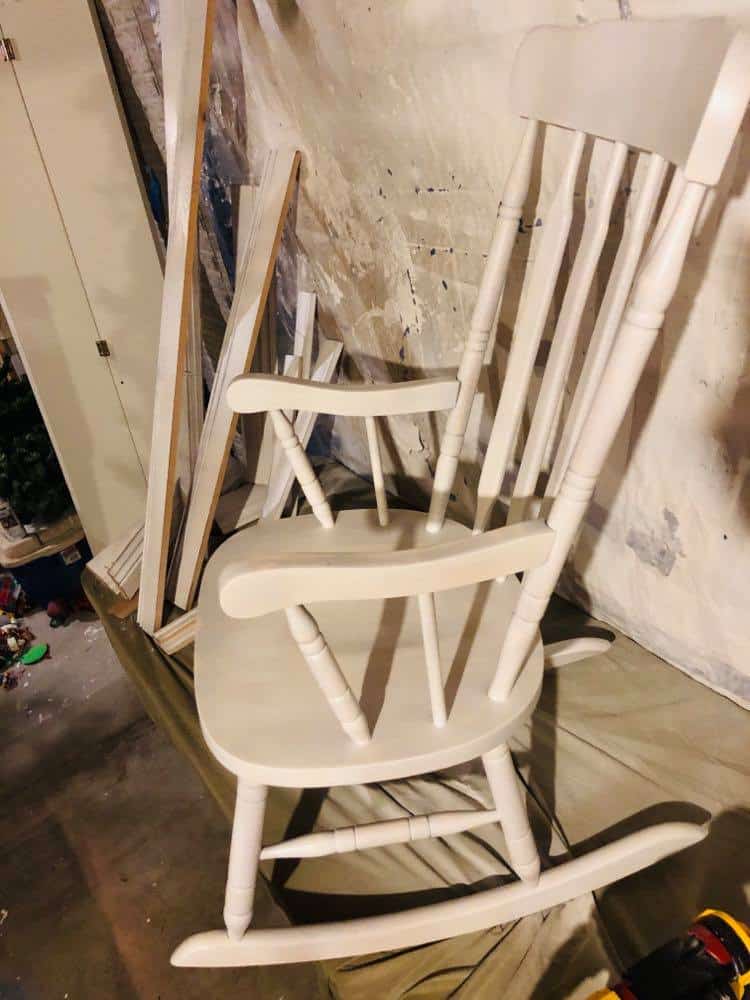
As with any painting project, the prep work is the most important. Let the sanding begin!
I started by hand sanding the detail spindles and then switched to a palm sander for the larger areas on the chair.

Now that the surface of the chair is roughed up, it is important to prime the chair.
What an eerie photo! After priming the chair, it looks so ghostlike with our weird basement lighting! BOO!
The Magic of Paint
It is always SO exciting when you can actually paint! I was tempted to spray paint because of the spindles but instead, we opted to use our paint sprayer. GAME CHANGER! I will never regret investing in this paint sprayer. So fast and the even finish achieved is amazing.
Love to spray paint? Here are 12 Spray Paint Projects that are Fun and Easy!
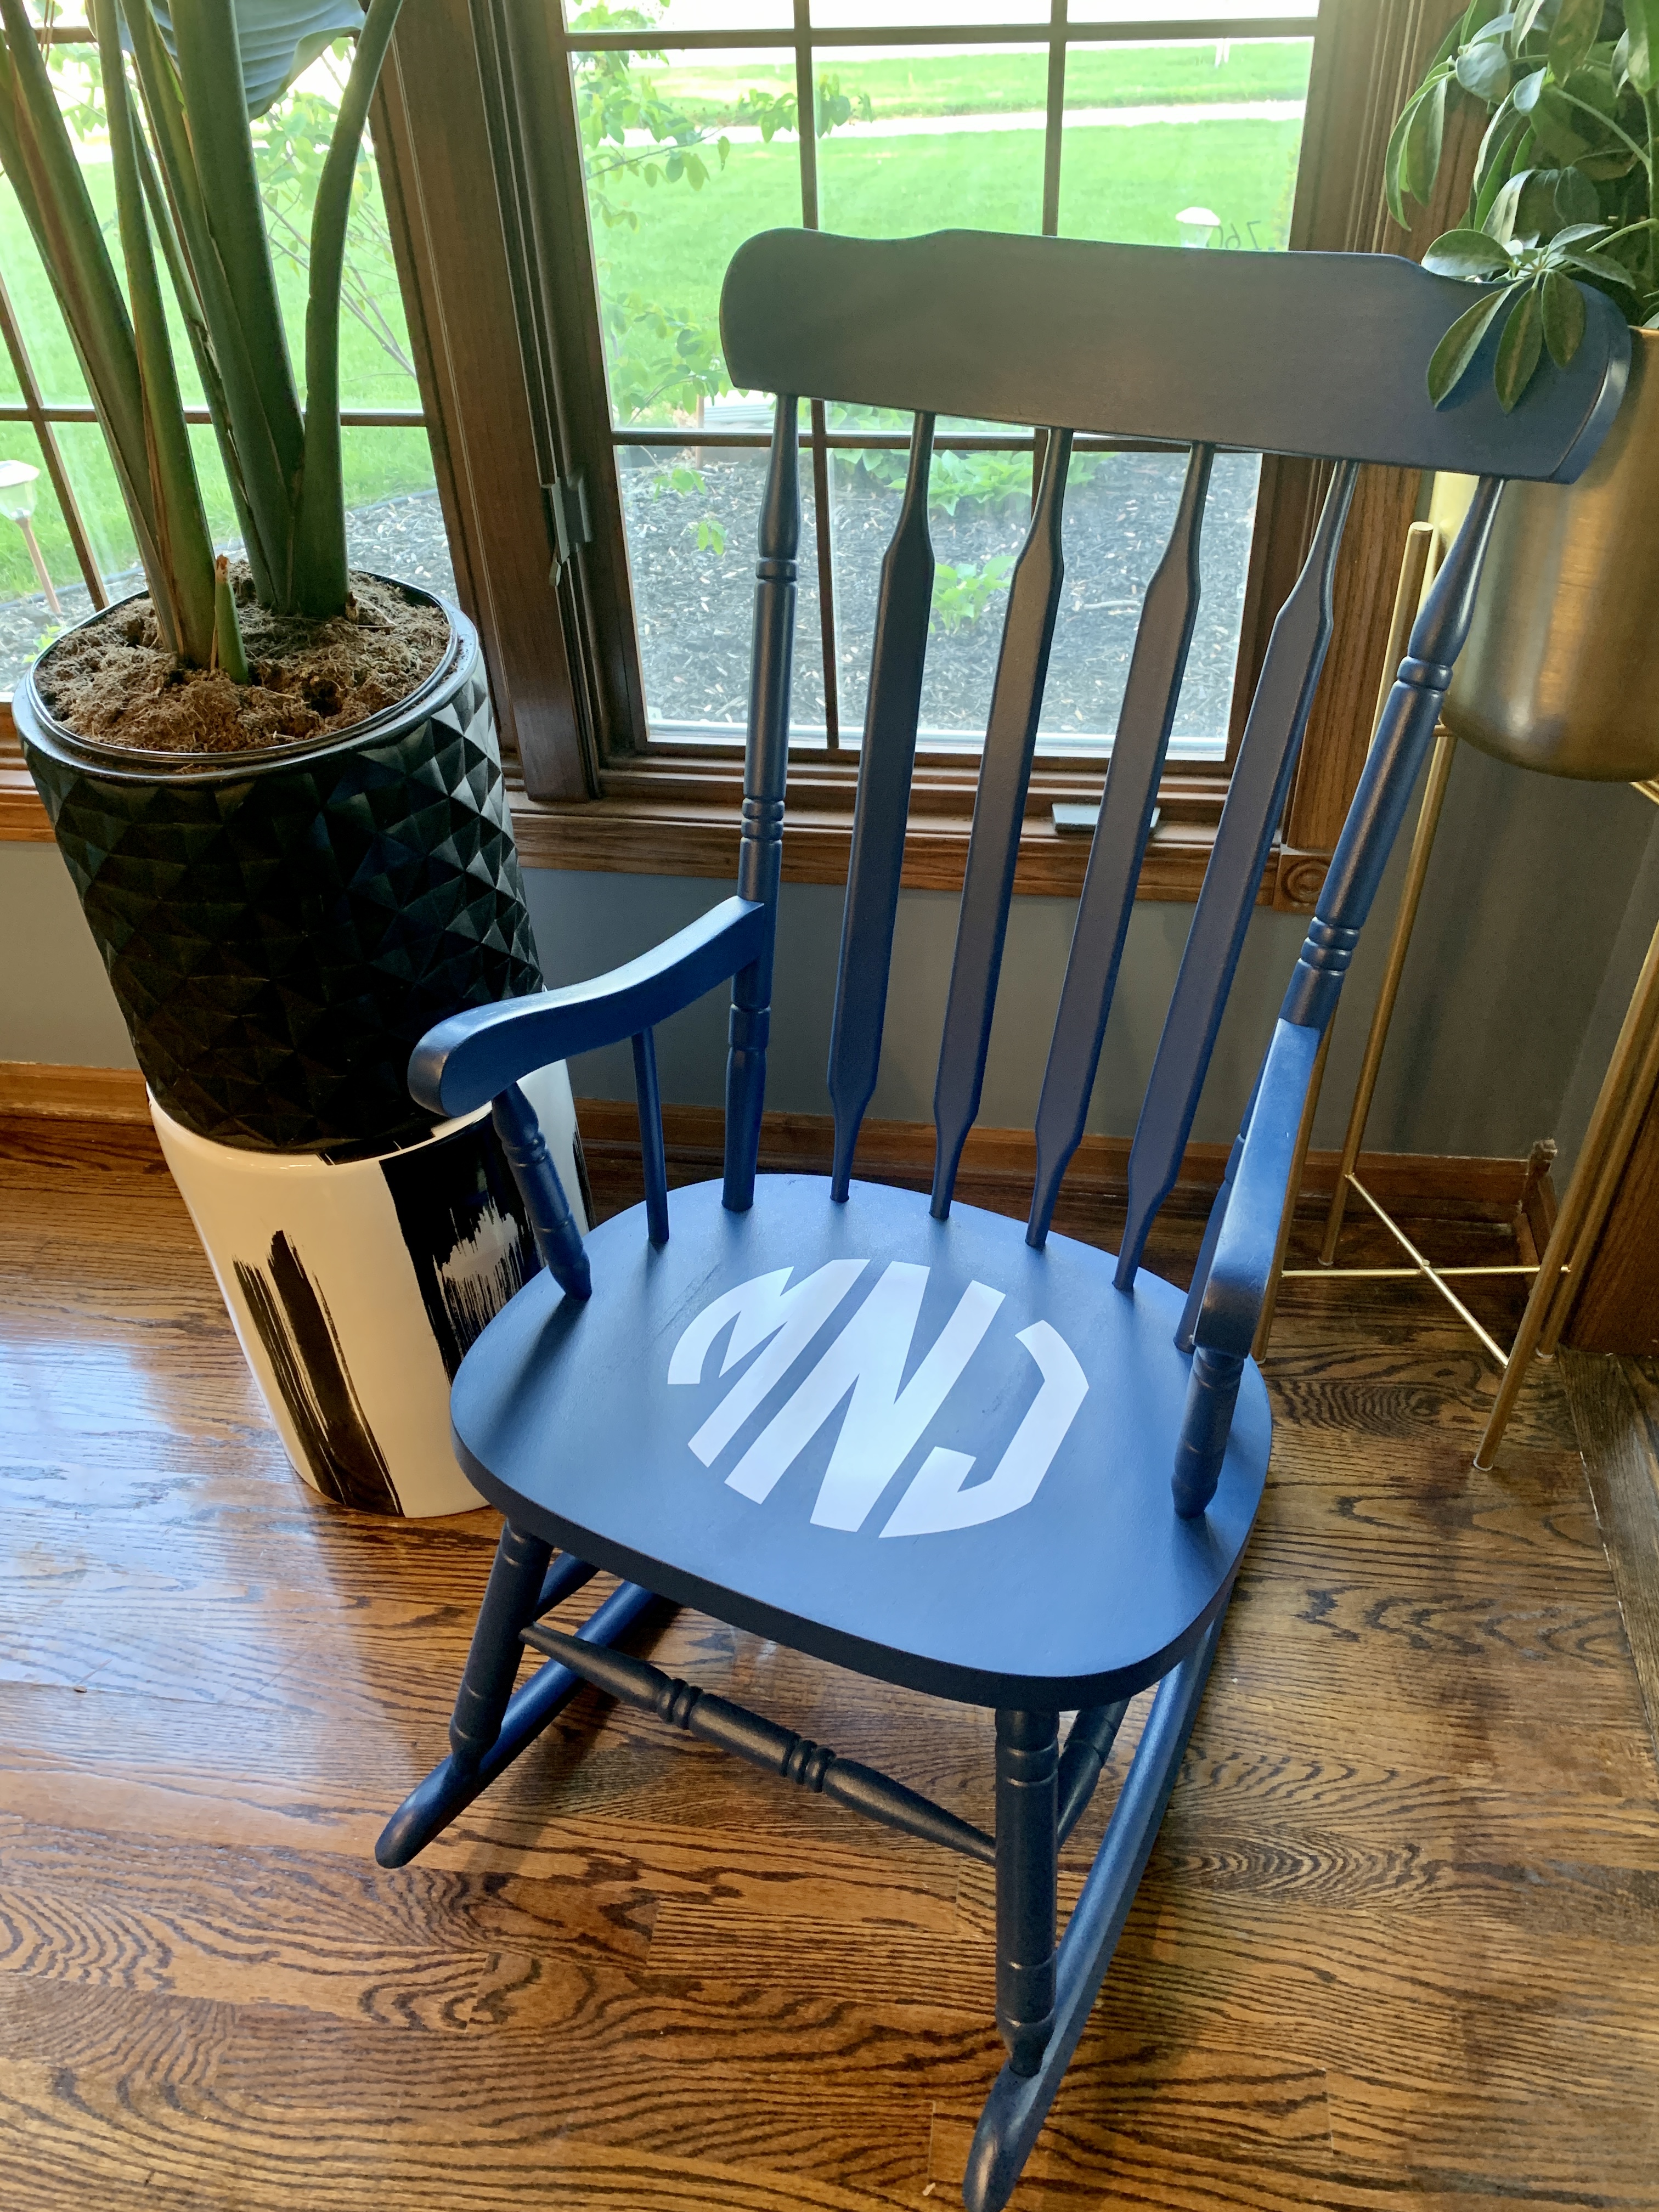
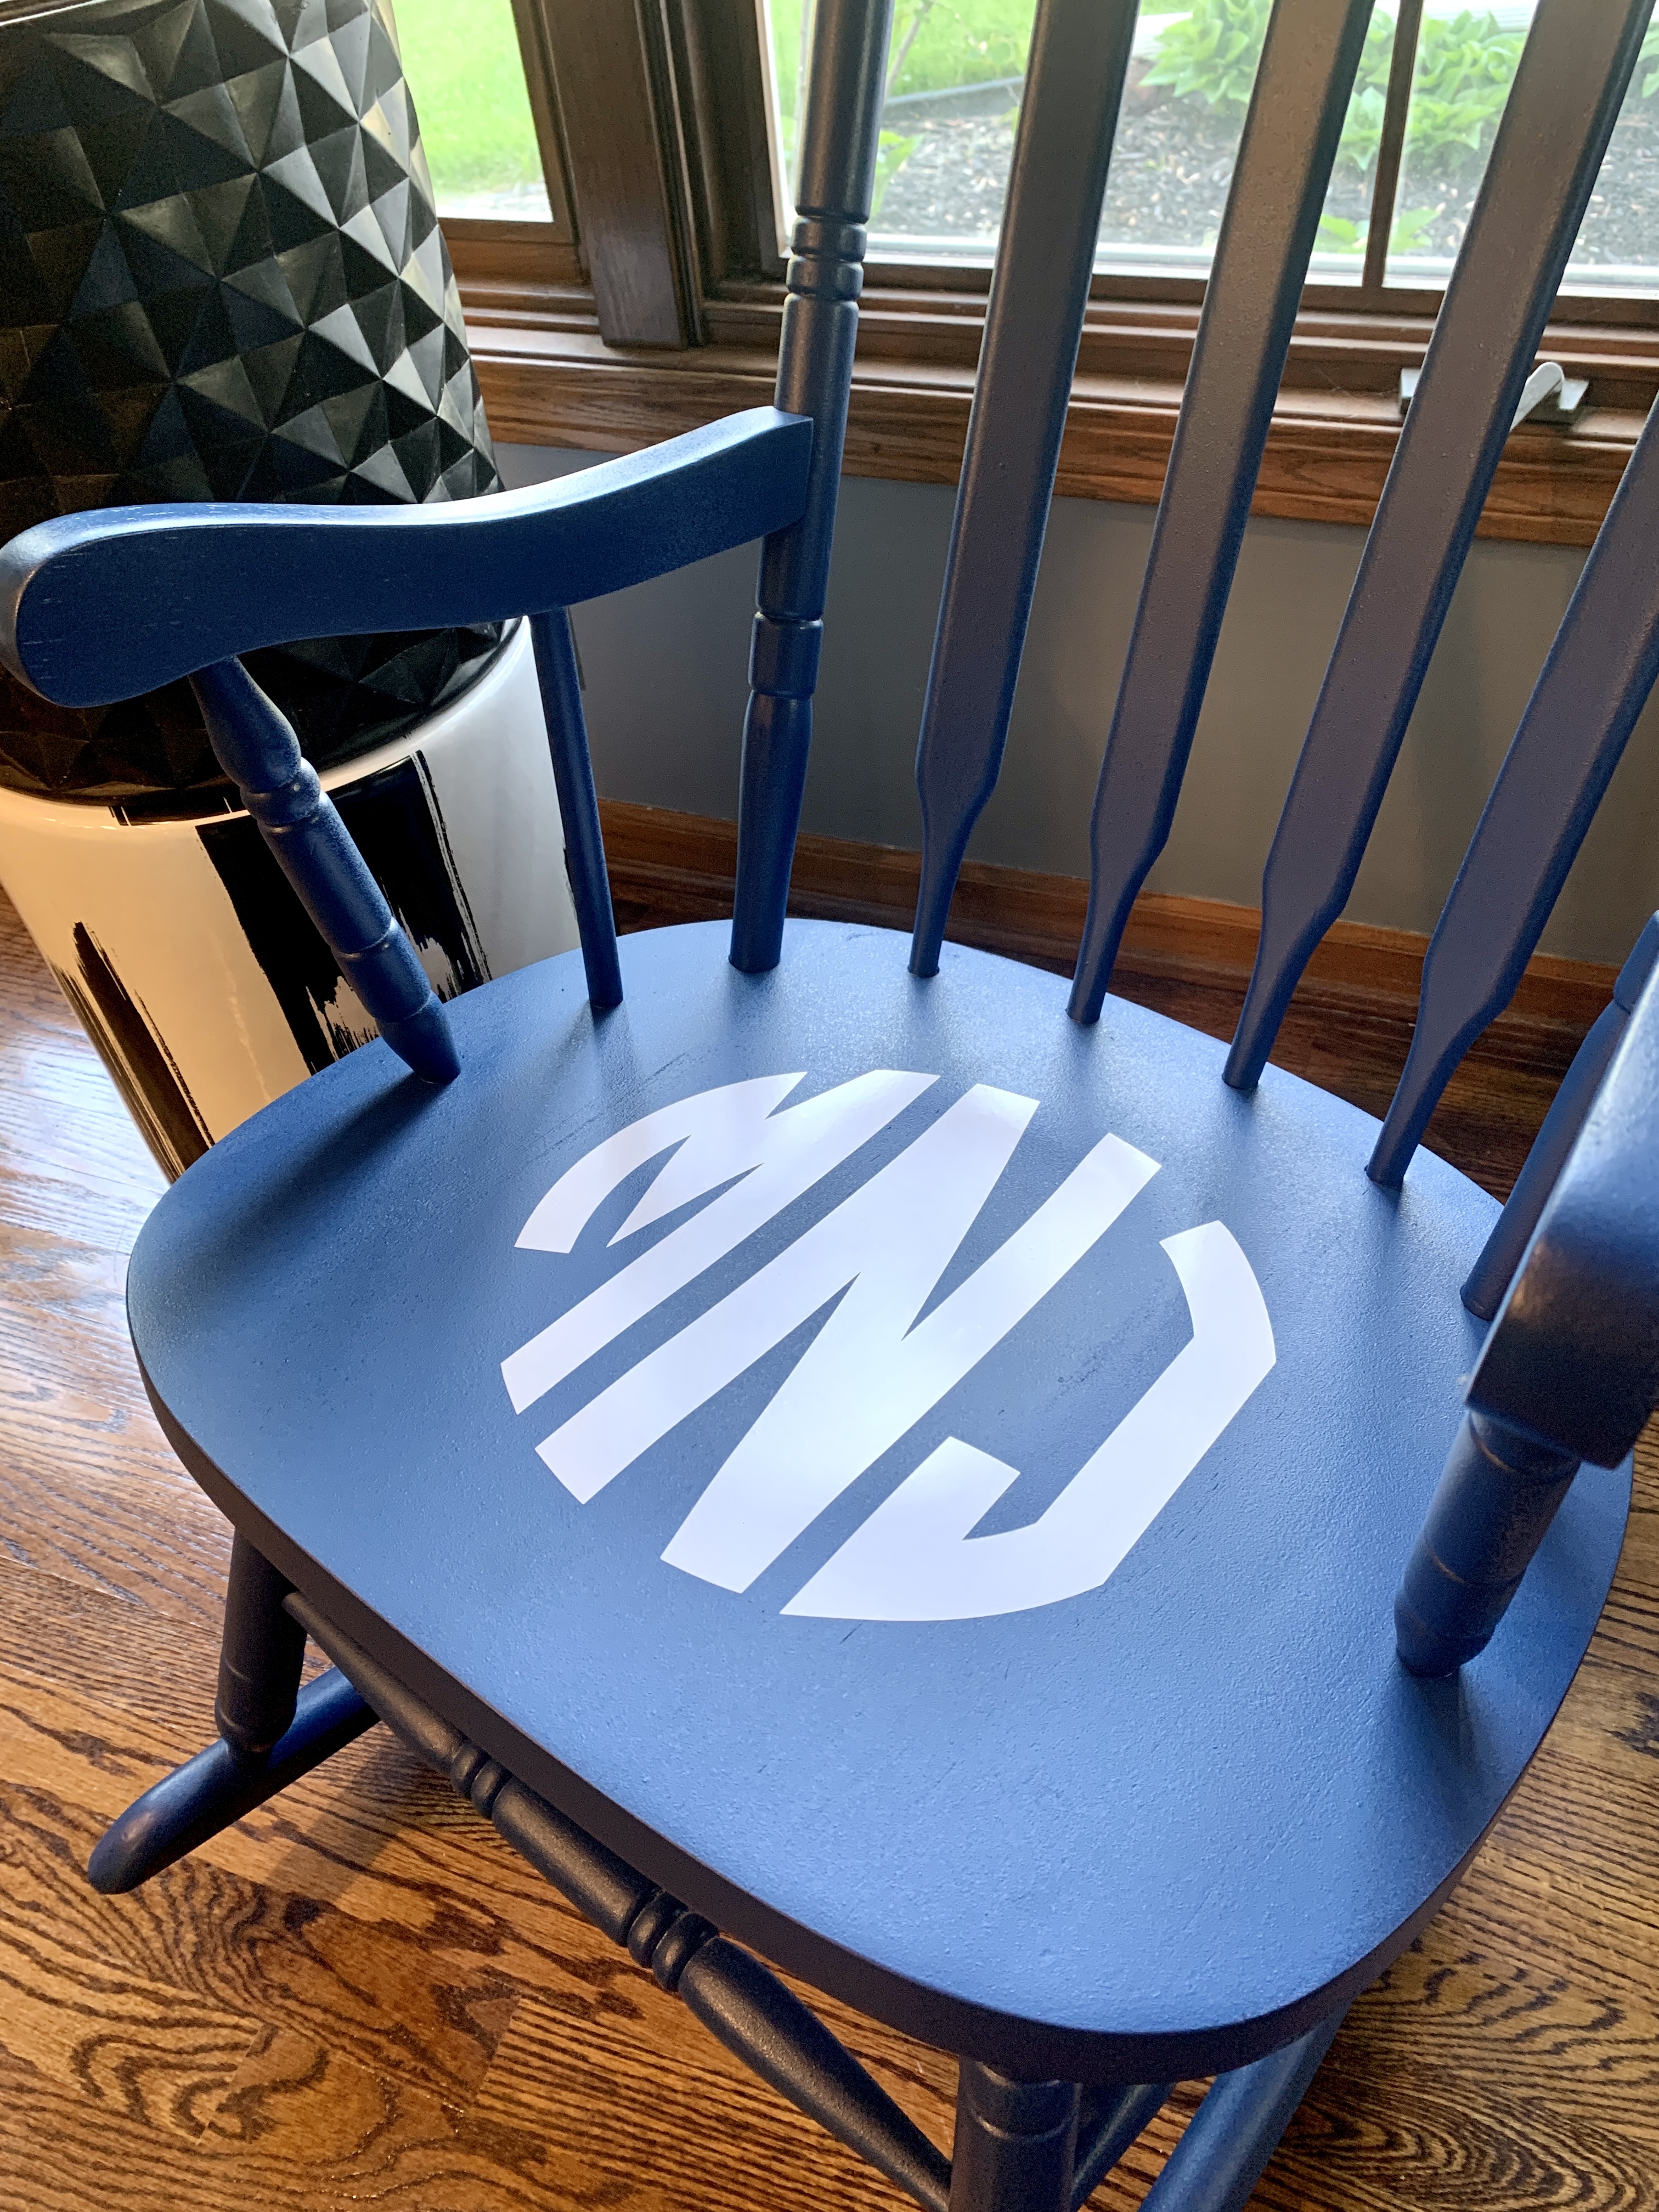
Classic navy is one of my favorite colors so I chose Behr “Inked” paint in a satin finish. I also think the navy color gives me flexibility in moving the chair to different rooms throughout our home.

I could call it good right here.
But I like a surprise ending.
And I love a good monogram!
I’m going to place the monogram on the seat of the rocking chair!
Since I will be the one doing the sitting in the chair, I am going to use my personal monogram.

If the order of letters in monogramming is confusing, Here is the order for a basic three initial monogram:
First name initial, then the last name initial, followed by the middle name initial at the end.
Hello MNJ
Yes, this is my personal monogram for Melissa Jane Noonan
As I mentioned, I found this great Etsy shop, Jens Custom Printing Co. that features larger sized vinyl monograms. Down the road, I would love to put one on a wall. (This would be so adorable above a crib! Grandchildren?)
The great thing about this vinyl monogram is that, someday, if I want to change it out for a different name , it is an EASY change.
Read the Instructions!
Reading instructions is sometimes a lost art. While this is an easy project, it is still important to read the instructions!
Tape the monogram exactly where you want it with painter’s tape

Carefully peel back part of the underside of the decal.
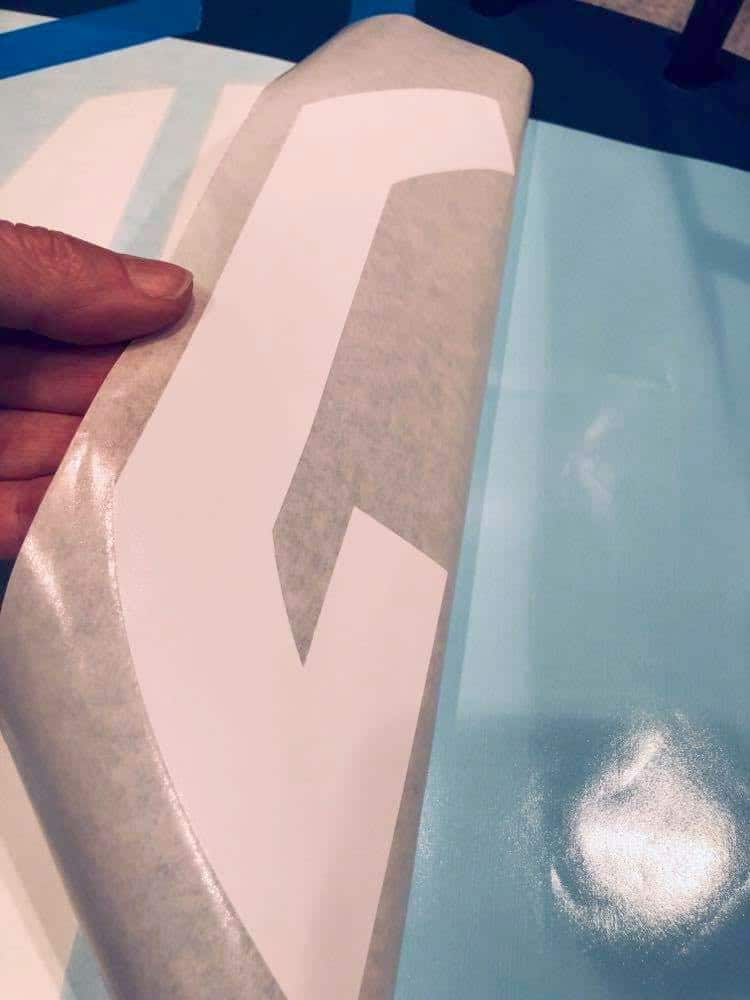
Next, cut about a third of the backing paper off.
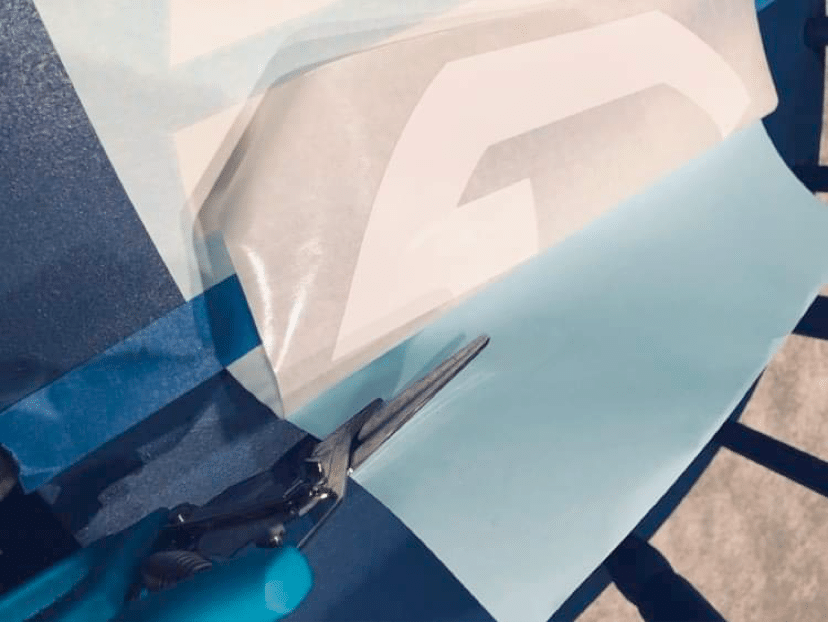
Work from the middle and press the exposed decal onto the surface. Use a squeegee (or credit card) to FIRMLY rub across the decal to remove any air bubbles.

Take off all the painters tape. Start to pull the remaining backing paper off VERY SLOWLY!
Then, starting in one corner, pull diagonally to remove the top sheet to reveal the decal. Voila!
Again, take your time!
I used the squeegee again to take out small air bubbles and secure the monogram firmly to the chair. I had to be very careful with the center of the decal because there is a curvature in the center of the chair. However, I just took my time and it worked beautifully!

I used a clean cloth to smooth out any remaining bubbles. I also gave the seat of the rocker a light coat of Clear Coat to “seal the deal” so to speak!
The Final Result
I could not be happier with the final result! Classic but with a surprise!
The monogram somehow invites me to plop down and start rocking!

This is AWESOME! I have been able to keep my beloved rocker but with a little modern personalization update!
The chair may have a different look but it is still infused with all my beloved memories of our children.
While my girls don’t fit in my lap anymore, I can rock, talk, and laugh alongside my grown up little girls!

Happy Mother’s Day to all! Keep on ROCKIN’!
Cheers!

Disclaimer: This post contains affiliate links.
Love everything about this: the story, the re-do, and you and the girls. Lovely all the way around.
Thank you so much, Janet! This was a fun one. I was looking for photos of the girls when they were little and went down some really fun rabbit holes! Thanks a bunch for reading!
Love the chair! I have a question about the wood floor. Is that wood or luxury vinyl tile planks? I’m trying to find an LVT that with go with oak cabinets and woodwork from the 90s and your floors are gorgeous! (Not going to paint my cabinets because I painted Katie’s kitchen cabinets in white and blue like you did, and one kitchen a decade is plenty!!
Hi Bette! The floor is actual wood. We had the floor refinished about 7 years and,sadly,there are some areas that need to be refinished AGAIN! (grrr!) There are some beautiful LVTs out there that really look like the actual thing! Have fun shopping for it…sounds like a fun project to me! And as far as the kitchen, I say “we” painted the kitchen, but I really mean to say “we PAID someone else to paint it!” LOL Happy Mother’s Day!
This rocking chair looks amazing, great job Missy!
Thanks a bunch, Wendy! Sitting in it right now as I type! =)
The rocking chair looks amazing. I love the color and the monogram. Happy Mother’s Day!
Thank you so much, Renae! Happy Mother’s Day to you as well!