

Fun and Easy Wallpaper Drawers
The 90s are slapping me in the face! This was the decade when we bought the most cds. From classical to indie rock, if we liked it, we bought it for our cd library. It was like eating potato chips…you can’t just have one! Let me show you how to turn a tired piece of furniture into a way cool CD tower with fun and easy wallpaper drawers.
As we flash forward three decades, (Oh, dear! Can it be that many?) we are beginning the process of digitizing the cds we want and donating those we don’t.
Sidenote: If you are interested in selling your cds online, Bonavendi is a good place to go. Honestly, you won’t get much per cd but it can add up if you have a lot!
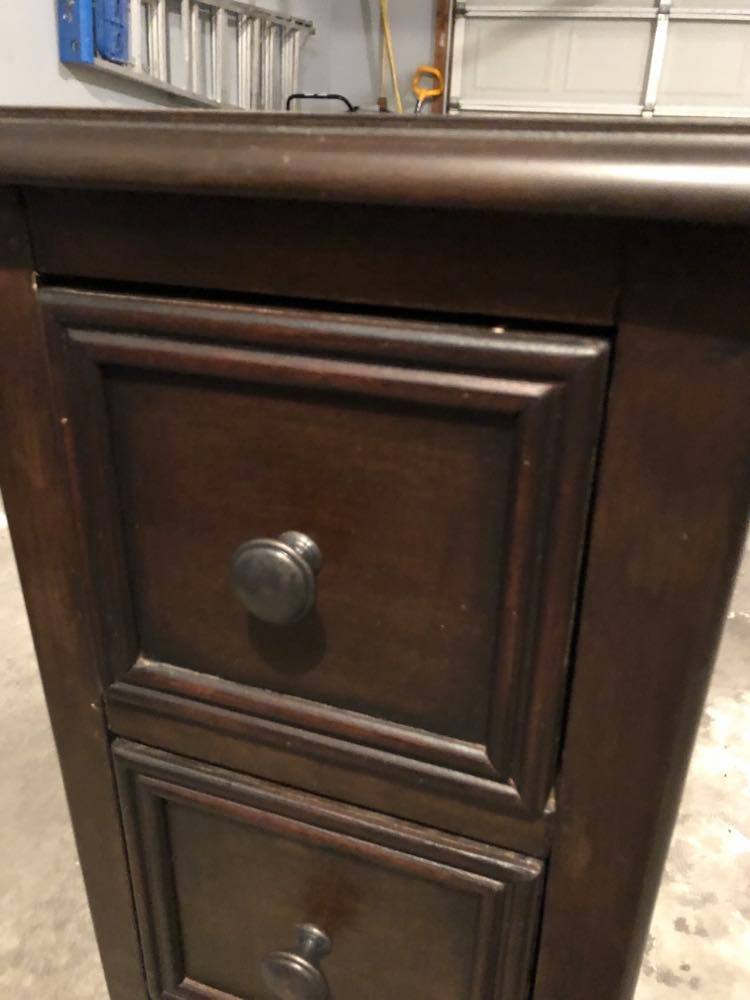
One of the dinosaur furniture pieces that has been staring me in the face is our cd tower. While still in decent shape with functioning drawers, it looks tired, dated and in need of a makeover.
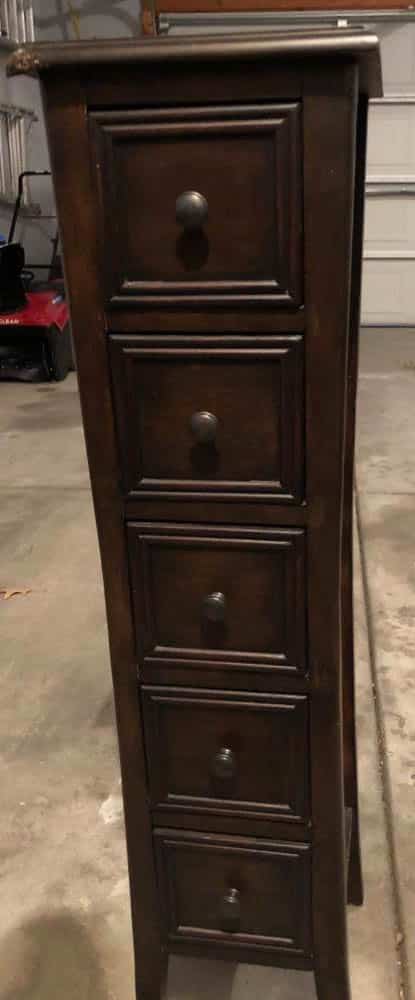
Great height. Great Storage. YAWN on the color. Put me to sleep knobs.
Of course, the magic ingredient is paint and wallpaper! But what else can I do that is a little different? Read on!
Here is what you will need:
– CD Tower, nightstand, dresser, or any wood furniture piece that has drawers.
-Sandpaper
-Palm Sander (although can be sanded by hand)
-White spray paint/primer (I used two cans.)
-Tape Measure
-Exacto Knife or razer blade
-Peel and Stick Wallpaper
-Drawer Pulls (Wait till you see what I discovered!)
Rust-oleum Painter’s Touch 2x Ultra Cover is my paint of choice because it is paint and primer in one! Plus, it doesn’t drip like some other brands. Yay!

The Sanding
As with any paint project, prepping the project is the most time-consuming. Don’t skip this step! Using fine-grit sandpaper, give your project is generous sanding. Make sure to sand all areas including finer detailed moldings and accents.
I used a palm sander for most of this project but followed up with some hand sanding to make sure I got all of the crevices. This is NOT a quality wood piece so I am not looking for wood grain. I just want to rough up the surface to take off the top layer of color.

Once, sanded, wipe down the project with a damp cloth to remove any remaining dust.

The Painting
Using spray paint appears to be a no-brainer. Point and shoot, right?
Not so! You do need to use a little technique in spray painting. Paint your project using many thin layers of paint. Be patient and avoid one or two heavy coats. Your painting will be more even and long-lasting.

When spray painting, use a sweeping motion that begins and ends in the air beside the piece. Using this technique, you will avoid splotches and uneven painting.
Let dry completely. I like to give it at least a couple of days so that the paint cures and hardens.
For more spray painting project ideas and inspiration, check out this post I did on Spray Paint Projects that are Fun and Easy!
The Surprise
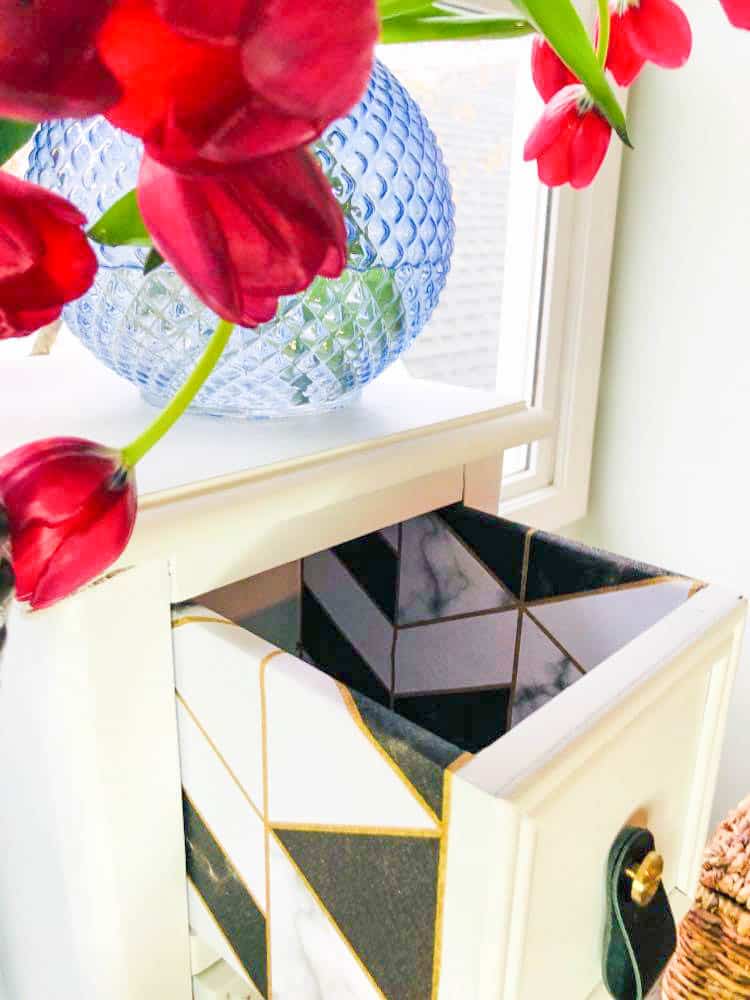
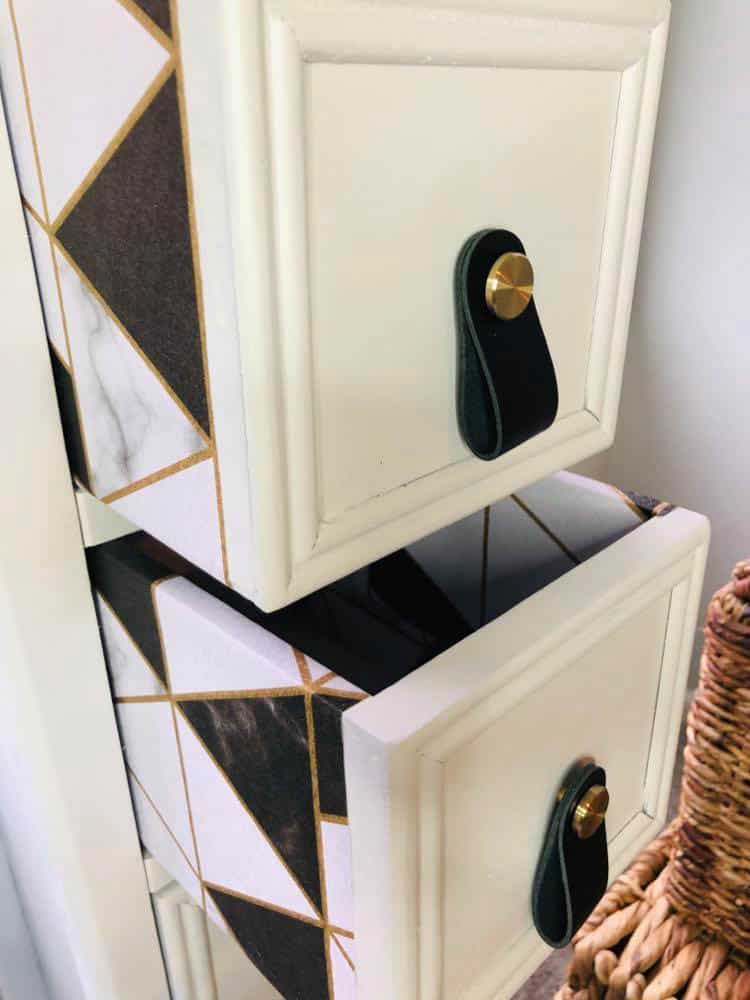
While I want a clean, classic look with white paint, I would also like a little surprise when you open the drawers.
Enter wallpaper! I found this awesome black, white, and gold geometric wallpaper pattern. Just the modern touch I am looking for!

Wallpaper can seem very scary but can be super easy when you use the peel and stick kind.
Over the years, peel and stick wallpaper has become very popular and there are so many amazing patterns!
Don’t let the wrinkles in the unrolled paper scare you; they smooth out perfectly when I put on the drawers.
Here are some other wallpapers that really tempted me when I was shopping for patterns! Because I’m using it for such a small area on the tower, I think BOLD patterns are perfect!


Measure Twice, Cut Once!
Since I want the wallpaper to show on the inner sides as well as the outer sides, I created a pattern of the inside and outside of one drawer and cut for all five drawers at once.

Line up the edge of the paper against the drawer edge and press down to anchor. Gently pull on the side of the paper to create tension as you press the paper against the sides. This will take out any creases and give you a smooth finish. I am not kidding…this is SO EASY!

Use a razer to trim any excess. Because the drawers on this project were deep, it was a little awkward with the razer blade. Halfway through, I started to use my sad, un-manicured thumbnail to cut the excess. Worked just as well!


Drawer Pulls
Don’t get me wrong. I am not knob-opposed.
I just want something different. Something slightly earthy, slightly edgy.
How about these leather drawer pulls with a brass screw! I’m using the black leather pulls which will tie in well with the wallpaper!
Is it possible for leather drawer pulls to make your heart leap with joy? ABSOLUTELY!


How many seconds does it take one person to screw in a drawer pull. Literally, 10 seconds!


Other than the sanding and painting, I completed this project on a Friday evening with all sorts of dog distractions literally begging for my attention. (Bentley was determined to play tug of war!)
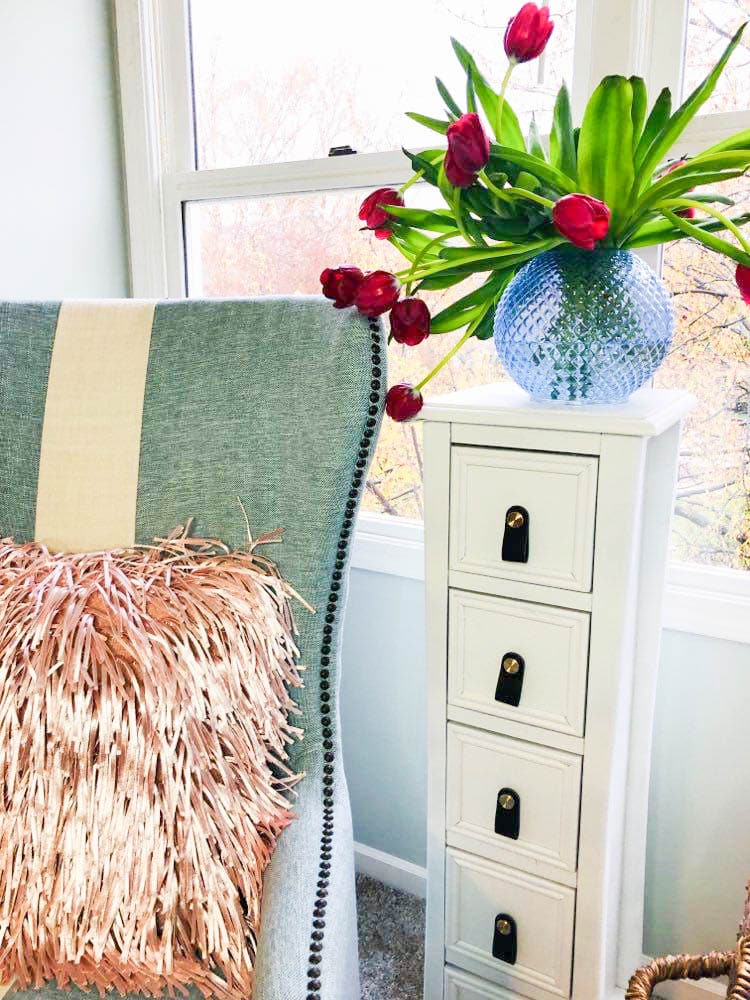
Voila! Transformation complete!
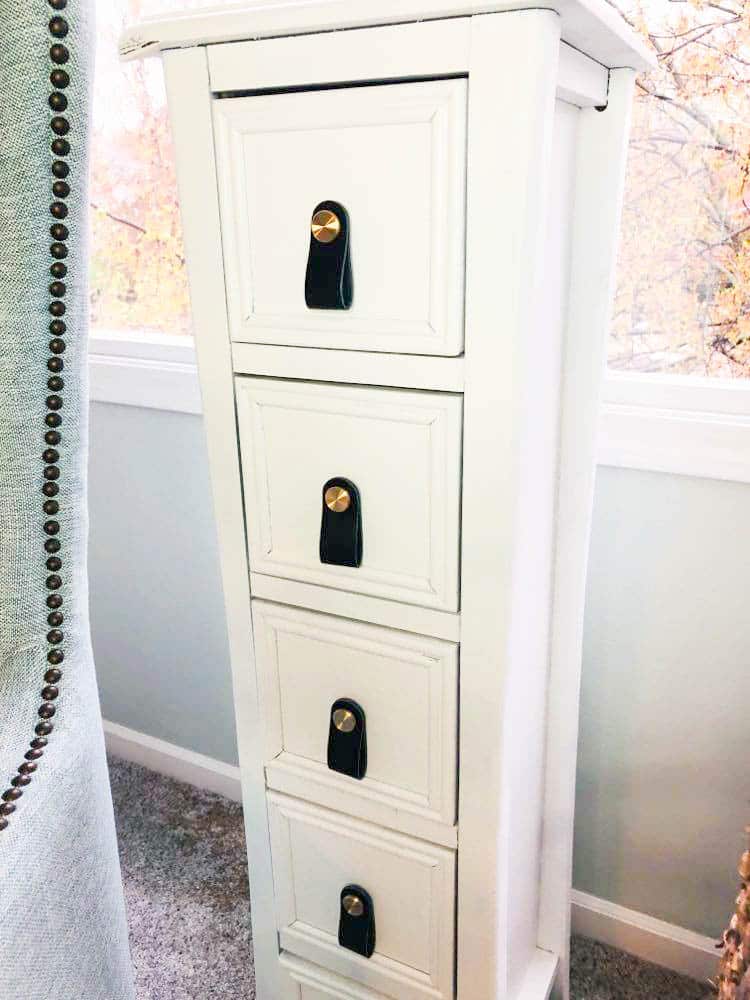
And then the surprise when you open the drawers!
I can’t wait to try this in different areas of the house!
Maybe in a Cozy Book Nook…
Or, as an addition to my “Plant Throne”…
Even, as a storage piece in our newly renovated kitchen!
Ultimately, it may end up in my office to store craft and office supplies. Since I use these items often, it gives me an excuse to open the drawers and see that cool wallpaper!
So, jump into this decade with me and liven up some furniture with peel and stick wallpaper! Happy papering!
Cheers!

*Disclaimer: This post contains affiliate links.
Absolutely love this Missy! Thanks for the inspiration
Thank you so much, Becky! It looks so much better now in my office than sitting in a garage corner gathering dust!
Nice Job Missy! that was a lot of work!
Love the transformation.
Hi Wendy, Just saw your comment….Thank you so much!
Thank you, Kari Anne! It was a fun project. I had no idea peel and stick wallpaper was so fun to work with! Thank you for sharing!
Such a great use of a CD Tower!! I have to go thrifting and find one!! Thanks for sharing!
Thanks, Cindy! It was a fun project. And, it made use of a cd tower gathering dust in the garage! Thanks for reading!
Love this. Such a beautiful upgrade!