

An Easy DIY File Cabinet Makeover for a Home Office
Are you tired of looking at that dull and uninspiring file cabinet in your home office? It’s time to revamp it and turn it into a stylish storage solution that reflects your personal style. With this easy DIY file cabinet makeover, you can update any old filing cabinet and transform it into a stylish piece of statement furniture – all without breaking the bank.
Get ready to upgrade your home office with this easy project that will enhance your productivity and brighten up your work area!

Sonata Home Design is a participant in the Amazon Services LLC Associates Program, an affiliate advertising program designed to provide a means for us to earn fees by linking to Amazon.com and affiliated sites.
Sometimes a makeover is not really necessary but just fun to do!
I think my daily make-up regime is actually pretty good.
But that doesn’t mean that I don’t LOVE a makeover that makes me feel like a new person!
Sometimes a room or a furniture piece needs a little makeover too!
DIY File Cabinet Nostalgia
A realization hit me the other day…a lot of my makeover projects start with items that once belonged to loved ones.
Do you find it hard to get rid of items that are a little worse for wear but belonged to someone special?
I have a piece of furniture that used to belong to my dad. I never really saw him use it but I always knew that it belonged to him.
In fact, this was always tucked away in the “back room” (meaning the unfinished part of the basement) of the basement where no one really saw it.
Yet, I remember it so well as my box of play dress-up clothes was stored near it.
These wood file cabinets belonged to my father. I don’t really remember Daddy filing things (not his thing!), but I do remember the presence of these cabinets. Like my father…strong and solid.
My mother gave these to me after he passed and I painted them black after a light sanding. I loved this initial makeover then and have used them daily in my home office. Nothing wrong with them, but I wanted to give them yet another update.
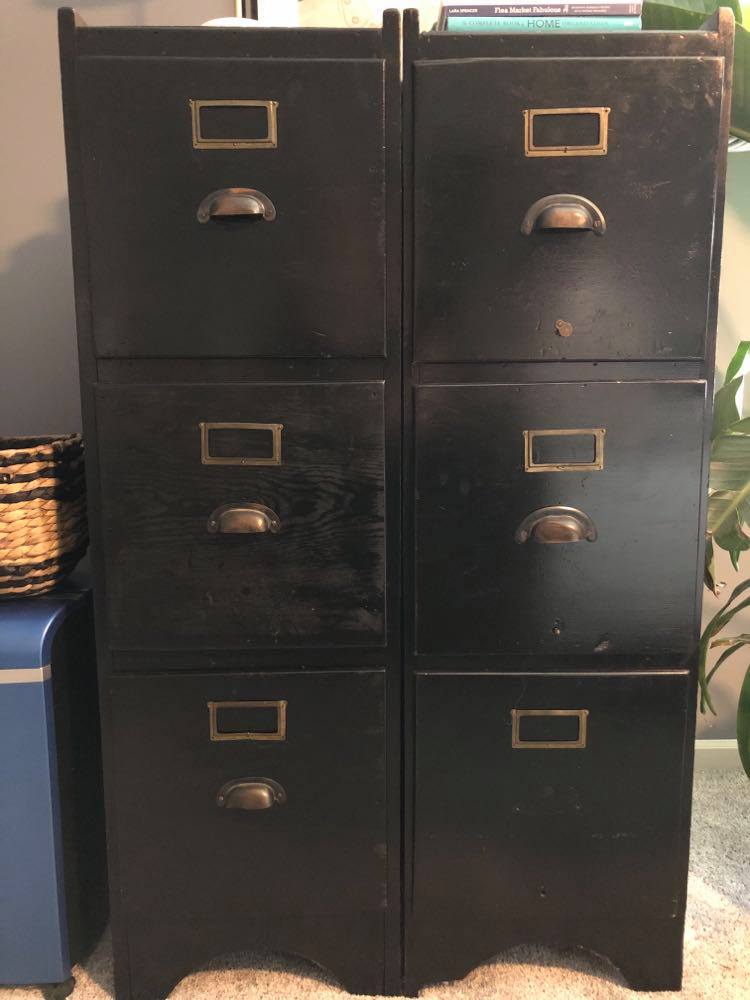
If you want to try this easy diy project and don’t have or can’t find vintage wood file cabinets, this project works with a metal file cabinet or a new file cabinet as well. If you are looking for a low-budget project using an old cabinet, be sure to check your local thrift store or a yard sale.

Vintage Meets Modern File Drawer Inspiration
In order to change a perfectly good piece of furniture, I have to be pretty inspired by something.
Turns out….it is the front of our house!
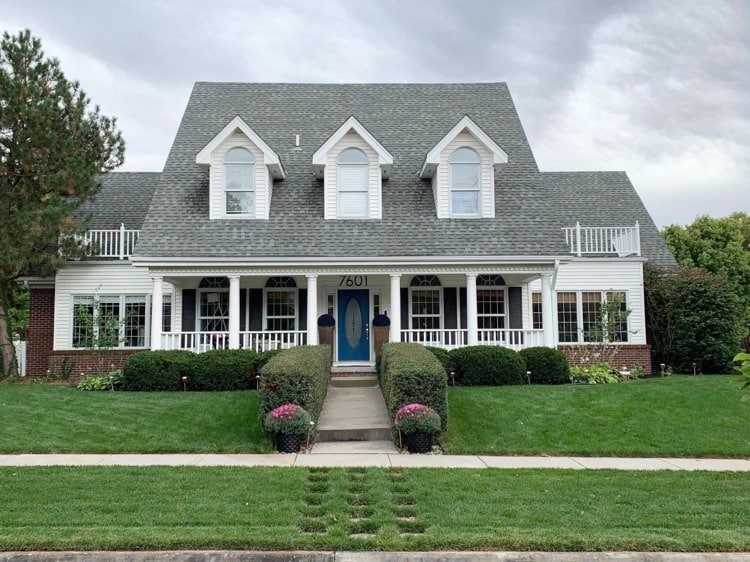
We recently changed the house numbers on our front porch.
Previously, we had perfectly good 4″ house numbers above the door. But they were small and actually a little difficult to read from the street.
In what felt like the most daring move ever, we replaced 4″ with 12″ house numbers! And, I couldn’t be happier!
Bold, graphic, and modernizing…a new life for our front entrance.
Now to do the same for my file cabinets…with house numbers turned into drawer pulls!

A DIY File Cabinet Makeover
The first step in this DIY file cabinet project is to give your wood or metal cabinet a fresh coat of paint. I chose my go-to shade of black, Sherwin Williams Tricorn Black, for the entire cabinet. It is amazing the transformation you can get from a quart of good old interior paint! (You could certainly use chalk paint if you prefer.)
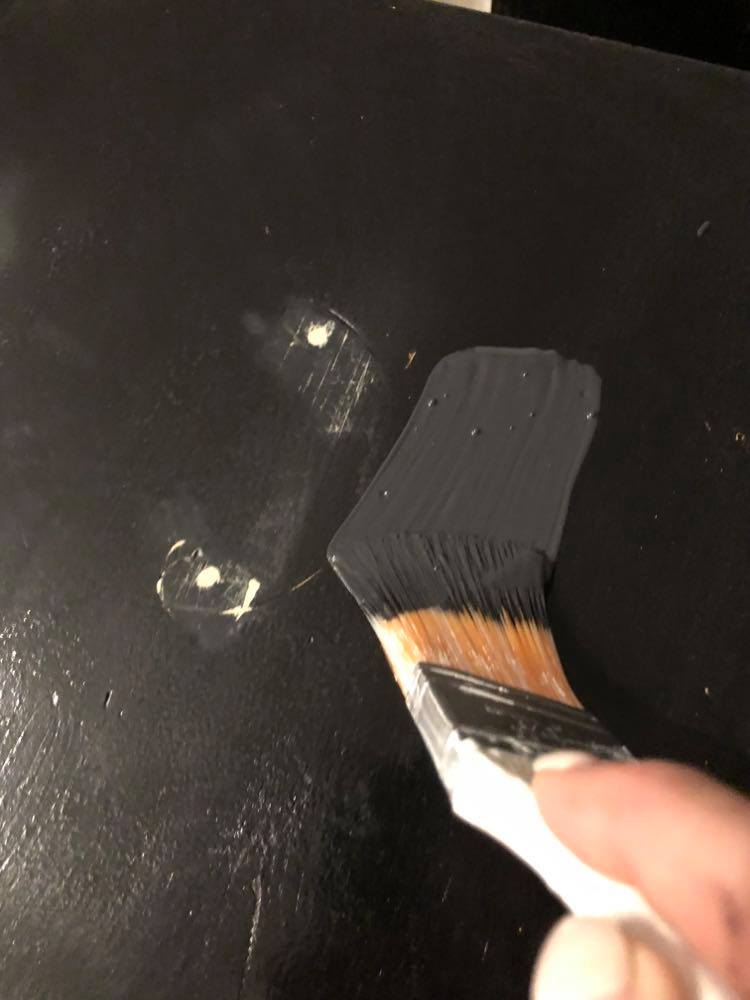
As with painting any piece of wood, be sure to sand and fill any holes with wood putty as part of your pre-painting routine. An easy way to do this is to lay the cabinet on its back so you have access to all the “important” sides.
Once the cabinet itself is painted, it is time to turn your attention to those house numbers to be used a drawer pulls.
For my particular project, I wanted the house numbers to “pop” against the black paint. So, I spray painted the black house numbers with Rust-Oleum Metallic Paint and Primer spray paint in “Titanium Silver.” For best results, spray the paint in multiple light coats instead of one heavy coat. The coverage will be more even and long-lasting.


For more spray painting ideas, you might like this…12 Spray Paint Projects that are Fun and Easy!
In order to attach the numbers to the drawer fronts, it is important that they are centered. Here is the easiest and best way to figure out where to place the screw holes.
Attach the hardware screws to the house number and place the number on the wood surface in the center of the drawer. Using a ruler or tape measure, make sure the number is centered and level on the front of the drawer.

Here is the easy part…just press down on the placed number! The screw will leave an impression on the cabinet front and then you know that this is where you drill. Two quicks drills and you are ready to attach. I love simple!
The final step is to attach the file drawer house number handles to the front of the cabinet.
The best choice is to use the hardware that comes with the house numbers.
Slip the floating spacer onto the screw, slide through the drill holes, and secure with a screw nut on the other side. Repeat with all of the file drawers. I was able to attach the drawer pulls for the entire thing in about 10 minutes!

The Reveal
What a difference! Vintage style meets style modern in my office. This once dull and lifeless cabinet is now a stylish and personalized piece of furniture that not only provides functionality but also enhances the aesthetics of the home office. I now have a stylish way to store my file and I can style the top of the cabinet as well!

The best part? My father’s file cabinet still reminds me of him every time I look at it. The drawers are actually easier to open now and I love the visual punch of the cabinet drawer numbers when I walk into my office.

Now it is your turn! Find an old file cabinet and give it new life with a little bit of paint and some beautiful house number hardware. It will be a beautiful part of your home decor and you will love the functional new look of this easy d.i.y. solution in your home office!
My father was definitely not into home decorating. However, I like to think he would appreciate this little upgrade to his cabinet and I am grateful for the daily reminder of him. Thanks, Daddy!
Cheers!

Don’t Forget to Pin It

Other Upcycle Decor DIY Furniture Projects

A Colorful Dresser Makeover Using Spray Paint

An Astonishing Before and After Bookcase Makeover


Amazing! Love those giant numbers, they give the cabinet the perfect touch.
Thank you, Wendy! I really love how it turned out. And, so much easier to just grab and pull!
Your post is so wonderful! I was super inspired by your creativity. I would love to invite you to link up your project at Whimsy Home Wednesdays to inspire others and have a chance to be featured https://fifthsparrownomore.com/whimsy-home-wednesday-blog-link-party-no-32/
You are so kind, Kristin! What a great link party you have!
Missy, I am a lot like yourself, I have the hardest time letting go of items that once belonged to loved ones. Makeovers are the best when they have that sentimental tug on your heart! Oh my, I think I need the 12″ numbers on my house, I am tired of the FedEx guy sending my items back and saying our address does not exist! LOL. Thank you so much for sharing your inspiration with us!
Lol! Before we had the large number, there were small numbers in this curly cue script…you couldn’t read them at all. Now you can see our address from a long way off! Thanks so much, Cara!
LOVE this upcycle, Missy! We will be featuring you starting Wednesday at the Creative Crafts Linky Party! Pinned and shared!
Creatively, Beth
Thank you so much, Beth! That is so exciting! You and your link party are so appreciated!