

Bunny Beauties: An Easy DIY Easter Pillow for Spring
Decorate for spring and Easter with this easy DIY bunny pillow project using a pillow cover and some dollar-store supplies.
Are you ready to sprinkle some charm into your Easter decor? If you’re anything like me, you love adding a touch of DIY magic to every holiday celebration. Let’s create an adorable Easter-themed pillow that’ll have you hopping with delight!

This blog contains affiliate links. This means a small commission is earned if you make a purchase by using this link. The price you pay will be the same whether you use the affiliate link or go directly to the vendor’s website using a non-affiliate link. Sonata Home Design is a participant in the Amazon Services LLC Associates Program. Additional affiliate links are also included for your convenience.
Time to Hop!
I am joining a group of my blogging friends to share all sorts of easy craft projects and inspiration for Easter. Be sure to check out all of the blog posts! Thanks to Carol at Blue Sky at Home for being our amazing host!
If you are coming here from the blog Master “Pieces” of My Life, welcome to Sonata Home Design. Don’t you just love all of MaryJo’s DIY Easter egg ideas! This definitely gets me in the mood for Easter decoratting!
Hi! My name is Missy and I love all things related to decorating a home with color without fear! I’m so glad you are here and am so excited to share everything about creating a home that reflects you and your personality! Welcome to Sonata Home Design!

M&Ms and pillows…you can never have too many!
There is no easier way to change out your home decor seasonally than with pillows!
With spring on its way and Easter on the horizon, I am seeing all sorts of fun bunny pillows in stores…often with, not one, but three bunnies!
As is often the case, the thought goes through my mind…”I can make that!”
Here is a quick DIY pillow project to help usher in spring and a “Hoppy Easter!”
Supply List
I cheated.
Just like using a box cake mix for a special cake, I cheated by using pre-made materials and adding my own spin.
The felt bunny form that I used is simply from a bunny garland that I picked up at the dollar store. They have carried them for years and it doesn’t look like they are stopping! (If you are a sewing purist…then you can easily create your own “pre-made.”)

The cheater material list consists of…
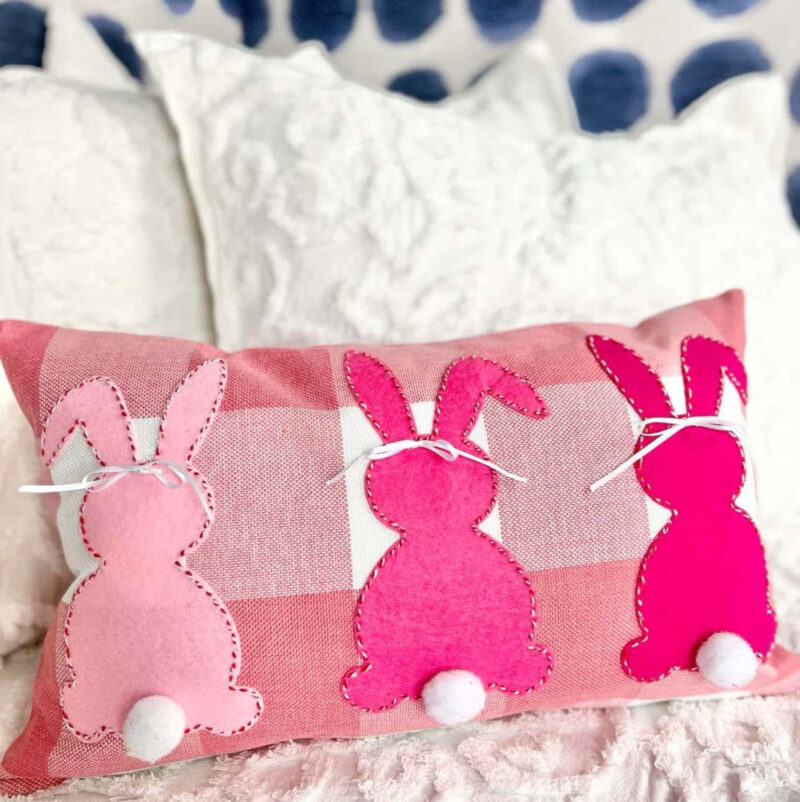
- Pillow cover in your choice of fabric. (I used this fantastic pink buffalo check pillow cover!)
- Dollar store felt bunny garland (or cut out any bunny shape from felt)
- Cotton twist twine (A dark embroidery thread will show up best. I used a red and white twisted twine for even more visual impact.)
- Needle (I love a good large-eyed needle. My favorite can be seen HERE.)
- Straight pins
- Scissors
- Pillow insert to match your pillow cover. (The lumbar pillow insert I used can be seen HERE).

My Favorite Pillow Tip: Choose a pillow insert that is one size larger than your pillow cover. For example, if you have 16″ pillow covers, use 18-inch pillow forms. Your pillows will look filled out and extra-cushy!
How to Make An Easy DIY Easter Pillow
It all starts with a pillow cover.

This amazing pink buffalo check lumbar pillow cover is the perfect backdrop for some spring bunnies. I purchased it from Amazon and it comes in several colors. It is so cute by itself that I could absolutely use the plain gingham side year-round!
You can see the Pink Buffalo Check Pillow Cover HERE.
Then…these felt bunnies!

This adorable felt bunny garland is from a dollar store. SO CUTE!
I decided to take apart the garland and use each cut shape to sew onto my pillow cover.
They even come with cute little pom-pom bunny tails! These remind me of when I added pom poms to some favorite green pillows. Another great spring project. You can see it here…
To coordinate with the pink check fabric, I used the three bunnies in shades of pink. Bunnies to spare!
No Bunnies? Pivot to an Easter egg pillow by cutting a simple egg shape from felt sheets. This is also a great way to use up fabric scraps!
Easy Peasy DIY Easter Pillow
There are just a few easy steps to transform any pillow into an Easter pillow. Here are the step by step instructions:
The first step is to figure out where you want the bunnies on the pillow. I chose to line them up like an Easter bunny kick line!
Using straight pins, anchor the separate felt bunnies onto the pillow cover with the right side up.
I placed the bunnies and then measured carefully to make sure they were evenly spaced and placed exactly where I wanted them.

Simple Stitches
The next step is to start stitching!
If you are not a fan of hand-sewing, you could certainly attach the bunnies with hot glue or fabric glue. But the hand-stitching is the easiest type of sewing and really does give the bunnies some character!
No fancy stitches here!

In and out…up and down! I tried to keep even spacing from the edge and just worked my way around the shape of the bunny.

Is it perfect? No, but it was a great way to keep my hands busy while watching Netflix!

Tying Up Loose Ends
Each bunny had two little holes at the top where the garland ribbon went through.
So, I cut pieces of the garland ribbon and tied little bows for each bunny.

Voila! A DIY bunny pillow that is as simple as a straight stitch!
This is so fun for spring and Easter!
Also adorable in a little girl’s room!
Or, the family room…
The kitchen…
How about my office?
Yes! I just love the little white pom pom tail on each bunny!

If you would like to bypass the process of making an Easter pillow, here are a few of my favorites you can purchase!
As I wrap up, I’m really glad I decided to make this DIY Easter pillow. It has been such a cute addition to my holiday decor, and it was an easy way to create my own pillow cover for Easter.
Whether you purchase cute pillows in a store, create from scratch, or use my bunny pillow hack, you will love adding these little critters to your springtime home decor!
Wishing you all a Happy Easter, and may your homes continue to shine with the adorable appeal of bunny pillows!
Don’t forget to head over to Blue Sky at Home and see Carol’s charming DIY Easter Bunny tree project!
Cheers!

Don’t Forget to Pin It!

So Many Great Easter Decor Ideas
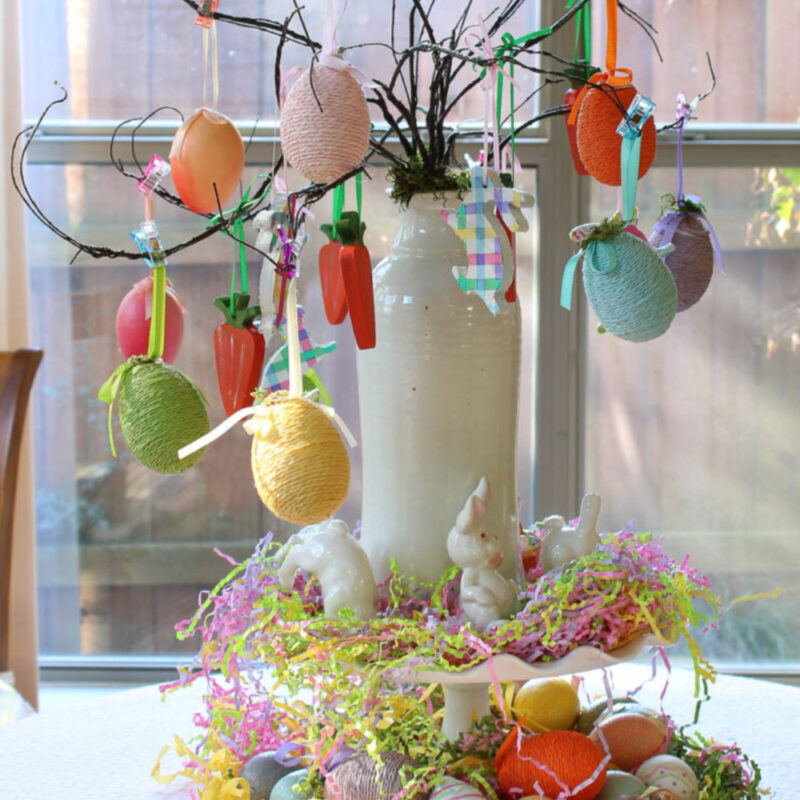
Bluesky at Home – How to Make a Easter Bunny Tree
Perfecting Places – Easter Tablescape Decor
Everyday Edits – Spring Console Table
WM Home Design – Easter Bunny Napkin Rings
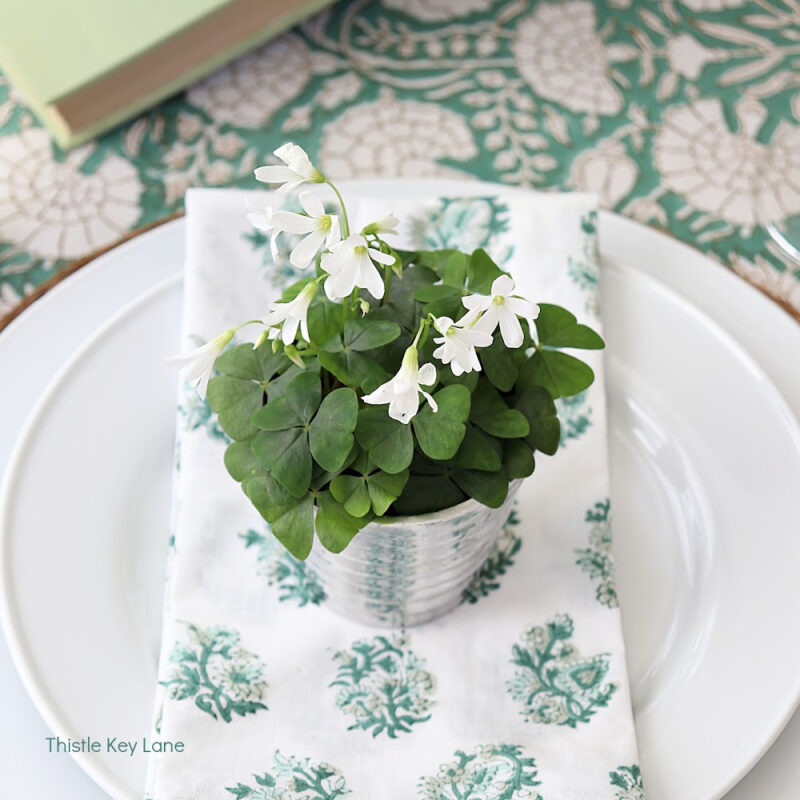
Thistle Key Lane – Green and White Spring Tablescape
White Arrows Home – Reusing Holiday Decor for Easter
Peacock Ridge Farm – Adding Beautiful Spring Touches
Masterpieces of My Life – 7 Ways to DIY Easter Eggs
Sonata Home Design – DIY Pink Bunny Pillow
More Easter Decorating Ideas
Colorful Easter Table Setting Ideas
How to Make Decorative Eggs for Easter


Such a darling pillow Missy. I kove your creativity and the ease of this pillow!
Thanks, Wendy! It was a fun way to keep my hands busy when it got too dark to take photographs! LOL! Thanks so much for reading!
Absolutely adorable! I love everything about this. You are so talented and creative!
Pat, you are the sweetest! I had so much fun with this project and couldn’t wait to share how it is was. Thank you for reading and sharing your thoughts! I appreciate you, my friend!
These are super cute and how easy!! Love it!!
Hi Helen! I love and easy project and this definitely delivered! Thanks for much for reading and commenting! It is great to hear from you!
Super adorable! It such a great idea for Easter decoration and easy to make too. Thanks for sharing it #HomeMattersParty
Thank you so much! I love easy projects and this could not be easier! Thanks for the platform!
#HomeMattersParty
Hi Missy So cute!
fyi some of the video ads are taking up half of the screen in some sections.
It may just be on my end, but it’s hard to see those cute little bunnies!
happy day! xo laura
Thank you for letting me know, Laura! We have been trying to figure out the issue but can’t seem to actually see the problem ourselves. It seems to work some and others not. I’m turning into Nancy Drew for this one! Thanks for a great blog hop!
What an adorable pillow, Missy! I need to pick up some felt bunnies! All of your Easter decor is so vibrant and beautiful!
Thank you, Kim! It’s fun to decorate for Easter, isn’t it?
Your pink bunny pillow looks like something I might find in a high-end gift boutique. It’s absolutely adorable Missy!
Aren’t you sweet, Michelle! Thank you so much!
Oh my gosh, is this cute!! I love the colors you went with and those little tails!
Thank you, Kristin! I had fun putting it together!
I simply adore this pillow Missy! I need one in every color.
Thanks, Wendy! Every color would be so much fun!
This is super cute Missy. I love the pink on pink and the stitching is the perfect accent. What a great idea and I am all about semi-homemade. Best of both worlds. Nice sharing with you. XO- MaryJo
Thank you, MaryJo! It was a fun project and it was so fun to “hop” with you!
This bunny pillow project is so cute, Missy. I love the combination of a premade pink check pillow cover and the garland from Dollar Tree. Great repurposing. Thank you so much for sharing at Celebrate the Holiday.
Thank you for hosting us, Carol! Always a treat!
LOVE how you upcycled those Dollar Tree felt bunnies, Missy! Such a BRILLIANT idea!
Thank you, Beth! It was so easy but so fun!
Such a cutie little pillow! LOVE the pink!!
Thnak you, sweet friend!
Your bunny pillow is adorable Missy ♥
Thank you for sharing it at Create, Bake, Grow & Gather this week. I’m delighted to be featuring your project at tonight’s party and pinning too.
Hugs,
Kerryanne
So exciting! Thank you so much!