

How to Hang a Cutting Board on the Wall: A Quick Guide
If you’re someone who values both functionality and aesthetics in your kitchen, you’ll love the idea of freeing up counter space by displaying your cutting board on the wall. Knowing how to hang a cutting board on the wall can not only add a unique decorative touch but also make your essential kitchen tools easily accessible.
There are just a few simple steps to hanging a cutting board on the wall, transforming your cooking space into a functional work of art!

This blog contains affiliate links. This means a small commission is earned if you make a purchase by using this link. The price you pay will be the same whether you use the affiliate link or go directly to the vendor’s website using a non-affiliate link.
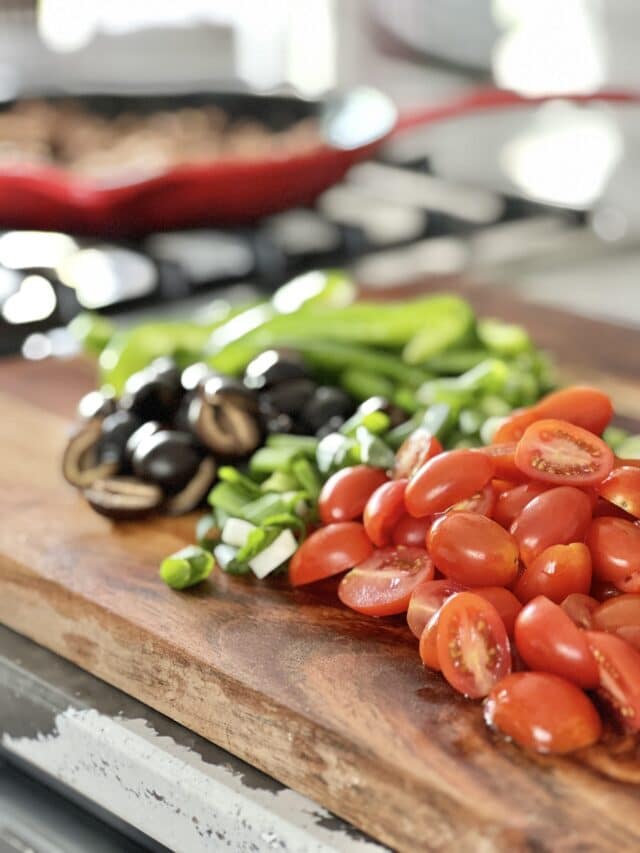
Picture this…You’re in the kitchen, a glorious mess of onions, tomatoes, and peppers. There is creativity everywhere, conjuring up your next culinary masterpiece.
But as you chop, slice, and dice, you suddenly realize – you need more kitchen counter space.
Your cutting board is taking up precious countertop real estate!
Don’t fret! Try wall-mounting your cutting board.
Yes, you heard that right – cutting boards on the wall! It’s a space-saving hack that’s both functional and stylish. Let’s dive into the easy task of knowing how to hang a cutting board on the wall.
The Why Behind the Wow
Before we plunge into the nitty-gritty of hanging, let’s talk about why you’d want to hang a cutting board on your wall in the first place.
First and foremost, it’s a total space saver. Think about all the room you’ll free up as you bake, sauté, and stir!
Chances are, you have more than one cutting board. From a charcuterie board to a wooden cutting board to a natural stone board, we love having boards in all different shapes and sizes. All the more reason to hang them on the wall!
Plus, it is a great way to add a touch of rustic charm to an empty wall and still have easy access to your board. It’s like giving your kitchen space a mini makeover without bringing in a sledgehammer.
How to Hang a Cutting Board on the Wall Without Making a Hole
One of my favorite wood cutting boards is a round, charcuterie board that doubles as an essential kitchen tool and a beautiful decorative element. While I have used it as a cutting board and as a charcuterie board, I most often use it as the base for a beautiful display of kitchen decor.
But I also want to give the board a place of honor by hanging it on the wall. We have a hallway off the kitchen that is a great place for the board to call home!
My chosen method of hanging boards is so easy. It uses every college student’s best decorating friend…Command Strips!
These adhesive tapes adhere securely to different types of wood and, depending on the size of the strip, can sufficiently anchor different sizes of boards on a wall.
What You’ll Need:
Gather these supplies before getting started:
- Cutting Board: You probably have lots of these. Choose one that’s not just a kitchen workhorse but also visually appealing. You’re turning it into wall art, after all.
- Adhesive stick-on tapes: The true stars of this show. They’re like the trusty sidekicks that make everything look effortless. Important: Make sure you know the weight of your cutting board so you get the correct size for secure hanging.
- Rubbing Alcohol: This comes in handy for preparing the surface and ensuring maximum adhesion.
- Level: Doesn’t every project seem to require a level? I keep one on each floor of the house. It is truly the secret weapon for ensuring everything hangs straight and true.

Choose Your Spot
Decide where your cutting board will adorn your kitchen kingdom. It should be easily accessible but also look visually appealing. Look for an empty wall or space in your kitchen or at least close by.
Clean the Area
Use rubbing alcohol to clean the wall surface and the back of the cutting board. This ensures a strong bond between the board and the adhesive strips.

Time to Strip!
Hang the board, I mean!
Remove the backing from one adhesive strip and ress the sticky side to the back of the cutting board. Place the strip toward the top of the board but still on a broader part of the board. It is probably best to not press the strip onto the thinner handle of the board.
Next, press a second adhesive strip hook side down onto the first strip and press firmly. You should feel the tiny hooks latching onto each other.
Remove the backing from the top strip and gently press the cutting board against the wall where you want it to hang. Hold it in place for about 30 seconds to let the magic of adhesion work its wonders.


Leave your cutting board hanging for at least an hour before giving it a gentle tug to ensure it’s securely attached.

If you’re a fan of things hanging perfectly straight, use a level to ensure your cutting board is aligned to your heart’s content.
Cutting boards can sometimes be irregular in shape (that’s the beauty of them!) and so you want to decide what element of the board to level. I chose to level the stripes on my board instead of the handle. (I don’t think I could handle stripes that weren’t level!)

This board is now close to the kitchen for accessible use and also beautifully fills this narrow wall space that leads to the kitchen!

How to Hang a Cutting Board on a Wall When a Hole in the Wall is Ok
Materials You’ll Need:
You won’t need a bunch of tools but you do need a little hardware. Here’s the simple supplie list:
- Cutting Board: Again, choose a board that you love and want to display!
- Sawtooth Hanger: This is option one for using hardware to hang your board. You can find these at your local hardware store or online – they come in various sizes so make sure you check the weight that the sawtooth hanger can hold.
- Screws and Wall Anchors: If you have a very heavy cutting board, these little guys are crucial for proper installation.
- Drill: Your trusty sidekick for making holes in walls!

Step-by-step How-To with Hardware
While this method is a little more involved than adhesive strips, it is still a very simple process!
Mark Where to Hang Your Board
Select the spot on your wall where your cutting board will hang. Hold your cutting board against the wall and mark the spots where anchors and screws will go.
If your board is particularly wide, you may want to use more than one hanger or screw. Use a level to make sure your markings are level.
Drill Baby, Drill
It’s time to fire up the drill. Carefully make holes at the marked spots, ensuring they’re the right size for your screws and anchors.
Insert the anchors into the holes. Gently tap them in with a hammer or rubber mallet until they’re snug.
Follow this up by twisting a screw into the anchor. Don’t screw it in tightly but rather leave a slight gap so you can hang the board.
Prep the Board
Attach the sawtooth hanger to the back of your wood board. Place it near the top of the board but in a wider area of the board.
Hang your cutting board and give it a little wiggle to make sure it’s secure, and voilà – you’ve just added a touch of gourmet style to your kitchen!
A Few Tips:
- Make sure your cutting board is in good shape before displaying it on the wall. No one wants to hang a battle-scarred board.
- If you have multiple cutting boards, you can create a stunning gallery arrangement on the wall. Be creative with its arrangement for a cool cutting-board art installation!
- Consider attaching a small chalkboard to the wall nearby. You can jot down recipe notes, shopping lists, or just doodle when you’re waiting for water to boil.
- In addition to regular retail stores, wood cutting boards can often be found at flea markets and thrift stores. Since cutting boards involve food prep, be sure to thoroughly clean the board once you get it home.
How Do You Make a Cutting Board Look Nice?
Let’s face it, our cutting boards take some serious abuse!
Daily use, water damage, and improper storage can wreak havoc on these kitchen workhorses. Making your cutting board look nice means giving your board the proper care that it needs.

Begin by giving it a good scrub using warm, soapy water to remove any residue. If your board has seen its fair share of chopping, a sprinkle of coarse salt and a lemon scrub can work wonders. Once clean and dry, rub a bit of food-safe mineral oil or even vegetable oil onto the surface to restore its natural luster and keep it hydrated.
A well-cared-for wooden board can stand out beautifully against your countertop. So, whether you choose to showcase its rustic wear and tear or give it a fresh start with oil, your cutting board is ready to take center stage!
How do I Display My Cutting Board in Other Ways?
There are other creative ways to show off your cutting board!
Layer and Lean
Prop your cutting board against the backsplash or a wall for a relaxed yet curated look that adds a touch of functional charm.
If you have multiple boards, layers them in a way that showcases their unqiue shapes and sizes.

Cutting Board Gallery Wall
Incorporate your cutting board into a gallery wall arrangement with other kitchen utensils or decorative pieces for a visually engaging and personalized display.
Wooden Board Shelfie
Place your cutting boards on open shelving or a dedicated kitchen bakers rack to highlight its practical use while transforming it into an appealing design feature.

Kitchen Island Accent
If you have a kitchen island with an overhang, slide your cutting board under it when not in use. Or, hang it from the side of the island. This great idea creates an effortlessly stylish and easily accessible storage solution.
Plate Rack Panache
Repurpose a plate rack or a dish drying rack to hold your cutting board vertically. This unexpected display method adds a quirky twist to your kitchen design while keeping your cutting board within arm’s reach.
Store them in a Basket or Magazine Holder
Gather up your cutting boards and give them a central storage spot in a woven basket or flea market magazine rack.
Stackable Centerpiece
Gather your collection of boards and go vertical. Create a unique centerpiece display for your dining area table by stacking your cutting board collection.
Display salt and pepper shakers or bowls, jams and jellies, or dinner side dishes. It is a perfect way to showcase your board collection and serve your meal in style.

My round wood cutting board definitely gets a frequent workout. Now, this board is accessible and beautifully displayed at the same time!

In a home where every inch of counter space counts, the idea of hanging your cutting board on the wall is a really good idea. By using either adhesive strips or hardware, it’s not only practical but also stylish.
This kitchen hack adds a dash of elegance to your cooking space and frees up room for all your kitchen creations!
Cheers!

Don’t Forget to Pin It


What a great post Missy! I love these Command strips and use them all the time.
Command strips are never far from my reach! Thanks so much, Wendy!
Great information!
Thank you so much, Susan!
What great tips. I’ve never hung a cutting board on the wall, but now I’m wondering why I haven’t!
It is definitely a space saver! Thanks for stopping by!
Great ideas, thank you for sharing! I’d love to invite you to join my link party, Tell It To Me Tuesday, open Tuesday – Friday each week. This weeks can be found at https://perfectlyimperfect-lwl.com/tell-it-to-me-tuesday-15-9-19-23-link-party/.
Thank you so much, Lyndsey! I have your link party bookmarked and will see you next Tuesday!
I’m wanting to do this but won’t you have to get new command strips every time you take the boards off the wall to use in the kitchen?
I use the velcro Command strips and have been able to remove my board and then stick it back to the velcro. That being said, I display the board that I don’t use every day but rather just for entertaining. So I don’t take it on and off a lot.