

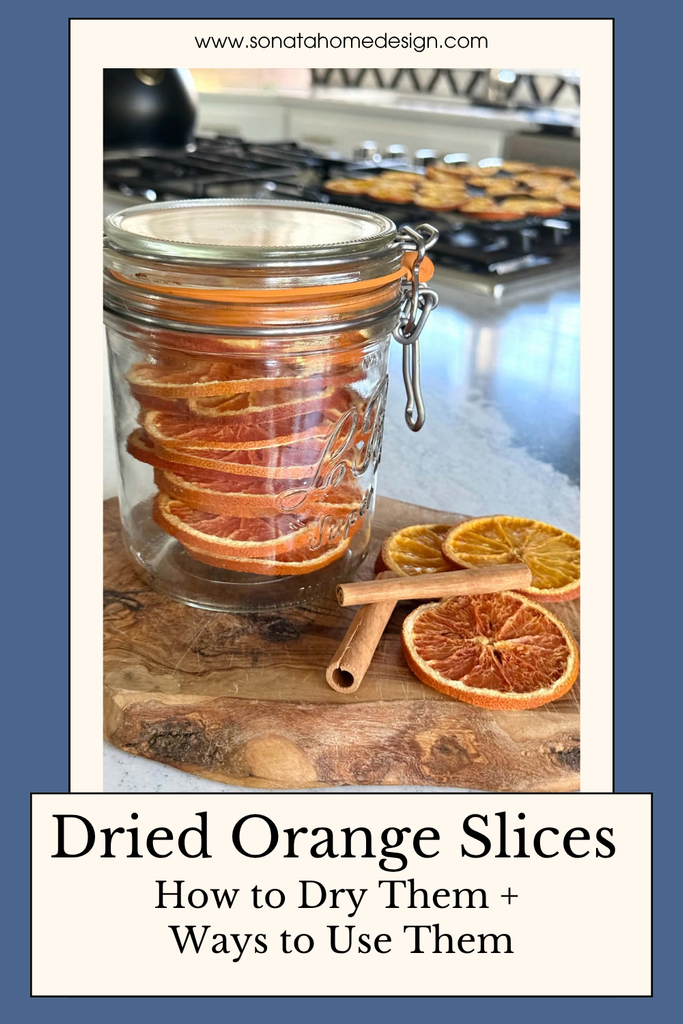
Dried Orange Slices: How to Dry Them and Where to Use Them
This blog contains affiliate links. This means a small commission is earned if you make a purchase by using this link. The price you pay will be the same whether you use the affiliate link or go directly to the vendor’s website using a non-affiliate link. As an Amazon Influencer, I earn from qualifying purchases.
When I think of the scents of Christmas, orange is right near the top of my list. Santa used to leave a whole orange in the bottom of my stocking. Little did I know, Santa understood that oranges take up a lot of space in a stocking. (Smart man.)
Now I get to bring that smell back every holiday season, and dried orange slices are my favorite way to do it.
They glow like little stained glass windows. They cost next to nothing. And your kitchen smells amazing while they dry!
In this post, I’ll show you how to dry orange slices in the oven and in the air fryer. Then we’ll talk storage and my favorite ways to use them. Let’s get slicing.
What You Need to Make Dried Orange Slices
You don’t need much! Here’s the list:
- 3-4 fresh oranges
- a serrated knife (or mandoline)
- paper towels
- parchment paper
- a baking tray, cookie sheet, or large baking sheets if you’re making a big batch
- a wire rack (optional, but it helps)
- twine for the fun part later
Which Types of Oranges Work Best
Almost any of your citrus fruits will work, but they dry a little differently. Here’s the rundown.

Naval Oranges: They’re easy to find, seedless, and firm, so they hold their shape. These are the ones I would tell you to grab first.
Cara Cara Oranges: I had to look these up. And now I love them! They’re a type of naval orange with pink-red flesh and a sweet flavor. They dry to a pretty rosy color.
Blood Oranges: Deep red inside and dramatic when dried. They turn a dark burgundy, which looks gorgeous on a tree. Look for them in winter.
Valencia Oranges: These are mostly juicing oranges, so they carry a lot of excess juice. That means a longer drying process. They are also more of a spring and summer fruit.
Whatever you choose, look for firm oranges with smooth skin. If your store doesn’t carry the fancy ones, don’t sweat it. Navels are the only thing you need.
How to Slice Oranges for Drying
Wash and dry your fresh fruit first. Then grab a sharp knife. A dull one squishes the fruit and tears the slices. (Trust me…I know.)
Cut across the orange, not top to bottom. That shows off the pretty star pattern. Aim for thin slices, about 1/4 inch.
The thickness of the slices matters. Thinner slices dry faster and turn crisp. A little bit thicker keeps more color and shape, but it takes longer.

Now blot both sides of each slice with a paper towel. Press gently so you don’t disturb the inside fruit.
Getting rid of excess moisture now speeds up the whole drying process.
Save the orange peels and end pieces. They’re great in a simmer pot later.


How to Dry Orange Slices in the Oven
The oven method is the classic. It’s slow, but it takes almost no effort.
- Heat the oven to its lowest temperature, ideally around 200 degrees F.
- Line your baking tray with parchment paper. Place the slices right on top of the parchment paper in a single layer. No overlapping!
- Bake for 3-4 hours, flipping the slices every hour.
- Cool on a wire rack. They firm up as they cool.

A Few Drying Tips
If you’re using two large baking sheets, swap them between oven shelves halfway through. Every oven runs a little different, so trust your eyes more than the clock. If the slices start to brown, drop to a lower temperature.
A wire rack set on top of the baking sheet gives you better air circulation, which helps both sides dry at the same time.

How to Dry Orange Slices in the Air Fryer
The air fryer is the speedy option. Warm air moves around the slices, so they dry faster than they do in the oven. Keep in mind, depending on the size of your air fryer, your batches will be smaller.
Set your air fryer to its lowest temperature. That’s usually somewhere between 175 and 200 degrees F. Lay the slices in a single layer in the basket. Don’t stack them. Run it for 1 to 2 hours, checking and flipping every 20 minutes or so.
Most baskets only hold a handful, so you’ll work in batches. Keep the remaining slices on the counter, blotted dry, until it’s their turn.

You can also try air drying slices on a rack on the counter. It works in a dry house, but it takes a LONG time…and patience is not my best skill.
Missy’s Notes
I don’t own a dehydrator (yet…), so I can’t walk you through a dehydrator method. My friend Jen at Midwest Life and Style has a great tutorial for dehydrated orange slices, so hop over to her post if that’s what you’ve got.
How to Tell When Dried Orange Slices Are Done
Done slices feel dry, not sticky. The edges curl a little, and the slices feel stiff once they cool. If they’re still tacky, pop them back in for 20 to 30 minutes.
Too brown? Use a lower temperature on your next batch. That’s how you get the desired result without scorched slices.
How to Store Dried Orange Slices
Let the slices cool completely first. Any leftover warmth creates moisture. Then store them in an airtight container, a glass jar, or a Ziploc bag at room temperature. Keep them in a cool, dark place.
Kept dry, dried oranges for decorating can last a year or more. The shelf life drops fast if moisture sneaks in, so toss anything that feels soft or smells off.


Dried Orange Slices
Equipment
- 1 serrated knife or mandoline
- 1 cutting board
- paper towels
- Parchment Paper
- baking trays or cookie sheets
- 1 wire rack
- 1 oven or air fryer
- airtight container or glass jar (for storage)
Ingredients
- 4 fresh oranges
Instructions
Prep
- Wash and dry the oranges.
- Slice them crosswise into thin slices, about 1/4 inch thick, with a sharp knife.
- Blot both sides of each slice with a paper towel to remove excess juice.
Oven Method
- Heat the oven to its lowest temperature, ideally around 200 degrees F.
- Line a baking tray with parchment paper.
- Arrange the slices in a single layer, not touching.
- Bake for 3-4 hours, flipping the slices every hour.
- Cool on a wire rack. The slices will firm up as they cool.
Air Fryer Method
- Set the air fryer to its lowest temperature, around 175 to 200 degrees F.
- Place the slices in a single layer in the basket. Don’t stack them.
- Dry for 1 to 2 hours, checking and flipping every 20 minutes.
- Work in batches and cool the finished slices on a wire rack.
Finish and Store
- The slices are done when they feel dry and stiff, not sticky. If they’re still tacky, return them to the oven or air fryer for 20 to 30 minutes.
- Cool completely before storing.
- Store in an airtight container or glass jar in a cool, dark place.
Where to Use Dried Orange Slices
Okay, the fun part!
Here are my favorite ways to use them. They’re also some of the easiest ways to add a festive feel to a room without spending much.
On the Christmas Tree
Thread twine through the slices with a needle to make a dried orange garland. Add cinnamon sticks between them if you like.
You can also tie single slices on as ornaments. They’re a great addition to a tree because they glow when the lights shine through.

On the Mantel
Mix dried orange slices into a mantel garland with greenery. A Christmas garland with a little orange in it looks fresh and a bit unexpected.
On Gifts
Tuck a slice (or several) under the ribbon. It costs almost nothing, and your gift smells wonderful.

In a Simmer Pot
Add slices to a pot of water with cinnamon sticks, cloves, orange peels, and your favorite spice mix. Simmer on low. The whole house smells like the holidays. Just keep an eye on the water level and top it off.

A Few More Ideas
- Charcuterie board: Dried slices make a pretty garnish on a charcuterie board. Use a fresh batch that hasn’t been hanging around the house.
- Drinks: Citrus wheels look great in hot cider, tea, or a holiday cocktail.
- Wreaths: Hot glue slices to a greenery or grapevine wreath for a simple pop of color.
- Table settings: Tie one to a napkin with twine for easy Christmas decorations at each place setting.
- Windows: Hang a few in a sunny window for that stained glass look.

How to String Dried Orange Slices into a Garland
A dried orange garland looks fancy, but it’s really just slices on a string. Here’s how I do it.
Dried Orange Garland Steps
- Cut a length of natural twine about 4 feet long. Several shorter strands are much easier to handle than one giant one. You can tie them together or hang them separately.
- Thread a large-eye needle (a tapestry or darning needle works well) and tie a big knot at one end.
- Make a pilot hole first. Poke a skewer or push pin through the slice about 1/2 inch in from the edge. Dried slices can be brittle, so go slowly.
- Run the needle through the hole and pull the twine through. Slide the slice down to the knot.
- Tie a small knot just below the slice so it stays put. Leave a few inches of bare twine, then add the next slice and tie another knot.
- You’ll need about 15 to 20 slices per strand. Mix in a few cinnamon sticks tied on with short pieces of twine, if you like.
- Finish with a big knot and leave a few extra inches on each end for hanging.


Missy’s Notes
Want your slices to lie flat and face forward? Try two holes instead of one. Poke two holes near the edge, about 1/2 inch apart, then stitch the twine in one hole and out the other. The slice sits snug against the twine and doesn’t swing or slide much. It takes a little longer, but it gives you a tidier, more classic garland.
Here’s a Tip
Make extras! A few slices will crack, and that’s normal. Also keep garlands away from hot incandescent bulbs and open flames. LED lights are a better pair.

How to Hang One Dried Orange Slice as an Ornament
- Poke a hole about 1/2 inch from the edge of a slice, using a skewer or push pin.
- Cut a piece of twine or thin ribbon about 8 inches long.
- Thread it through the hole and tie the ends in a knot to make a loop.
- Hang it on a branch, or tie it onto a gift.

Sonata Holiday Decorating

Simple Simmer pot recipes for the whole year

Christmas tree decorating ideas that spark joy

An Anthro-inspired DIY Christmas wreath
Dried Orange Slices FAQS
Can you eat dried orange slices? Yes, they’re tart and chewy. Skip any that have been hanging on the tree or sitting on a gift.
Do I need sugar? No. Plain slices are all you need for decorating.
Why are my slices still sticky? There’s still moisture inside. Put them back in at a low temperature for another 20 to 30 minutes and check again.
How long do they last? For decorating, a year or more when stored dry. Check them now and then for softness or odor.
One Last Slice
I love how a few oranges and a little time can make the house feel like Christmas. Whether you use the oven method or the air fryer, you’ll end up with the prettiest, most inexpensive holiday decor around!

If you try it, tell me how you used yours. I’m always looking for more ideas!
Cheers!

A Little About Me
Hi! I’m missy. So happy to meet you!
“Decorate with Joy! Live with Happiness”
I truly believe that your home should be a reflection of your personality, a space where you feel free to express yourself and create a sanctuary that feels uniquely yours.
I love creating mood boards, hunting down unique home décor treasures, tackling easy DIY projects, and gathering with family and friends. Homes are meant to be enjoyed, filled with laughter, and shared with the people you love!
– cheers –

Don’t Forget to Pin It!
Pin the image below to your boards on Pinterest (just click the Pin button in the top left corner). You can also follow along with me on Pinterest!





Shop Till You Drop

