

Trash to Treasure Total Makeover
These two metal basket vases are not ready for the dumpster! See these twin trash to treasure woven “vases” reworked in two very different and unique ways.
We have been cleaning out the garage and finding all sorts of “stuff” from early in our marriage. (the late eighties/early nineties…Can we say big hair?) We definitely found some potential trash to treasure projects!
We found these! Full of old, crumbling florist foam, dry, powdery “moss” and broken winterberry holiday stems, these “vases” had seen their glory days a long time ago.
Age has its way with us all!

What are these?
After disposing of all the “stuffing”, I was left with two…what would you call these?
They are vase-shaped but can’t hold water. They are woven like a basket but don’t function like a basket.
For our purposes, let’s call them vases.
***This post contains affiliate links that help to buy me coffee in my retirement. (Have a cup with me!) Sonata Home Design is a participant in the Amazon Services LLC Associates Program, an affiliate advertising program designed to provide a means for us to earn fees by linking to Amazon.com and affiliated sites. Additional affiliates links also may be included for your convenience.
Twin Vases/Unique Styles
While you may not have a decor piece in this specific shape, style, or finish, these makeovers will work on pretty much any vase or open weave basket.
With such a classic shape, I thought it would be fun to decorate these twin vases in two completely different styles.
You see, as the mother of twin daughters, I dressed them alike for the first few years of their lives and then realized that the look-alike “cuteness” was more for me and not for them.
Twins deserve their own unique style! So, I am decorating these vases in different ways for each of my daughters….amazing, unique young women with their own distinct styles. They will know which one is theirs in the blink of an eye!
Laying the Foundation with Paint
Spray paint is the quickest way to make a huge change in trash to treasure projects.
In fact, here are 12 Spray Paint Projects that are Fun and Easy
So lets at least get these vases on the same starting page with some spray paint! I chose Rust-Oleum “Copper” spray paint for its beautiful metallic finish and great coverage.

With the new copper finish, each vase took on a much more architectural vibe! (Eiffel Tower anyone?)

Twin Vase #1
Classic and simple…this is the goal for the first vase. (My firstborn twin does not like fussy decor!)
All I used for this vase is some white nautical cotton rope from a dollar store.

Leaving a 6″ tail on the front end, simply wind the rope around the neck of the vase until there is approximately 6″ on the other end. Then, tie in the front with a basic knot.


You do the math. Other than spray paint, this vase cost me $1.25 to revamp!

I think the vase is beautiful with its open weave but I also think it looks great with some faux grasses.

Twin Vase #2
My other daughter does like a little fuss so I’m going all out with the second vase.
Pom-poms!
These are so easy to make and can be added to just about anything for a fun pop of color and texture.
Any pom-pom kit will show you how to make them. (I mindlessly make them while watching tv!)
Here is a quick recap of the process.
How to Make a Pom-Pom
Leaving a “tail” on one end, wind the yarn to fill an extended arm of the pom-pom maker. Continue winding onto the other extended arm with the same piece of yarn.
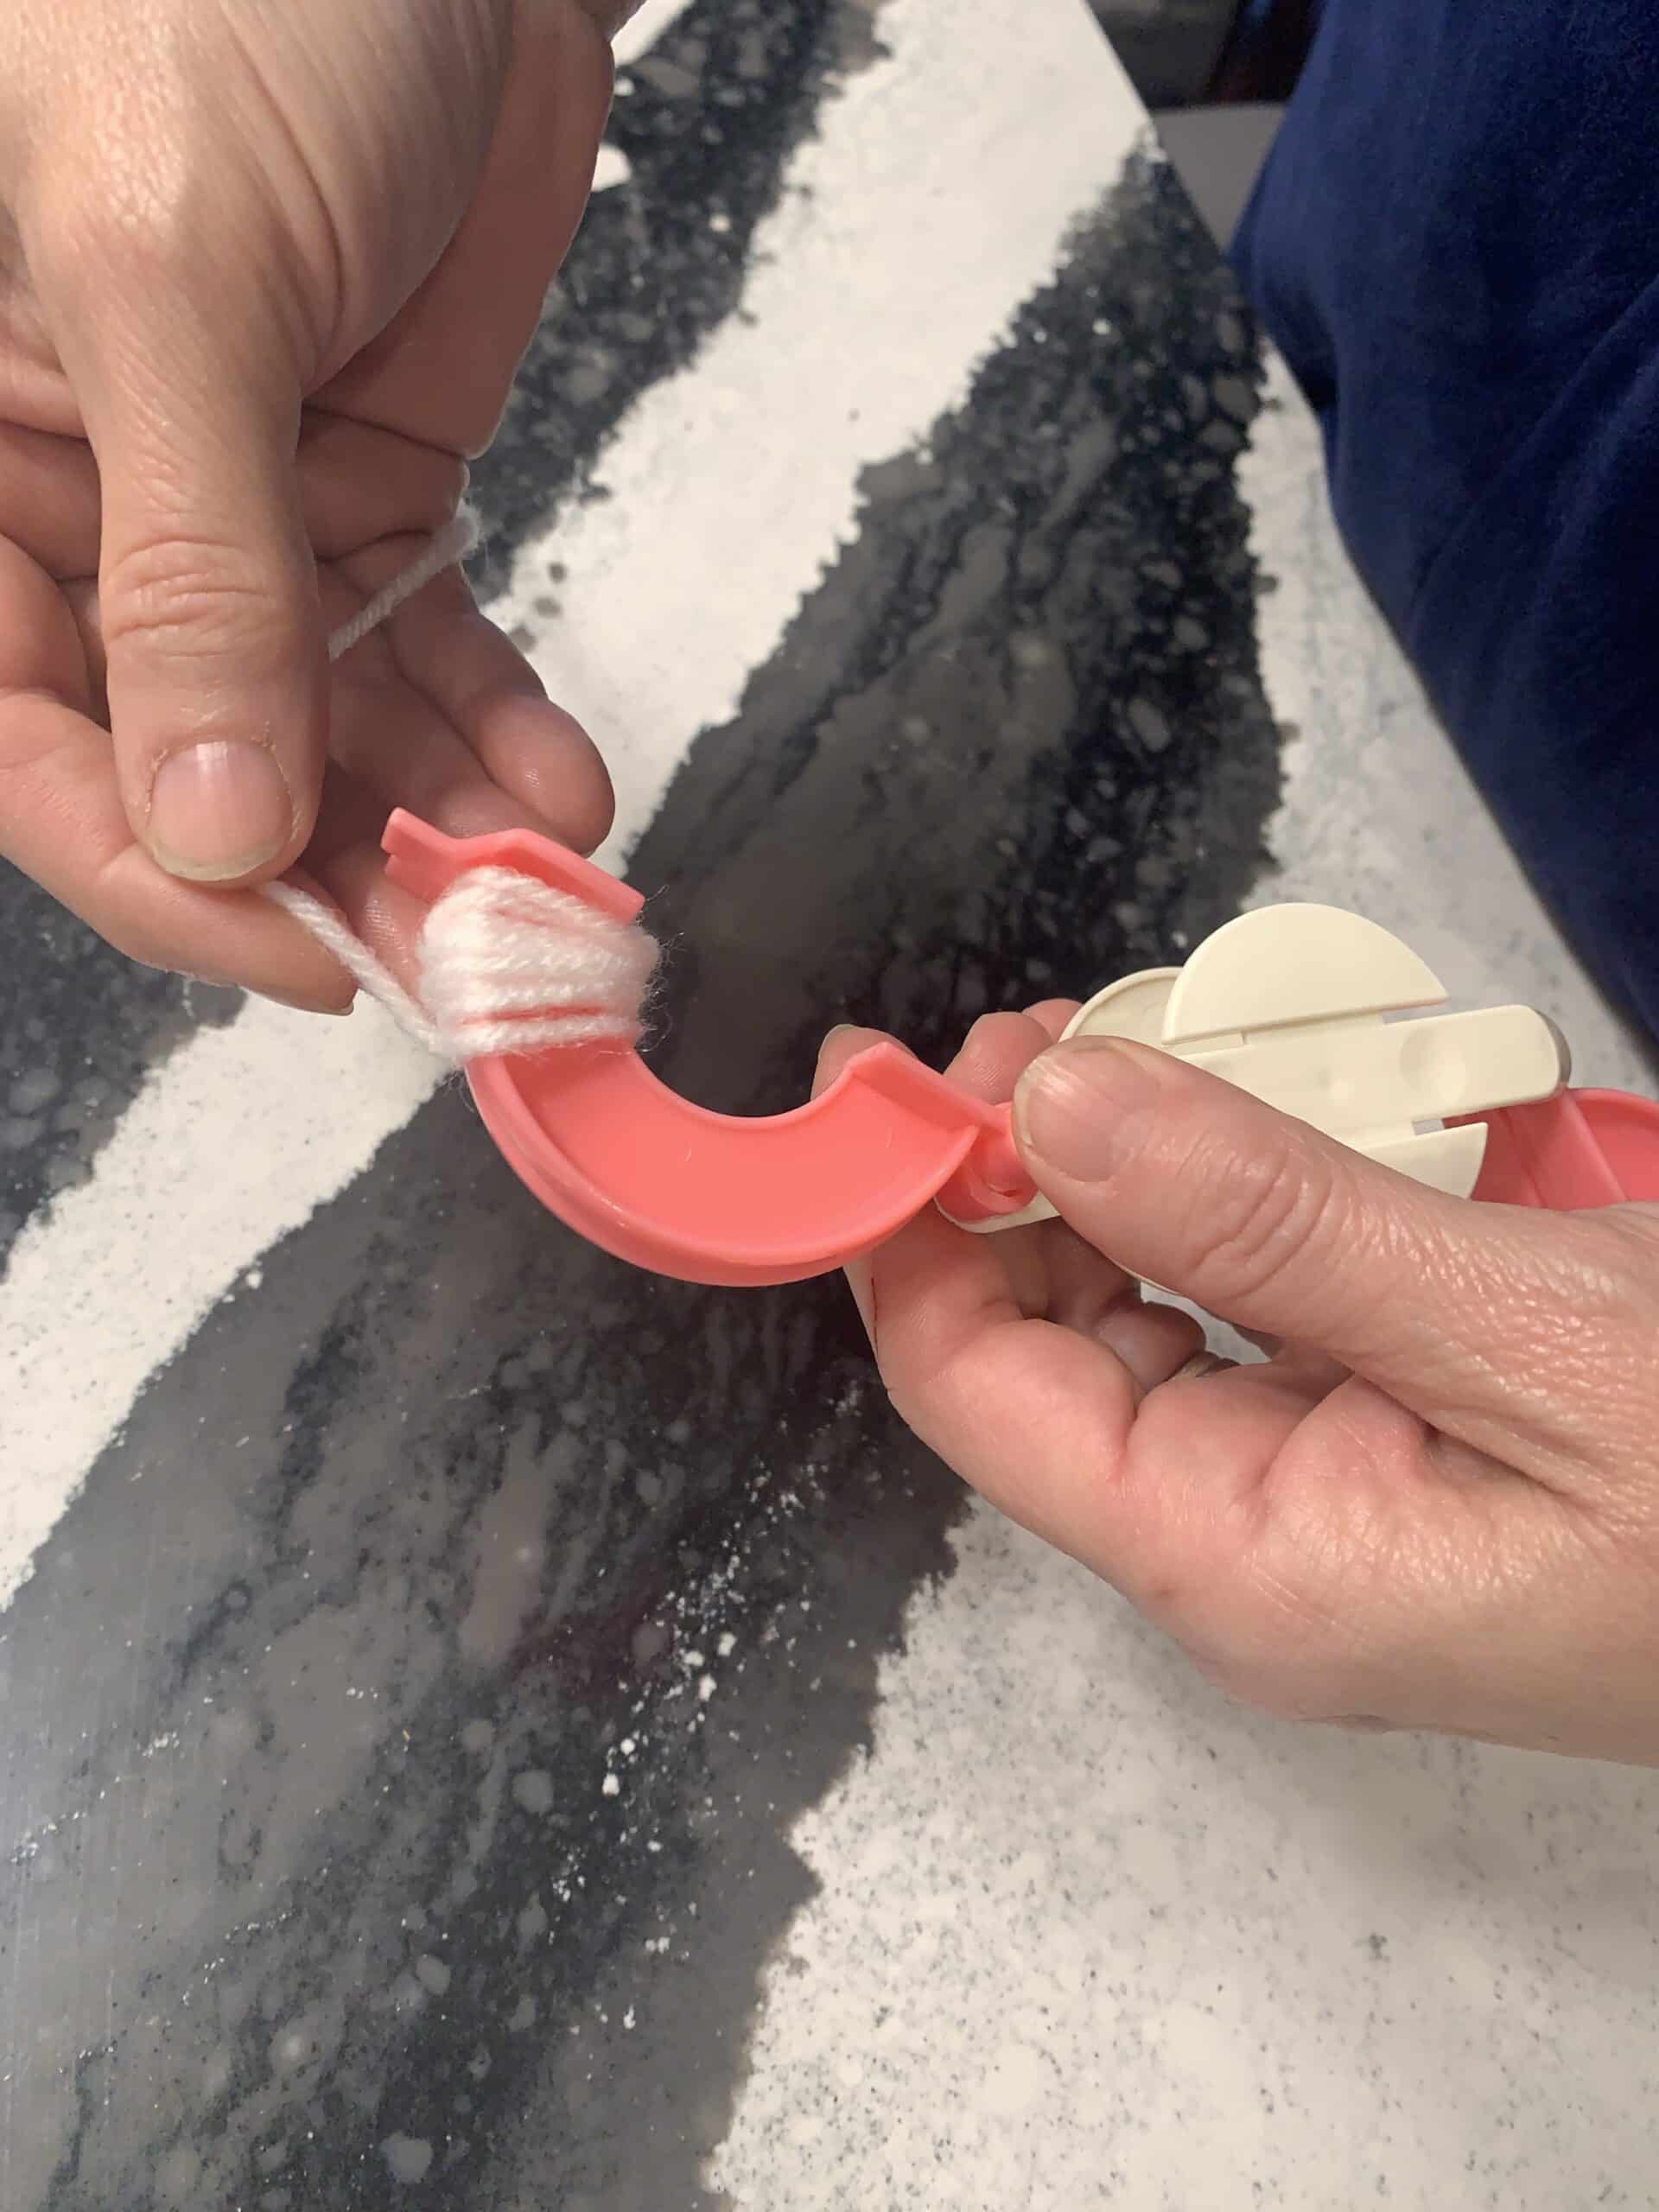
After closing the arms in to create a wheel, snip through the center of the yarn on both sides with sharp scissors.

Use the “tails” to tie a knot in the wheel crevice.

Open the plastic arms and pull them apart.
Voila! A pom-pom in about 3 minutes!

Want to see all the steps together? Here is a video!
The same process can be used with any type of yarn. For this project, multi-colored chenille yarn was used in addition to the white yarn.

You might be interested in seeing some other projects I have created using pom-poms.
4 Steps to Creating Pom-Pom Magic…with Pillows and Placemats!
Back to the project! Using the “tails” of the pom-pom, start to attach by tieing each one onto the weave of the basket or vase. You can attach the pom-poms in any design you want.

I went for a curvy, serpentine pattern. Altogether, I used 12 small pom-poms and 5 large pom-poms.

Ooh-La-La! This puts the “treasure” in trash to treasure!
It looks like a comfy feather boa…but in chenille!
Spray paint and yarn…this refresh cost about $3!

Dressing alike can be fun once in a while but twins do like to develop their own unique sense of style.
Have fun with your next trash to treasure project!
Cheers, my friend!

Missy, I love the redo of both of your vases! I really must get one of those pom pom makers!
You should! They add such fun texture and you can customize colors so easily. Plus…inexpensive!!! Thanks so much for reading, Jane!
Fantastic garage finds! I have a feeling these might be repurposed and painted a few more times before they retire!
You know me well, Becky! Thanks for reading!
Looking good Missy, I love all of the differetn options you show here. Nothing better then a trash to treasure project.
Thanks, Wendy! I love repurposing things! Thanks for reading! ~Missy
I love a good trash to treasure transformation Missy. Both of these are beautiful – I think I’m drawn to the pom poms though. I might need to get a pom pom maker 👏
You can never go wrong with pom-poms! Initially, I was intimidated by the thought of making them. Then, I found out how easy it is!