A “Make It Work” Focal Point
Do you have a wall canvas that is not quite big enough for your space? Create a “Make It Work” Focal Point and give your wall canvas more depth and presence by combining it with a larger piece of framed artwork.
I love Tim Gunn. And, in watching past episodes of Project Runway, I get a little rush whenever he commands “Make it Work!”
It is a combination “Get it Together!” and “I Believe in You!” statement.
You would be surprised how often I mutter this phrase under my breath.
And, how often this little phrase works for me!
***This post contains affiliate links that help to buy me coffee in my retirement. (Have a cup with me!) Sonata Home Design is a participant in the Amazon Services LLC Associates Program, an affiliate advertising program designed to provide a means for us to earn fees by linking to Amazon.com and affiliated sites. Additional affiliate links are also included for your convenience.
Well, I discovered my first challenge in the form of the room’s inspiration and artistic focal point.
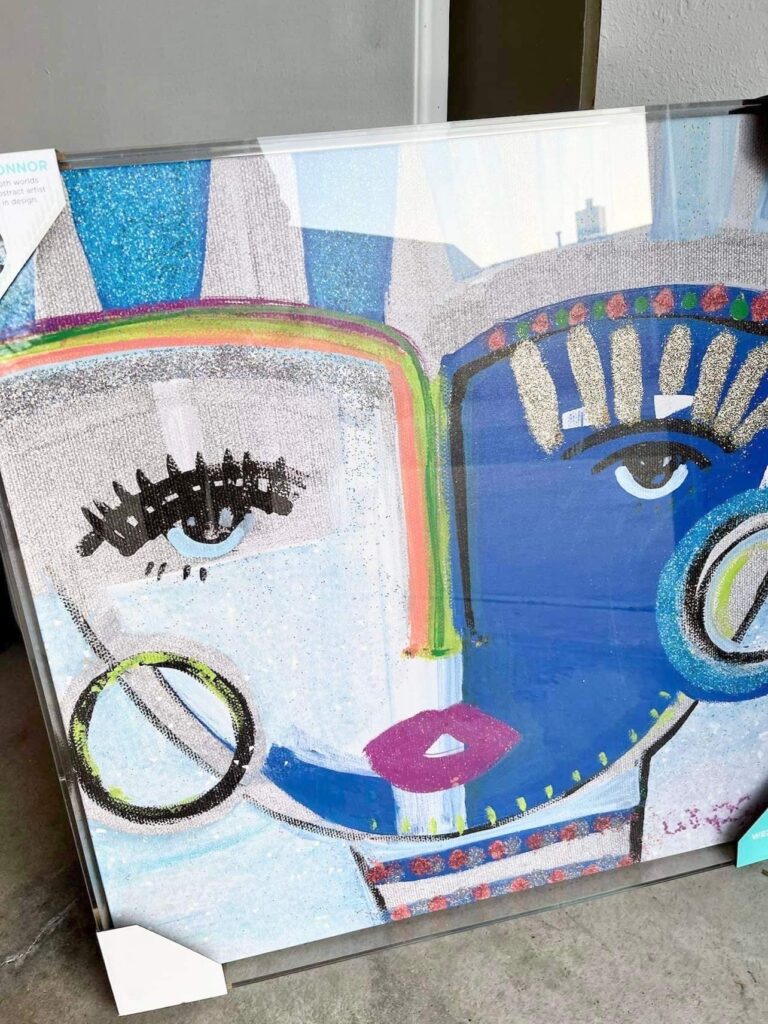
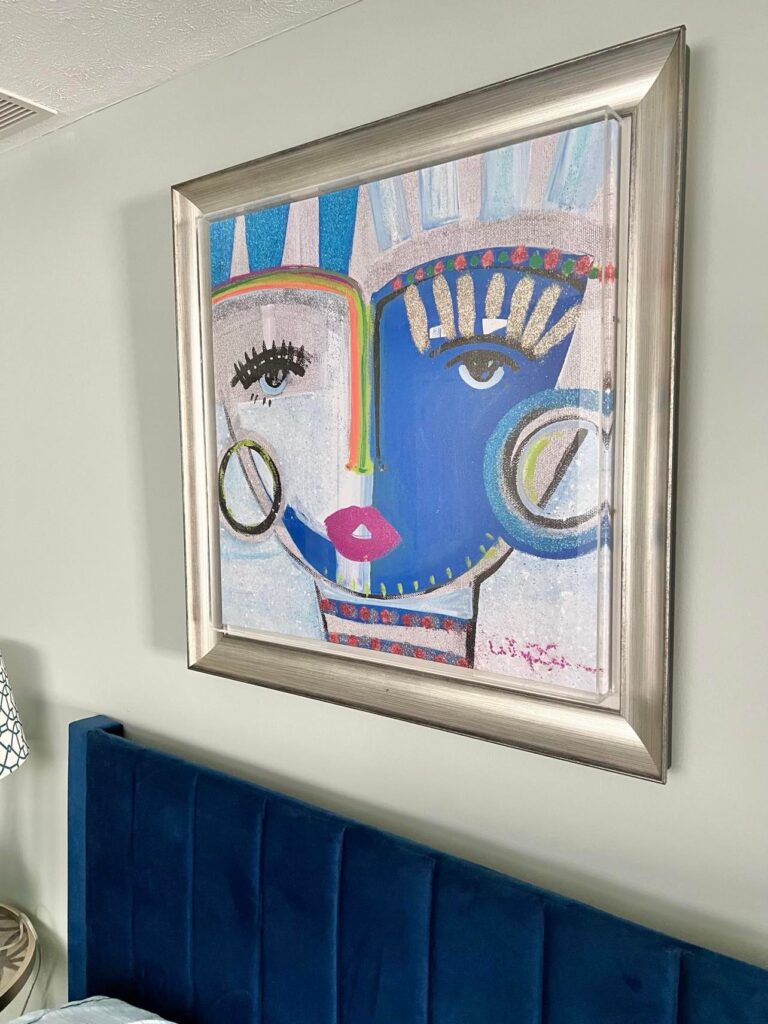
This wall canvas by artist, Windy OConner, takes my breath away! Be sure to check out her website. Can we say AMAZING!
Color, form, dramatic impact…I knew this belonged on top of the room’s blue velvet headboard!
Look at all that fantastic color!
Size Matters
However, there was an issue with this particular canvas.
The canvas I purchased is not quite large enough to command the space above the bed.
While the headboard is not massive, the canvas just didn’t seem to have the size impact that I was looking for. This wall art deserves a real place of honor!
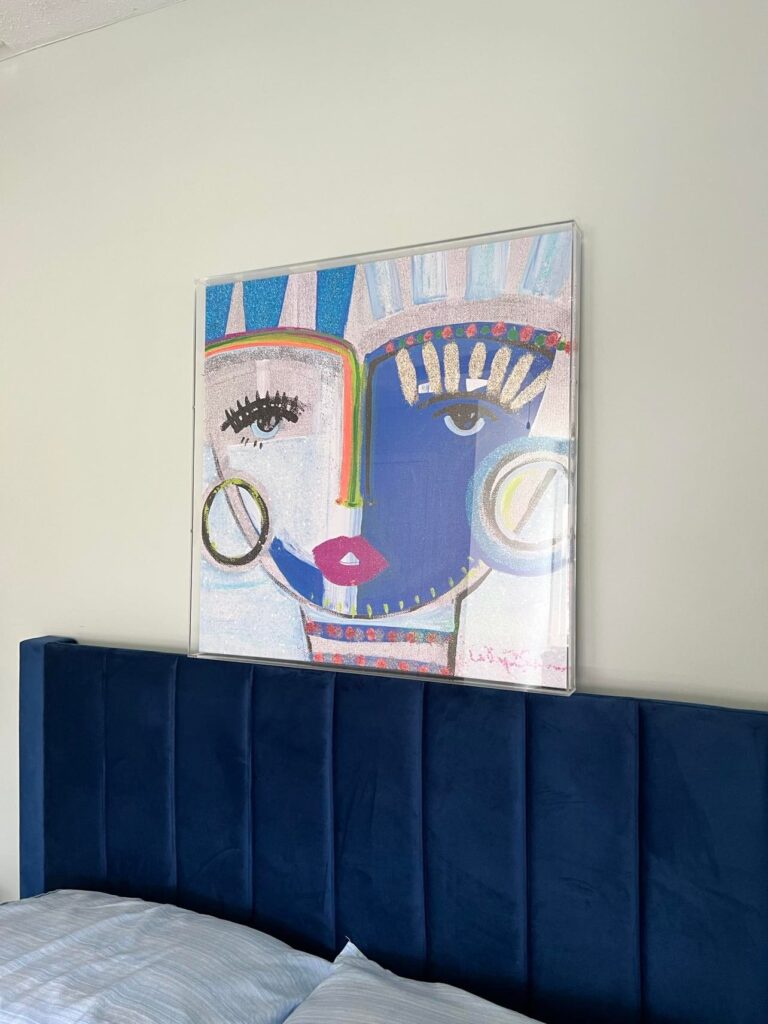
Ok, Missy….this is a “Make It Work” Moment! How do I make the existing canvas look larger?
I considered adding other elements to the wall. But, I want the sole focus to be on this amazing wall art.
Think. How can I give the canvas some real estate “oomph?”
I thought about taking it to a frame shop to build it out.
Ummm…too expensive for the current budget. (I have lamps to buy!)
Try Again. Think. Make It Work…
An Epiphany!
I love a good epiphany! Why not use an existing piece of framed wall art that has been sitting in a hallway closet for over a year?
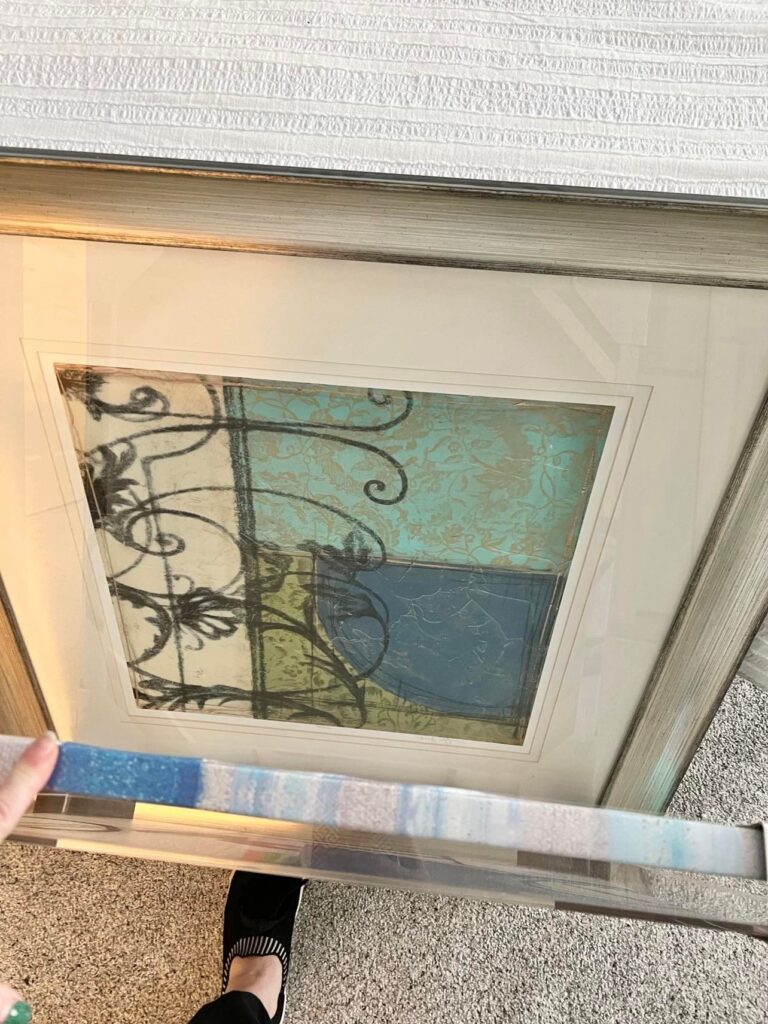
This is a perfectly good piece of artwork. It hung in our bedroom for years before I gave the room a refresh.
But I was a little weary of the artwork and so tucked it away not knowing what to do with it.
The artwork itself may have worn itself out for my taste, but the FRAME! I LOVE the frame!
How can I repurpose this frame for the canvas for a Make It Work Focal Point?
“Come on, Missy! Make it work!”
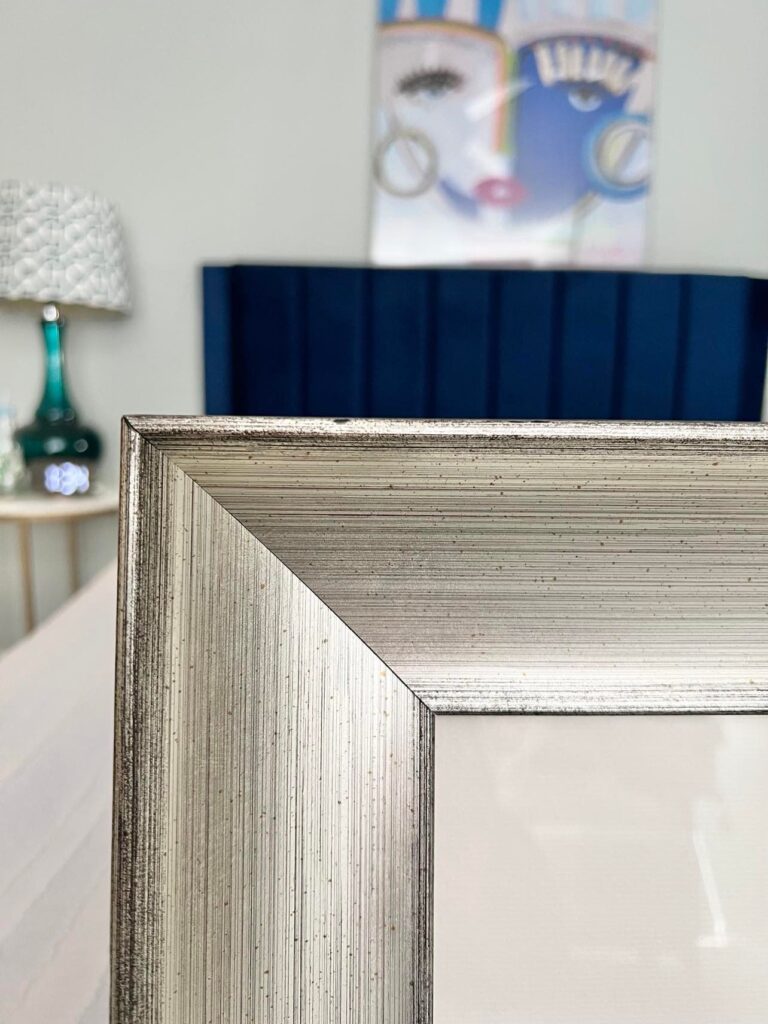
Taking the entire piece apart was not something that thrilled me. Plus, the canvas (which came in an acrylic box) was just a teensy bit smaller than the frame.
“What to do? What to do?”
Then it hit me…why not just attach the acrylic frame with the canvas inside to the front of the glass of the framed piece!
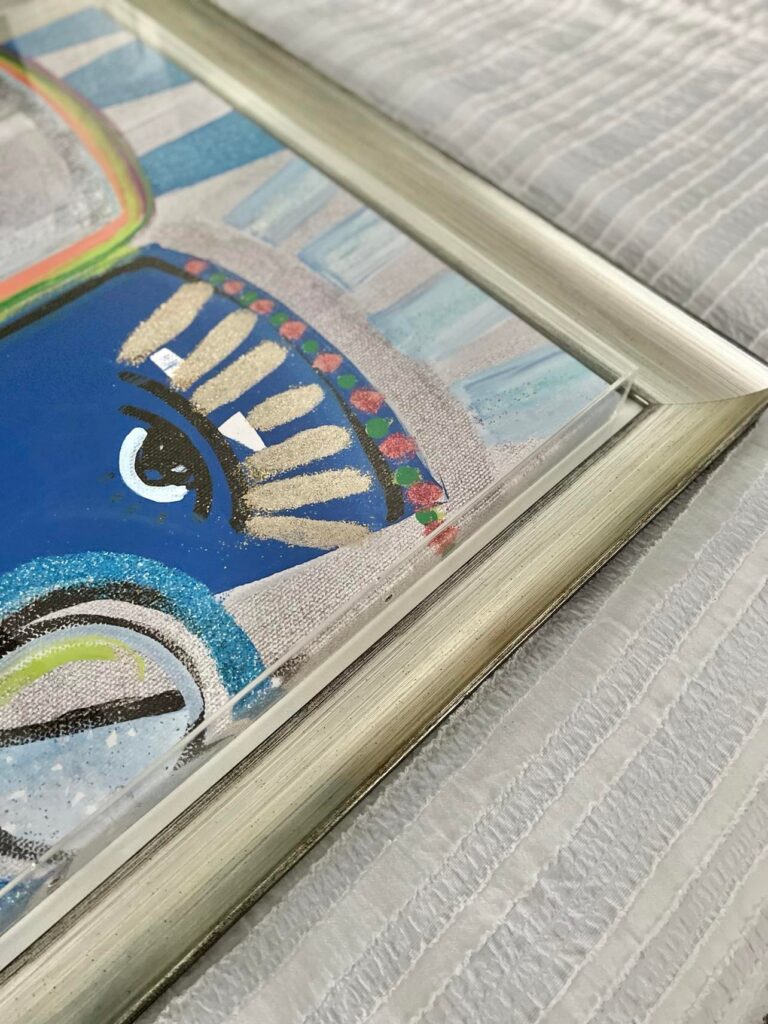
And how to attach it?
Velcro! Hefty two-inch pieces of velcro!
Velcro 101
It couldn’t be easier! This is a technique that you can use any time you are working with velcro or other adhesive strips.
Did you know there is industrial strength velcro? Perfect for the weight of the project. You can see the industrial strength velcro that I used HERE.
Wanting to create a strong bond and avoid a sticky mess, peel off the protective paper from only one side of the strip and attach it to what you are bonding. In this case, the wall canvas. Keep the protective paper on the other side until you are ready to attach.
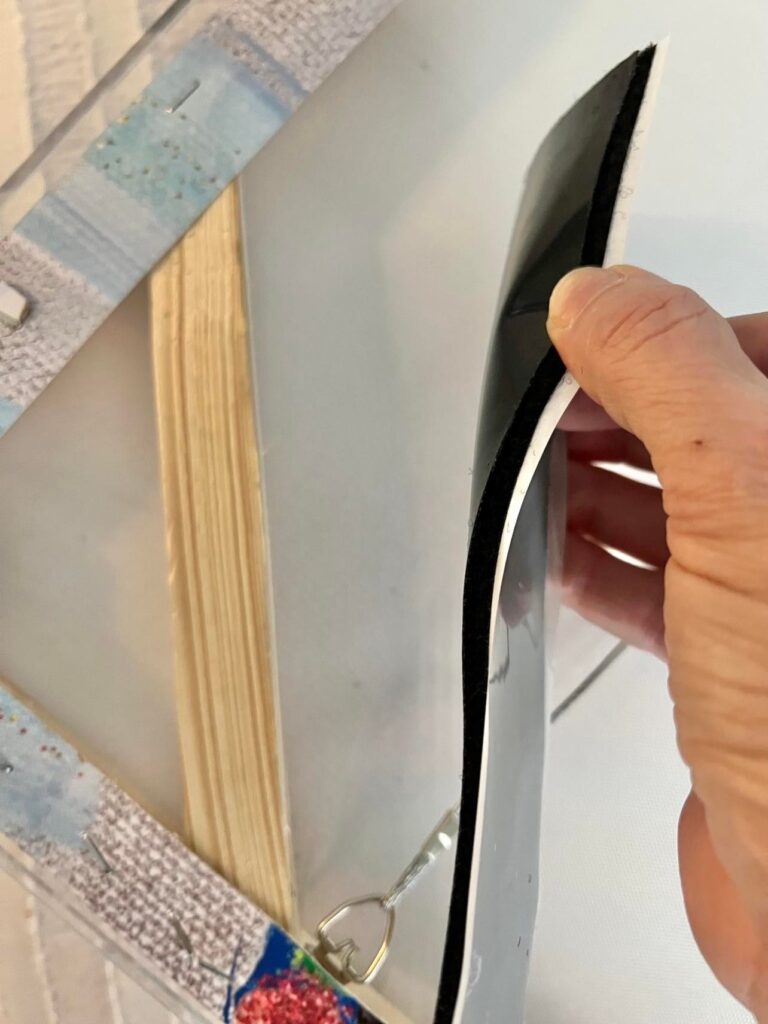
Use two strips per corner to create a strong foundation, particularly for a heavier piece such as this. (The acrylic box is heavier than you might think.)
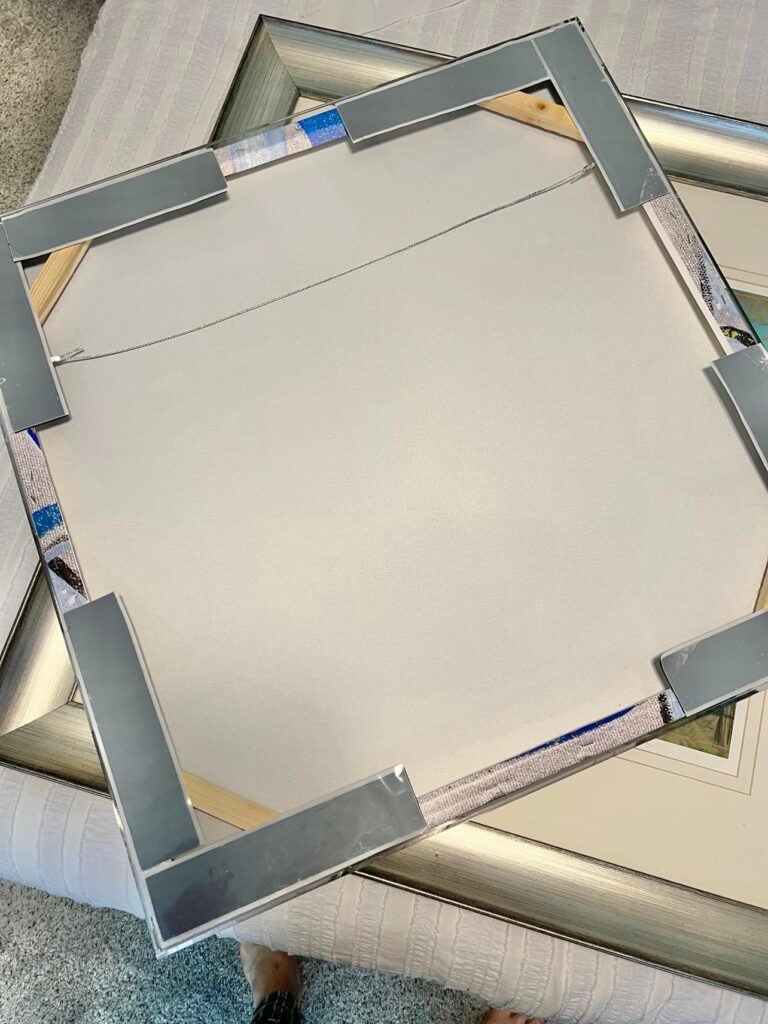
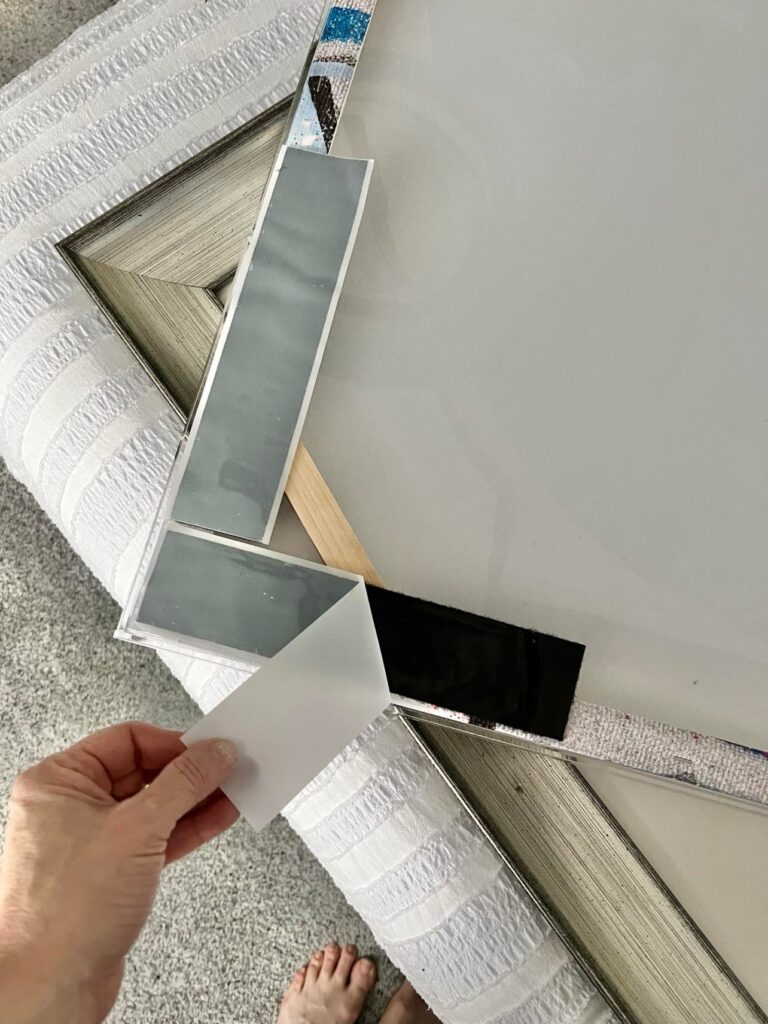
Once all the pieces are on, peel off all the protective papers.
The last step…stick it on!
My “Make It Work” Focal Point Is Working!
My Make It Work Focal Point worked! The acrylic box with canvas inside is securely attached to the front of the framed piece and is not going anywhere…until I want it to! (The beauty of velcro!)
Keeping the canvas in the acrylic box and attaching it to this beefy frame gave it the presence and impact it deserves!
(While my artwork came in a protective acrylic box frame, this could be done with just a canvas or by adding an acrylic shadowbox.)
Next week…I’m turning the bed into its own Make It Work Focal Point! Stick with me on this fun and colorful journey!
Cheers, my friend!


Missy,
Industrial Strength Velcro is a “must keep on hand” in my life. It saves the day (project) so often, right?
Big fan here of “Mr. Make It Work”! Gotta’ love Tim & his “can do” attitude.
Happy Sprucing,
~Scarlett
Velcro and duct tape! Toolbox essentials, right? Thanks for commenting, Scarlett!