

How to Make a Christmas Tree Look Fuller (Even a Fake One!)
Do you have a small Christmas tree that looks a little sad and tired… or maybe even like a Charlie Brown tree? Don’t worry…you don’t need to toss that old tree or invest in a new one. With just a few easy tricks, you can give your Christmas tree a fresh, fuller look that looks as festive and magical as the real thing.

Whether you’re working with a traditional fake Christmas tree, a flocked tree, or even a pre-lit tree with skimpy branches, there are lots of ways to give it that lush look you’re after.
And here’s a little secret…most of these tips work just as beautifully on a real Christmas tree too. A real tree can have sparse areas, bare spots, and uneven branch depth just like an artificial tree.
So, no matter what tree is sitting in your living room this holiday season…this post is for you!
Key Notes
- A thin or sparse artifical tree can look full and lush. No new tree required!
- A thorough fluffing is the single most important step toward a fuller Christmas tree.
- Pine picks and floral picks fill bare spots quickly.
- Wide ribbon adds texture, volume, and professionally decorated look.
- Layering lights from the trunk outward creates the illusion of depth and fullness.
- These tips work beautifully on reall Christmas trees too!
This blog contains affiliate links. This means a small commission is earned if you make a purchase by using this link. The price you pay will be the same whether you use the affiliate link or go directly to the vendor’s website using a non-affiliate link. As an Amazon Influencer, I earn from qualifying purchases.
Before You Start
This is your foundational step. And it will save you a lot of frustration later.
Before you do anything else, give your tree a quick inspection. Think of it as a “tree check-up” before the real fun begins!
Work through this checklist:
- Walk around the tree and note where the bare spots and empty spaces are
- Check for missing or broken tree branches
- Test all of your tree lights and replace any dead strands before decorating
- If it’s a pre-lit tree, note which sections have dead lights so you can supplement
- Identify the “best features” of your tree (a nice full bottom? a good height? (so you know what to build on
- Decide if you need to add extra branches or floral picks before you begin
Missy’s Tree Tip!
Grab a notepad and do a slow walk around your tree before touching a single decoration. Jot down where the sparse areas are – top, middle, bottom. This gives you a decorating game plan before you start.
The Tradition Lives On
The tradition of decorating a Christmas tree is one of my family’s favorite parts of the festive season.
Real or faux, green or white, balsam or spruce…the options are endless!
And so are the Christmas tree ideas!
While getting a newer tree can be fun, sometimes your budget, storage space, or sentimental attachment says, “Keep the old one.”
And honestly? With the right techniques, that faux tree can look better than ever.
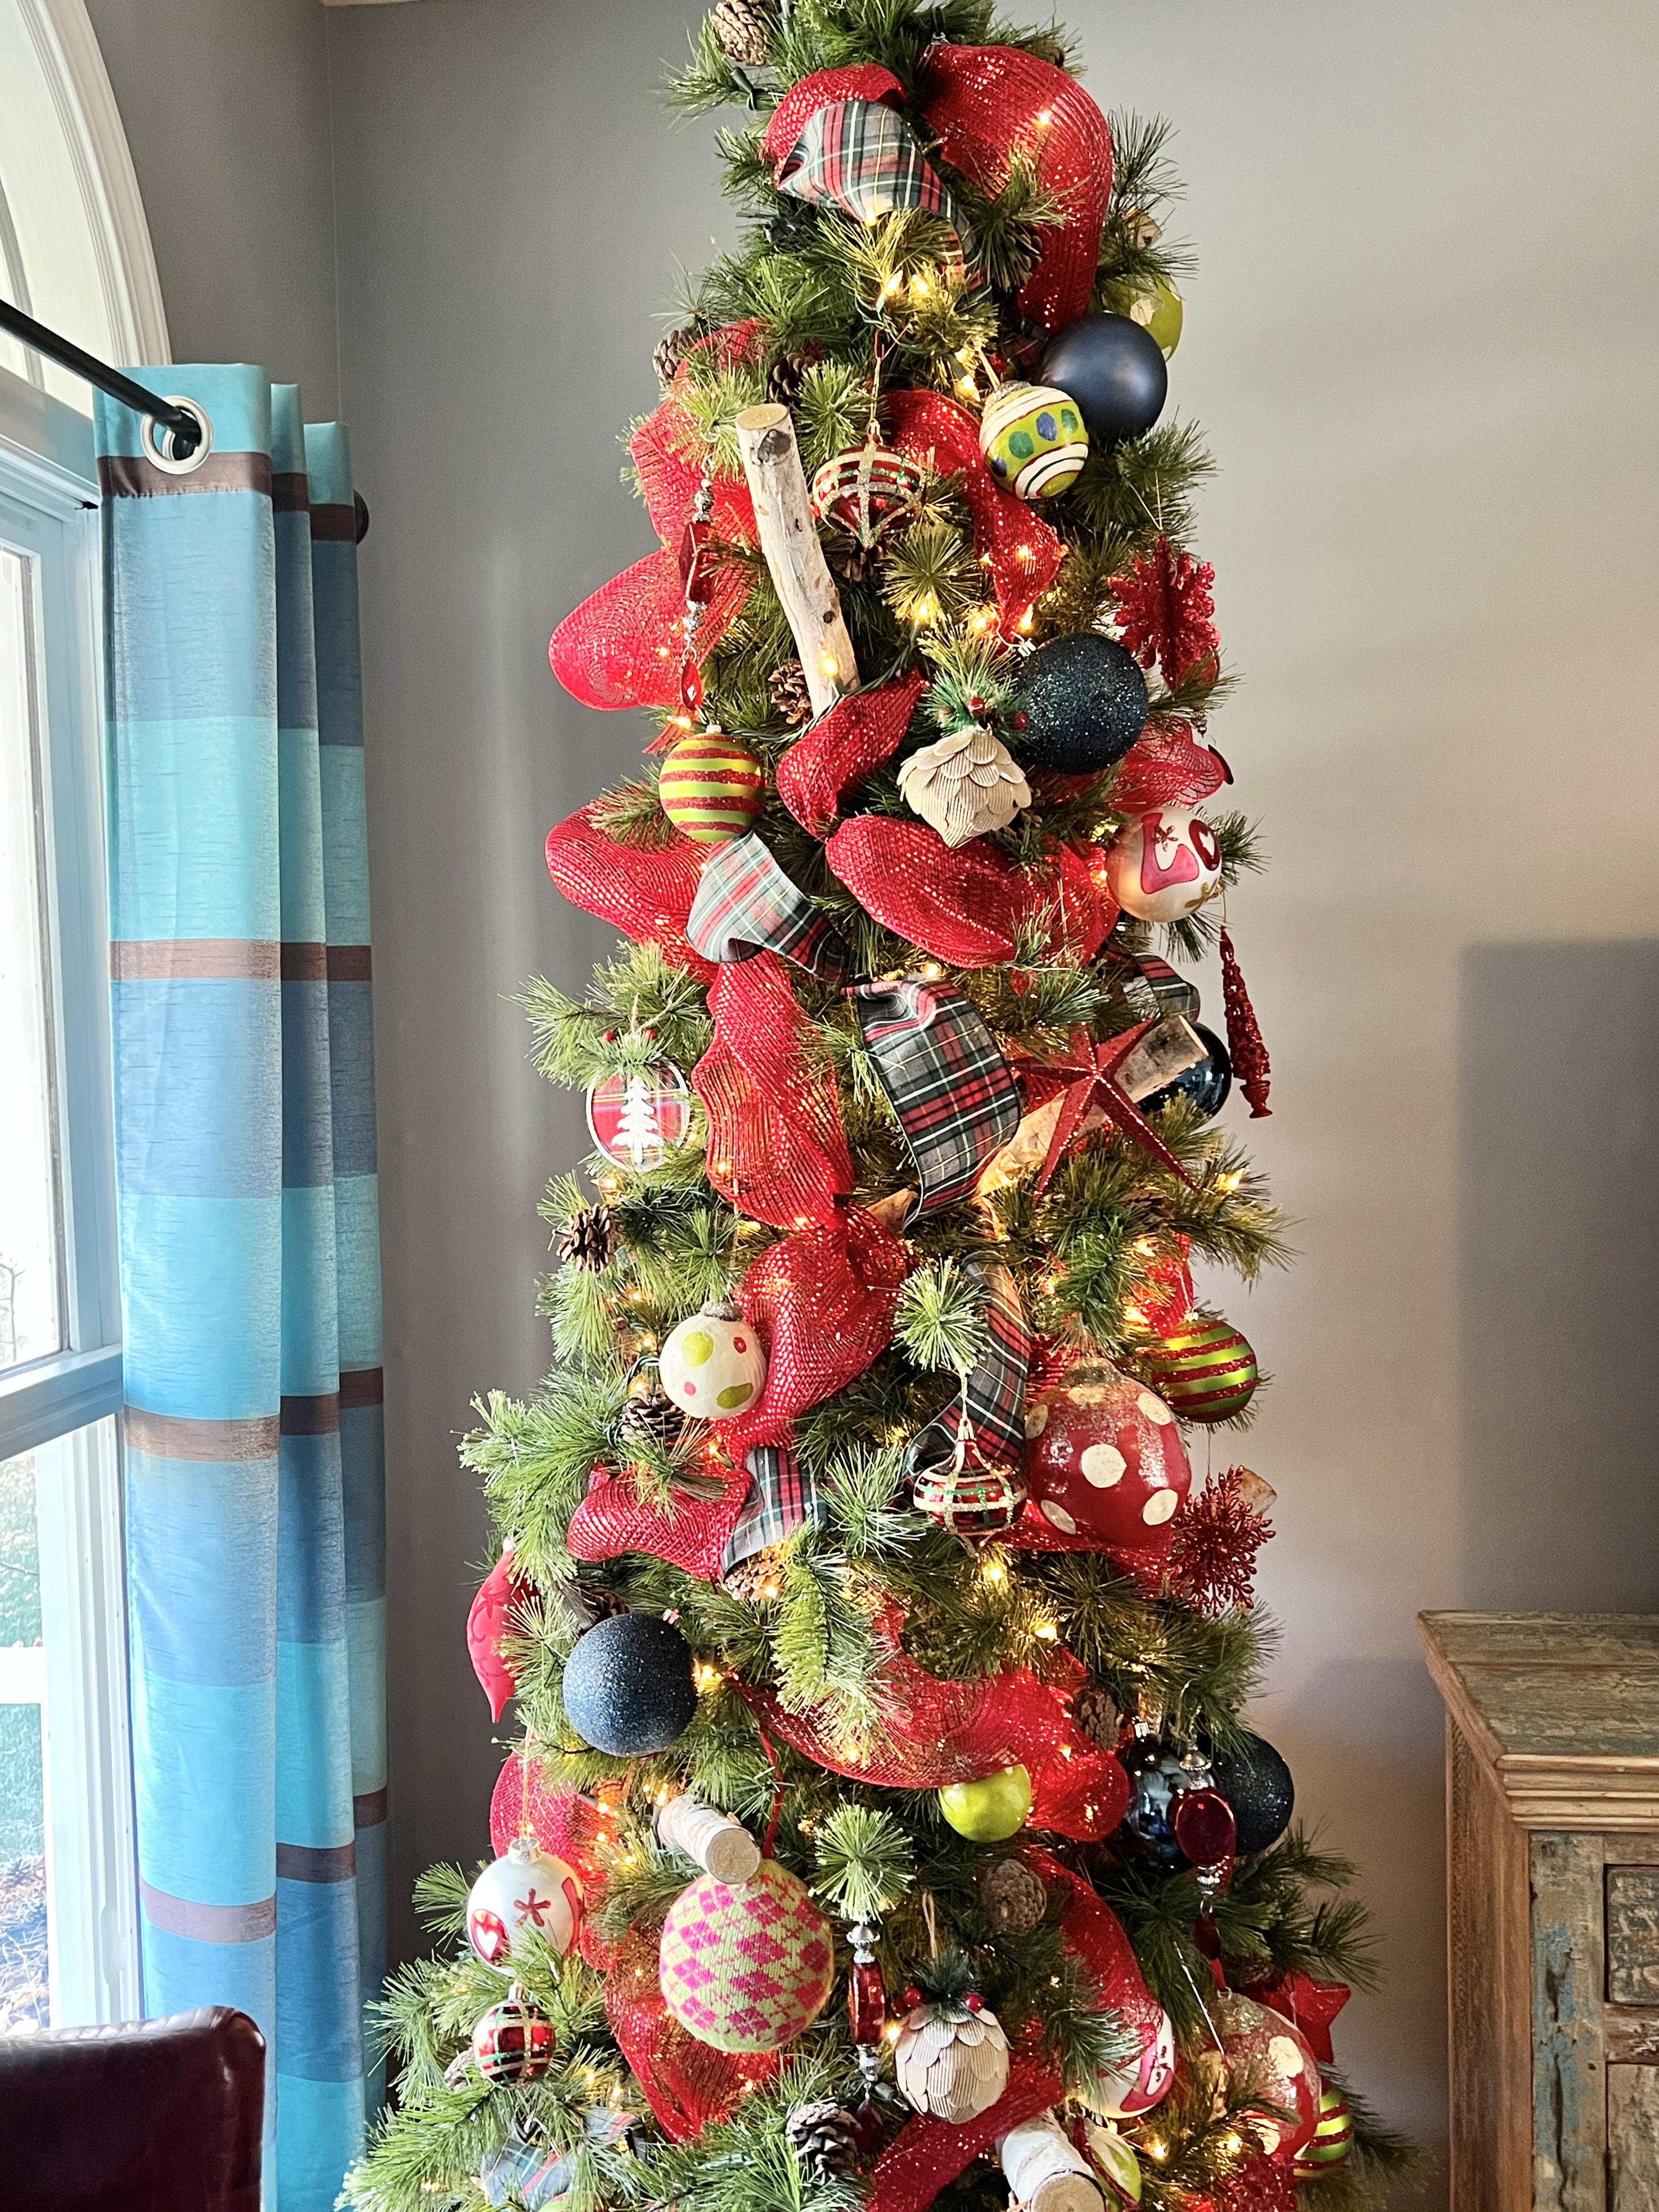
Case in point…this tree.

It’s not terrible. But it’s not great either.
Skinny.
Missing branches.
Dead lights.
Tired.
Let’s give it a tree spa day!
Step 1: Elevate the Tree (Literally!)
We all love a soaring Christmas tree.
The first step in transforming a short or small tree into a taller, more prominent presence is to give it a lift…literally!
Elevate your tree by placing it on a box, in a garden urn, or on a small table.
Here, I used a small coffee table to lift this tree by a couple of feet.

Whatever you use, leave about a foot of space between the top of your tree and the ceiling so you can add a fabulous topper.
Easy ways to elevate your tree
- Set the tree stand on a sturdy box, crate, or coffee table.
- Place it in a large garden urn or decorative basket to add height and visual interest.
- Leave about a foot of space at the top of the tree for a topper.
This is a great way to give your fake tree the visual impact of a larger tree. And perfect for those high ceilings or open living room corners!


Missy’s Tree Tip!
Don’t have a decorative urn or basket? A simple wooden crate painted in a holiday color or wrapped in burlap works beautifully and costs almost nothing.
Step 2: Fluff Like a Pro
This is the most important step!
I’ll be honest… this is not my favorite task. It takes time…and it can make my hands itch.
But it makes a HUGE difference in the fullness of your tree. Don’t skip it!

Start at the bottom of your tree and work your way up:
- Separate and shape individual branches to fan out like a natural pine tree
- Fill bare spots by bending faux branches upward and outward to mimic the way real pine needles grow
- If you see a bare spot in your tree, twist nearby branches into the space to fill it in
- Wear gloves if the branches make your hands itch
Though tricky at first, with some patience and practice, you’ll be able to create real branch depth and achieve the fullness of your slim Christmas tree that you’ve been dreaming of.
Missy’s Tree Tip:
Think of each branch as a tiny tree of its own. Fan out the small sub-branches in every direction…up, down, and sideways. The goal is to eliminate any visible “see-through” spots when you look at the tree from across the room.
Step 3: Incorporate Extra Greenery
This is one of the easiest ways to fill in a sparse tree fast.
Extra branches, pine picks, and layers of greenery are your secret weapons.
They are like mini tree branches you can pop wherever you need them. And they go a long, long way!

How to incorporate extra greenery:
- Insert extra branches or pine picks directly into the tree’s existing branch slots
- Add floral picks to possible spots where bare spots or empty spaces are most visible
- Use picks with pinecones, berries, or faux eucalyptus for different textures and a more lush look
- Let some picks stick out past the tree slightly. This creates the illusion of a more voluminous tree and makes even a small tree feel wider
This works especially well for a slim tree that needs more width. Or for a small tree placed in smaller rooms where every inch of fullness counts.
Missy’s Tree Tip!
Look for picks that match or complement your tree’s needle color for a seamless look. Or go slightly different to add depth and dimension. Both work!
Step 4: Replace or Add Christmas Lights
No tree is complete without lights!
Warm white lights are especially magical. They add a soft glow that enhances the fullness of your tree and creates beautiful focal points throughout the branches.
Tips for adding Christmas lights
- Check every string of Christmas tree lights BEFORE adding them
- Tuck fairy lights or LED strands deep into the center of the tree near the trunk. This creates the illusion of depth and makes the tree feel fuller
- Wrap branches from the trunk outward to create dimension
- Layer some lights closer to the trunk and others near the tips of the branches

Start at the top and work down one branch at a time, making sure each strand is wrapped snugly.
Have a pre-lit tree?
Add more lights!
I know, I know…you bought a pre-lit tree so you wouldn’t have to wrestle with Christmas lights!
BUT…
Adding lights to a pre-lit tree creates the illusion of a fuller tree and gives you that magical holiday glow.
Missy Tree Tip!
Warm white lights create a cozy, traditional feel. Cool white lights feel crisp and modern. Choose based on your color scheme. Warm whites pair beautifully with reds, golds, and plaids. Cool whites work well with blues, silvers, and minimalist decorations.

Step 5: Ribbon for the Win
Ribbon is a professionally decorated look in a roll of fabric.
It adds texture, shape, color, and a little heft to a fake tree. It ties into your color scheme for a cohesive look.
And, it fills in unsightly gaps in a way that nothing else quite does.
How to add wide ribbon loops
I like to use wide ribbons…2 to 3 inches wide ribbon in about 2 to 3 feet long. Working with shorter sections makes it much easier.
- Tuck one end of the ribbon into the back of a branch
- Create a loop and pinch along the ribbon
- Tuck that pinched area into the back of a different branch and secure it by twisting a small inner branch around it
- Start a new section of ribbon where the last one ended
- Continue looping and tucking down the tree

The tree already feels bigger!

Try layering a solid-colored ribbon with a patterned one for contrast. Plaid paired with mesh is one of my favorites. It adds drama while keeping things light and airy.

Missy’s Tree Tip!
If your ribbon keeps slipping, use small floral wire or a green pipe cleaner to secure the pinched areas. No one will ever see it! And your loops will hold beautifully all season long.
Step 6: Go Big with Ornaments
Here comes the fun part!
Large ornaments and oversized ornaments are your best friends when you want to fill in a tree and create a full appearance. They visually anchor the and naturally draw the eye, making eveything feel more intentional and lush.

Tips for impactful decorating
- Use a mix of sizes. Larger decorations toward the center and back of the tree, smaller decorations toward the tips of the branches
- Place reflective and metallic ornaments close to the Christmas lights for added sparkle. This creates the illusion of depth and makes the tree feel more dimensional
- Tuck filler decorations (shiny ball ornaments in your color scheme) toward the back of the tree to add visual interest without cluttering the front
- Use ornaments in different textures. Matte, glittered, metallic, and fabric all layered together create a rich, layered look.

This is your moment to show your personality!
Plaid, stripes, vintage, whimsical…whatever your holiday spirit calls for!
Missy’s Tree Tip!
Hang your most beautiful, statement ornaments at eye level. These become the focal points that guests notice first. Then fill in above and below with smaller, simpler pieces.
Step 7: Add Picks and Floral Accents
Floral picks are my favorite secret weapons.
They’re inexpensive, easy to use, and they transform sparse areas into something that looks intentional and designed.

Add them to:
- Fill in larger branch gaps or empty spaces throughout the tree
- Extend past the tree for added volume and width
- Create texture and contrast with natural materials like pinecones, berries, or faux eucalyptus
- Help transition between ribbons and ornaments for a more cohesive look

Don’t hesitate to let them stick out a little bit. This makes your tree look wider and gives even a small tree a grander presence.
Missy’s Tree Tip!
Group picks in odd numbers…threes and gives feel more natural and visually pleasing than pairs. Tuck them in at slightly different angles for an organic, garden-fresh look.
Step 8: Add Something Unexpected
Want to stop guests in their tracks?
Tuck in something unexpected!
Birch logs.
Mini wrapped presents.
Plush holiday figures.
Small lanterns.
A sprig of something that matches your Christmas decorations elsewhere in the room
To complement the red plaids and polka dots in this tree, I tucked in some birch logs. It’s a subtle addition…but it always takes people by surprise when they look closely.

Surprise elements make your tree feel curated and special. And they give it personality that a store-bought, perfectly symmetrical wide tree just can’t replicate.
Missy’s Tree Tip!
Repeat one unexpected element from your tree somewhere else in the room…on the mantel, a side table, or your Christmas garland. This creates a cohesive look that feels professionally designed.
Step 9: Style the Base of the Tree
Let’s not forget the bottom of your tree! The base is just as important as the top of the tree.
A well-chosen tree skirt, basket, or tree collar “grounds” the entire tree and completes the look.

Ideas to dress it up:
- Add wrapped faux gifts in color that match your color scheme
- Display candle holders, winter greenery, or a lantern for a wintery look
- Bundle logs or add a tree collar for rustic charm.
- Try this easy DIY tree collar using photo frames and fabric!
- Add nutcracker friends to stand “on guard” by Christmas packages
Because this tree sits on a coffee table, I added a candle on a holder and a small bundle of wrapped birch logs to the top of the table.


Missy’s Tree Tip!
If your tree is elevated in a basket or urn, fill the gap between the tree stand and the container with crumpled newspaper first, then cover with Spanish moss or sheet moss. It looks polished and costs almost nothing.
Step 10: Crown It With a Fabulous Topper
Your tree topper is the exclamation point of your tree!
It pulls the whole tree together, draws the eye to the top of the tree, and signals to everyone in the room…”Hey! Look at me!”
You can go traditional…or unexpected!
Tree topper ideas
- Big loopy bow with wide ribbon
- Classic star or angel
- Santa hat
- Picks, sprays, and branches fanned out for a natural, organic look.
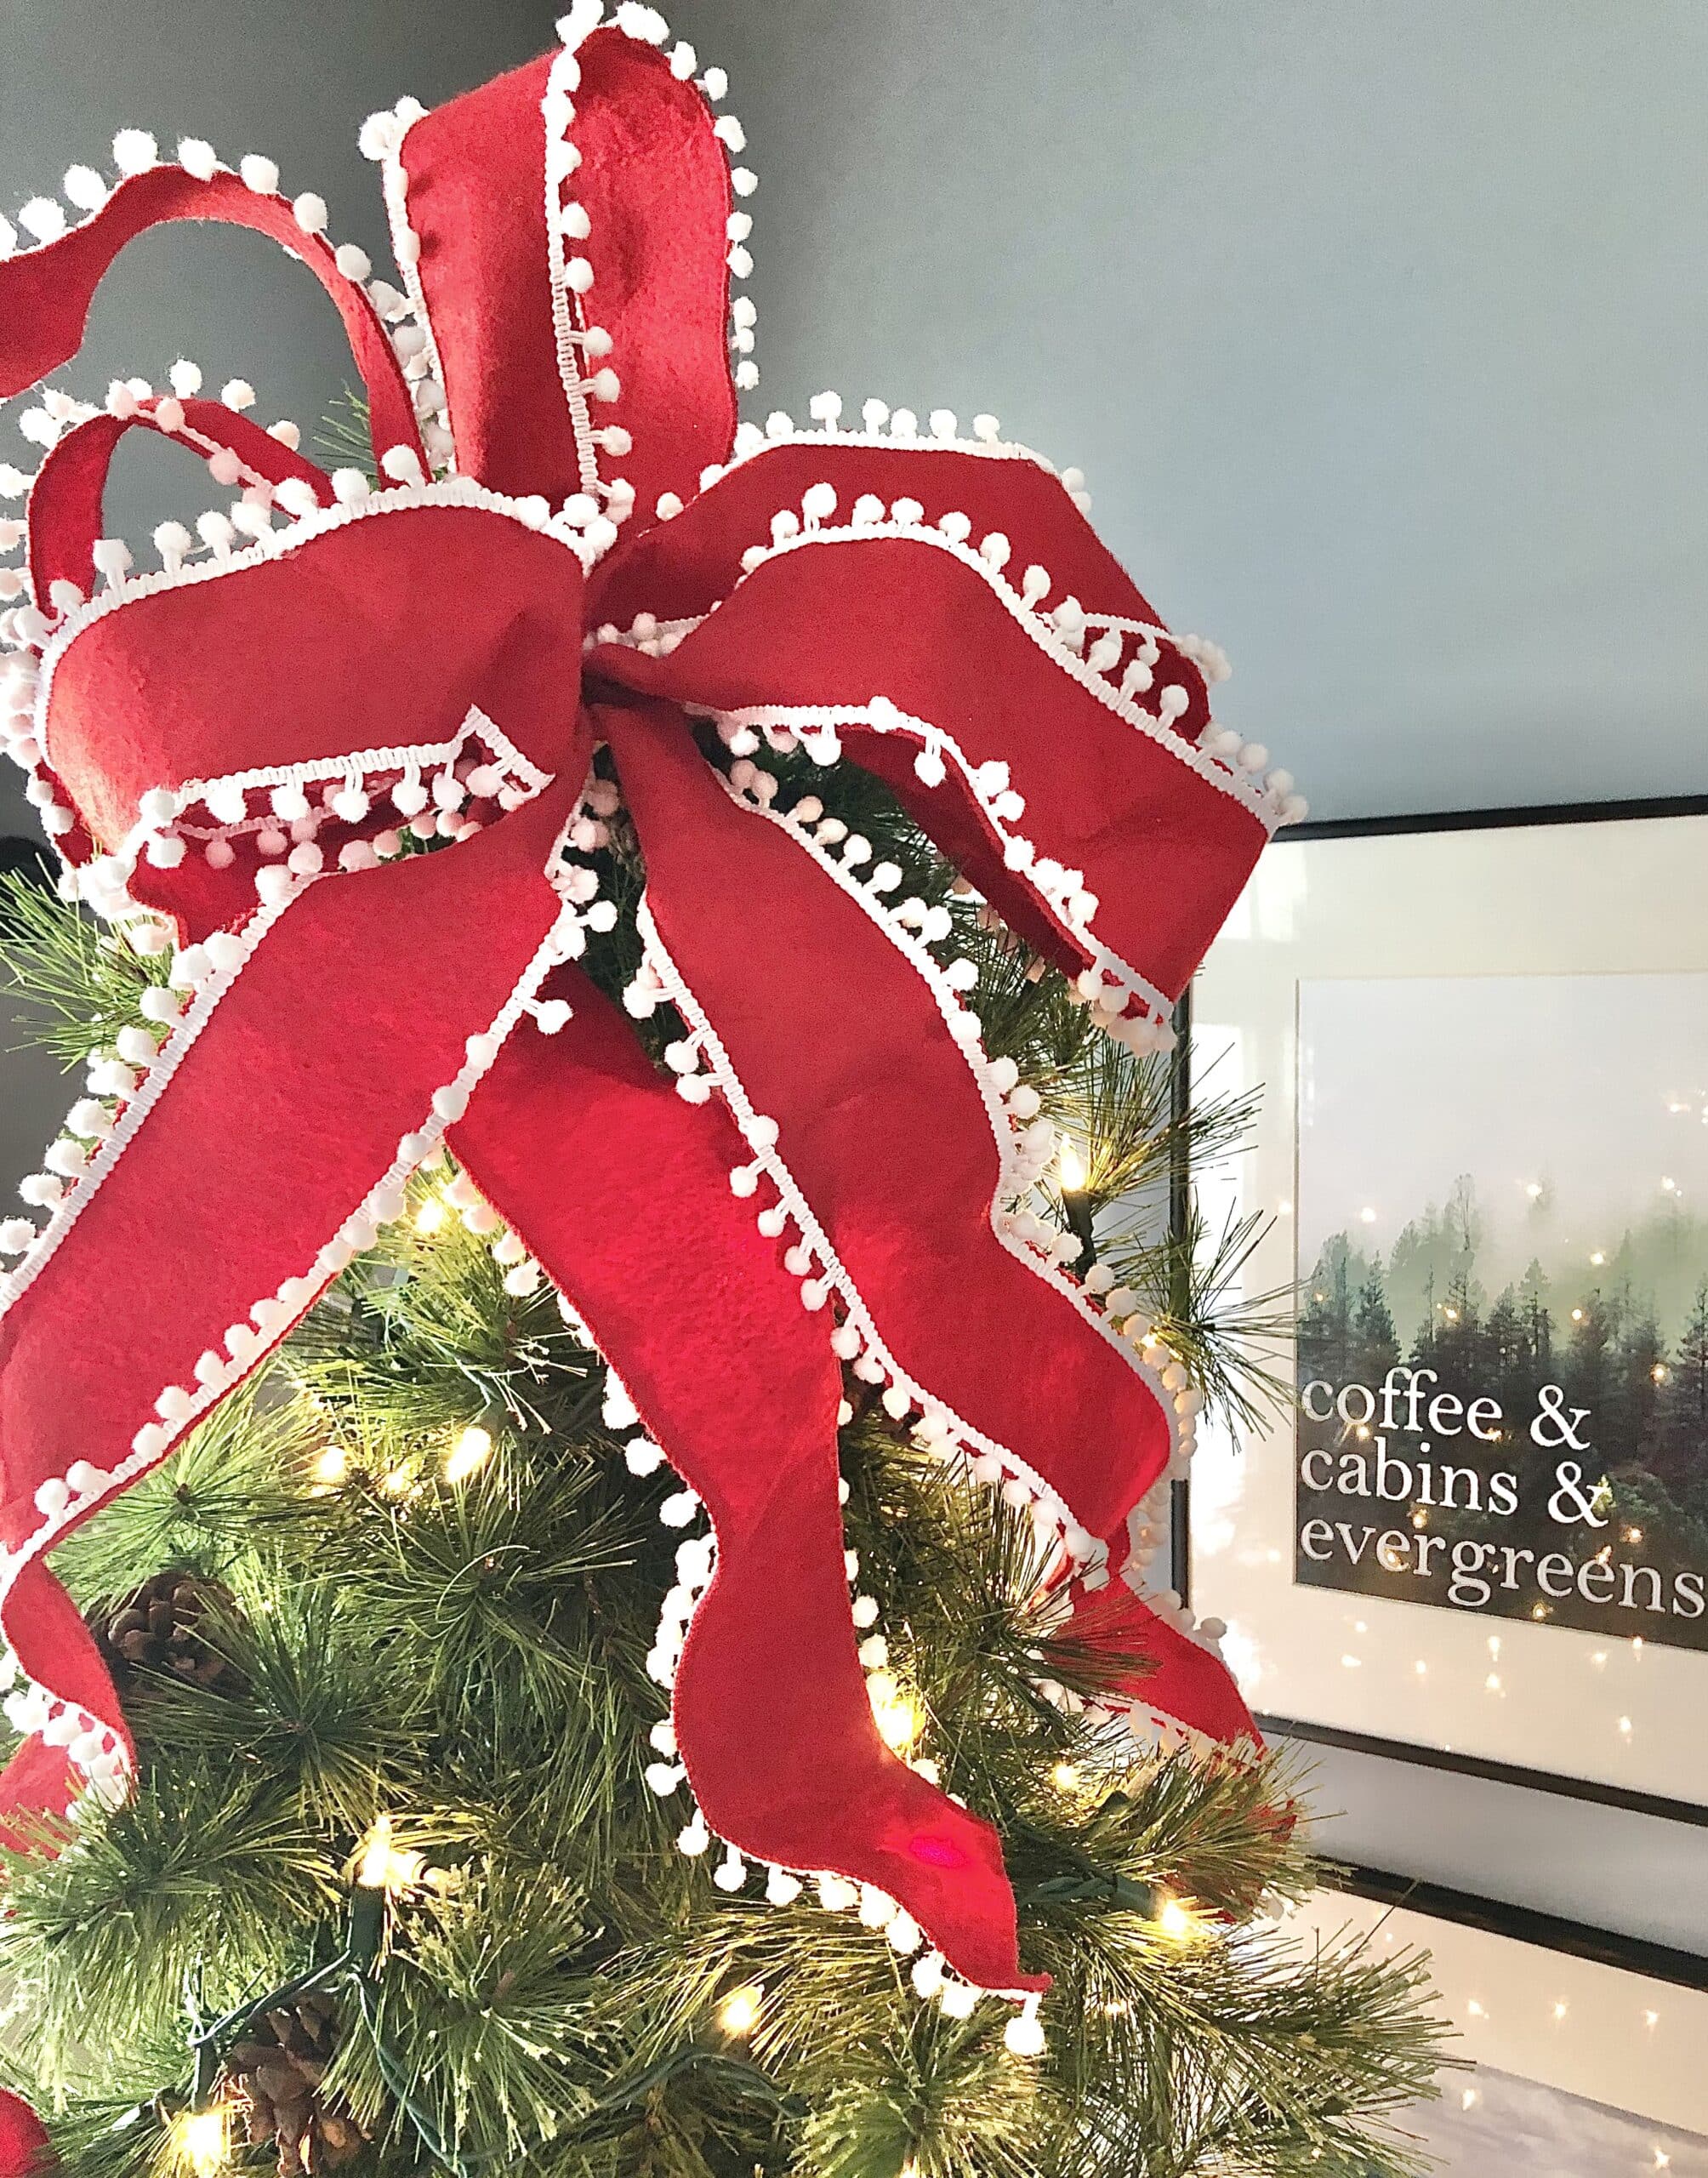
A big, loop bow with pom poms crowns this tree perfectly!
Missy’s Tree Tip!
Make your topper bow from the same ribbon you used on the tree. This ties everything together and gives the whole tree a cohesive, finished look from top to bottom.
From Sad to Spectacular
Let’s take a look at the transformation…

That old tree started with sparse areas, skimpy branches, and dead lights.
Now?
It’s tall, lush, and absolutely holiday-ready, with a full appearance from top of the tree to base of the tree!
So before you head to the store in search of a new real Christmas tree, give your fake tree a little TLC. With these easy tricks and budget-friendly ideas, you can transform your artificial tree into the perfect backdrop for all your holiday memories.
And the focal point of your festivities? That would be this tree!
Cheers!

A Little About Me
Hi! I’m missy. So happy to meet you!
“Decorate with Joy! Live with Happiness”
I truly believe that your home should be a reflection of your personality, a space where you feel free to express yourself and create a sanctuary that feels uniquely yours.
I love creating mood boards, hunting down unique home décor treasures, tackling easy DIY projects, and gathering with family and friends. Homes are meant to be enjoyed, filled with laughter, and shared with the people you love!
– cheers –

Don’t Forget to Pin It!

Still in the Christmas Spirit?

christmas tree decorating ideas

creative christmas gift wrapping ideas
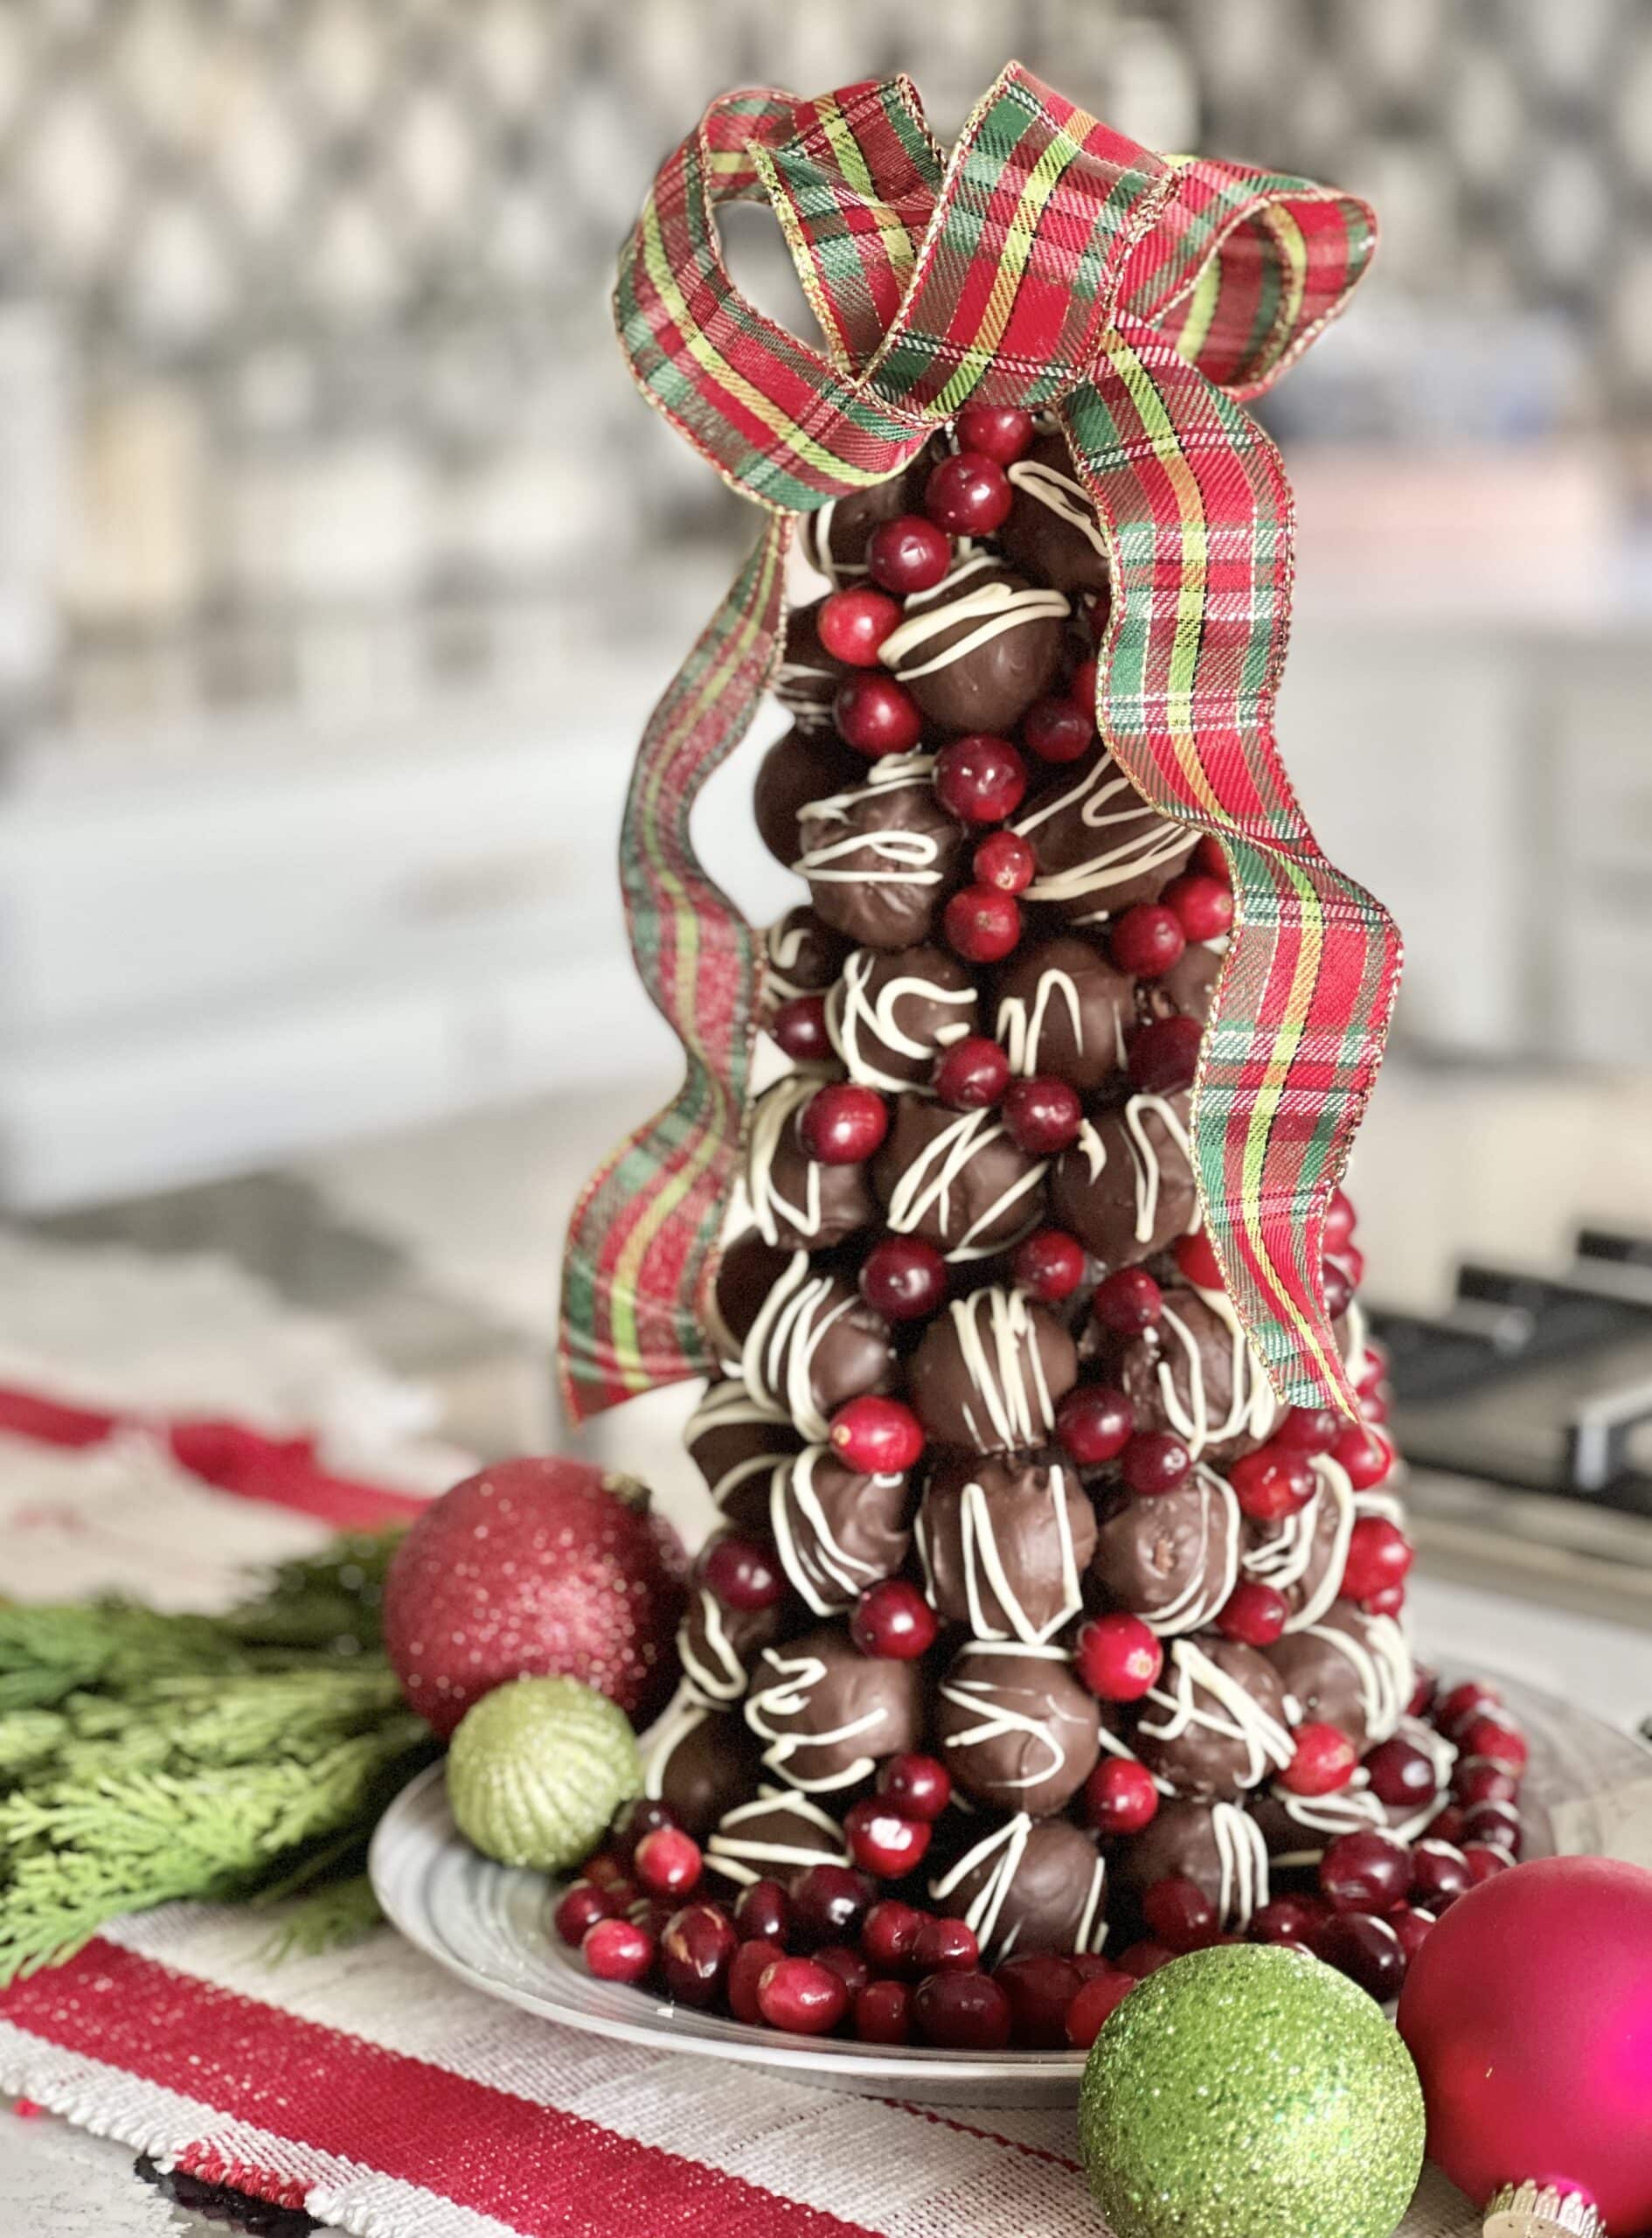
Chocolate Truffles + Truffle tree idea
A Note on Storing Your Tree (So Next Year is Easier!)
A little care at the end of the season goes a long way!
Storing your artifical tree properly keeps it in better shape year after year. So next Christmas time, you’re starting with a tree that still has its fullness. Not one that’s more beaten up than whern you started.
Storage tips:
- Disassemble the tree section by section and loosely fluff the branches back out before storing…this helps them hold their shape
- Store in a breathable tree bag, not a plastic garbage bag, which traps moisture and can damage the needles
- Avoid compressing the branches too tightly in the box or bag…this crushes them and creates more work for you next year
- Store lights wrapped loosely around a piece of cardboard or a cord organizer to prevent taqngling
- Keep the tree in a cool, dry place away from direct sunlight, which can fade and dry out artificial needles over time
- Label each section of your tree (top, middle, bottom)so reassembly is quick and painless next year
- Tuck a small sachet of cedar or lavender into the bag to keep the storage smell fresh.
One more thing…take a photo of your finished tree before you take it down! It becomes your reference guide for next year and makes decorating faster and easier.

Frequently Asked Questions
Looking for a quick answer? Here are the most common questions about making a Christmas tree look fuller.
How do you make a Christmas tree look fuller? The best way to make a Christmas tree look fuller is to start by thoroughly fluffing every branch, then layer in extra fullness using pine picks and floral picks in bare spots. Add lights deep into the center of the tree, then use wide ribbons, large ornaments, and oversized ornaments to fill in the remaining empty spaces. Work from the inside out and bottom to top for best results.
What is the easiest way to make a fake Christmas tree look fuller? The easiest way is to fluff it…really fluff it! Separate every branch and sub-branch and fan thyem outward in every direction. This single step alone dramatically improves the fullness of your tree before you add a single decoration.
How do you fill in gaps in a Christmas tree? You can fill in unsightly gaps with floral picks, pine picks, or extra branches inserted directly into the tree’s branch spaces. Wide ribbon looped through bare spots is another great option. For deep or large empty spaces, tuck a few ornaments toward the back of the gap to creat the illusion of depth.
Can you add extra branches to an artificial tree? Yes! Some artificial trees have branch slots that accept additional branch inserts. You can purchase extra branches or branch picks at most craft stores. They are a great way to significantly improve the full appearance of a slim tree or small tree.
Do these tips work for a real Christmas tree too? Absolutely. Most of these techni2ues work just as well on a real tree. Fluffing doesn’t apply, but adding picks, layering ornaments and larger decorations, using ribbon, styling the base, and elevating the tree all work beautifully on a real Christmas tree with sparse areas or uneven branch depth.
How do I make my Christmas tree look professionally decorated? For a professionally decorated look, focus on layers. Start with lights deep in the tree, then ribbon, then large ornaments and focal point ornaments in the middle layers, then smaller decorations toward the tips. Use a mix of sizes, different textures, and a consistent color scheme. A well-chosen tree skirt and a statement topper complete the look.
How do you keep an artificial tree looking good year after year? Store it properly! Use a breathable tree bag, don’t compress the branches, store lights separately to prevent tangling, and keep it in a cool, dry location away from direct sunlight. Take a photo of your finished tree before taking it down so you have a reference for next year.


Shop My Favorite Christmas Decor

Beautiful job! What a great transformation! Happy Thanksgiving!
Thank you, Leslie! It was a bit of a challenge but it turned out pretty well. I have a hard time throwing things away…I would rather give makeovers! Happy Thanksgiving to you and your family!
Wow! You made your “scrawny” tree look amazing! The art of “fluffing” a tree is key!! I also love how you added ribbon! So pretty!
Hi Donna! You are right…fluffing is key! It is not one of my favorite things to do but it makes such a huge difference! Thanks for reading, my friend!
Your tree looks lovely! Growing up my step-father always bought and brought home some of the saddest looking trees from wherever he bought them. I can remember us all complaining about another Charlie Brown tree when he responded that he felt bad for the sad trees since no one else would buy them but they always looked lovely and full and just fine by the time we put on the ornaments, garland/ribbon, tinsel, etc. I once knew a family that put lighted green garland around some bare spots of their tree to fill it out!
What a nice man your step father sounds!