

A Easy DIY Pumpkin Vase
Fall is here and we love decorating our homes for the change of season. Quickly give your home decor some autumnal flair with this easy, no-carve DIY pumpkin vase project for Fall.
This versatile vase will bring some decorative pumpkin “spice” into your home!
To those of you coming from Sweet Valley Acres, welcome! Crystal has such an incredible eye for design and unique projects. I have always been in love with her blog. Lucky me got to spend time with her at the Haven Conference and I fell in love with her even more!
Table of Contents

Don’t you just love decorating for Fall?
I LOVE decorating for fall!
I think the sights and smells of Fall are such a part of my cozy home DNA…Fall decorating is the best!
Every year, I add a few new pieces to my collection of autumnal decorations.
(I think I might need to buy another storage tote!)
This year, I decided to spruce up a plain glass pumpkin-shaped candle holder.
I came across this glass pumpkin candle holder at a yard sale.
See it there among the Christmas reindeer, the red wreath, and the multitude of reading glasses?
Each one had a small crack in it…
But I can live with that!

You can also find glass pumpkin candle holders on Amazon.

From Glass Pumpkin to Mercury Silver Vase
I’ve always wanted to try creating a mercury silver finish with glass.
This seemed like a good project to give this a try.
And Rust-Oleum Mirror Effect Spray Paint helps to create the magic! I promise…this is so easy!

First, for the sake of keeping my hands fairly clean and avoiding painting the wrong side, I taped off the back candle “entrance” with painter’s tape.

I started by spraying a very light coat of the Mirror Effect paint on the INSIDE of the glass pumpkin.
Did you catch that?
The INSIDE of the pumpkin and not the outside! (Kind of an important distinction!)
Next, I spritzed some vinegar onto the inside of the pumpkin and then blotted the inside lightly with a paper towel to create the “mercury effect.”
My high school chemistry teacher would be so proud of me!

You can repeat these steps until you get the effect that you want.
I love the finish and it looks so pretty sitting in a window with the light shining through.
Wouldn’t Cinderella love this pumpkin for her carriage?
I could stop right here with the project and be very happy!

The Layers of Fall
But, when I think of Fall, I think of layers.
So, let’s layer it up!
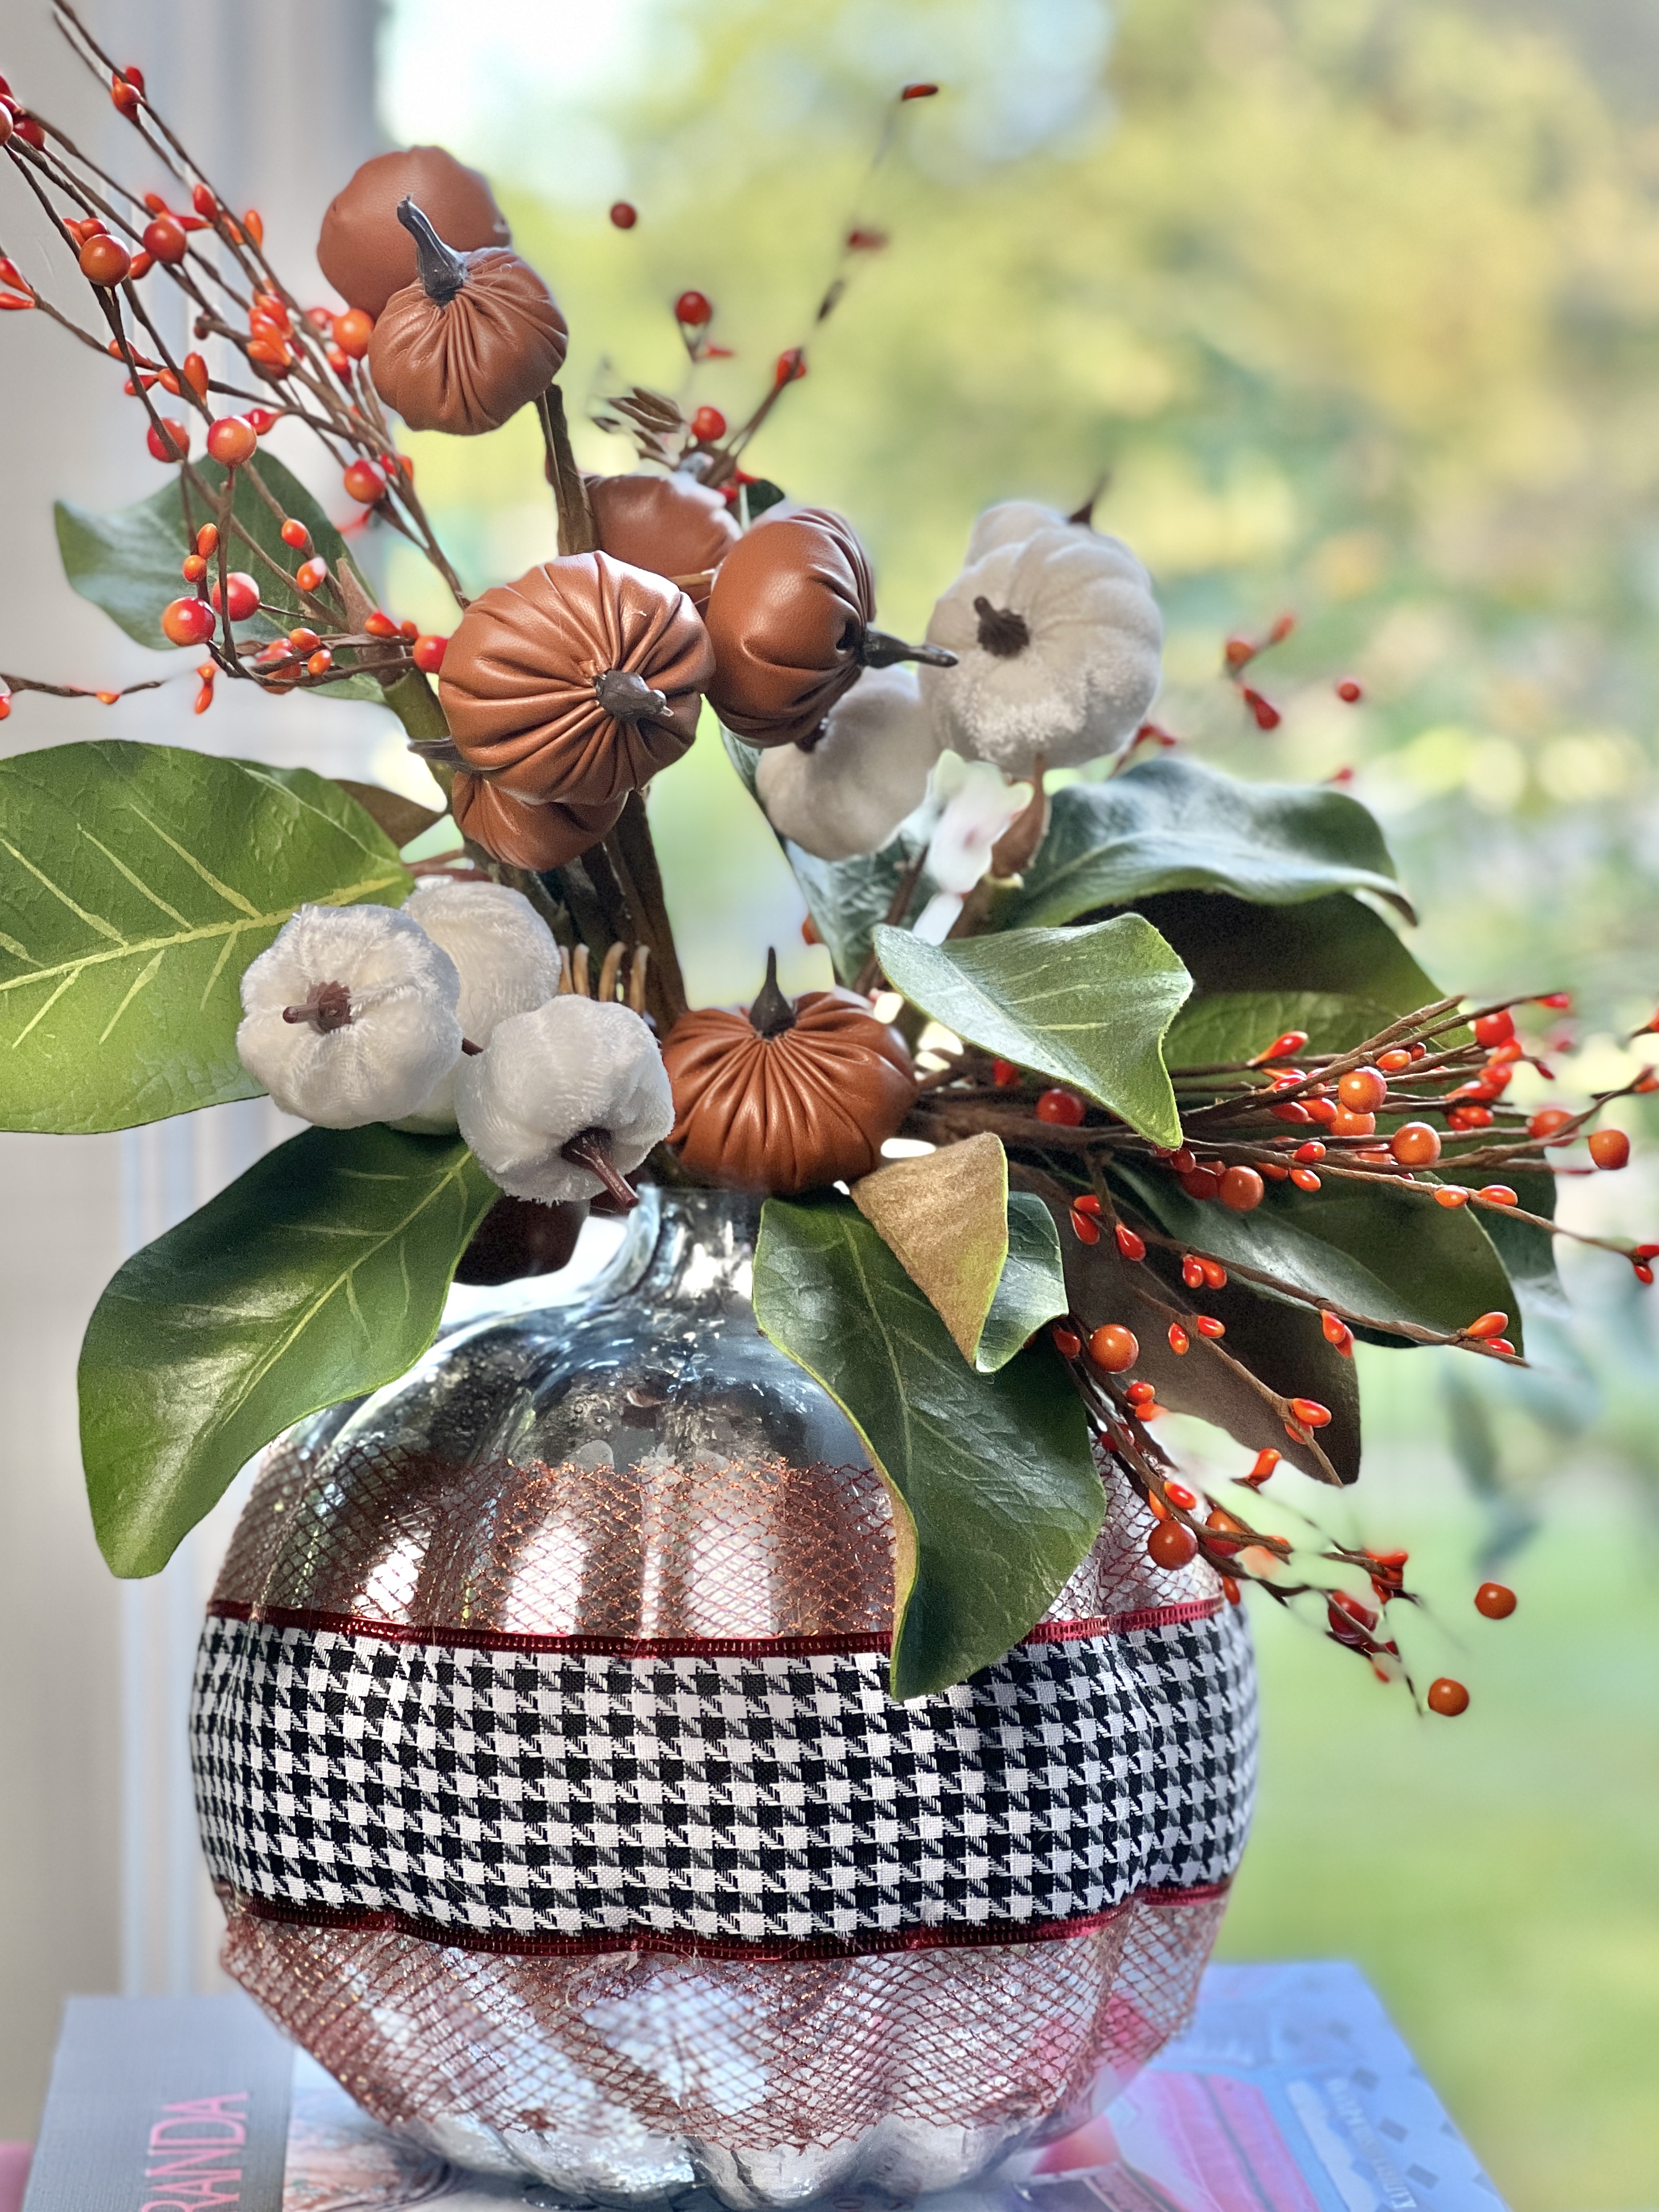
I added the copper mesh ribbon and black and white houndstooth ribbon around the pumpkin. I used hot glue as I created the ribbon band around the pumpkin.

This was a little trickier than I thought it would be because of the curve of the pumpkin. My glue gun was a great help as I could “cheat” any excess ribbon into the curves.

Finally, I filled the top with some lovely faux florals with some very fun textures.
Color and texture for Fall!
I love how my Mercury Glass Pumpkin turned out! It’s the perfect addition to my fall decor.

Let the Light Shine
I placed the pumpkin vase near a window so that all of the textures would be visible in natural light.
Give It a Try!
If you’re looking for a quick and easy DIY project to add some fall flair to your home, give this mercury glass pumpkin vase project a try!
The next stop for you on this blog hop is Meredith with Arts and Classy. Wait till you see her Pottery Barn pumpkin dupe.
Have fun with all of the Pumpkin inspiration!
Cheers!

Honored to have this post featured in the Fabulous Friday Link Party!
I love your mercury glass pumpkin Missy, and the ways you dressed it up for Fall!
Thank you so much, Cindy! So fun to decorate for Fall!
Wow! the mirror effect is awesome and I always love how you incorporate black and white in your home! It’s definately a favorite pattern for me! Susan
Thanks, Susan! It is always fun to bring in some pattern! Thanks for reading!
You did such a good job on your mercury glass vase. It looks so pretty decked out for fall!
Hi Kim! Thanks so much for reading and leaving a comment. Decorating for Fall is so much fun! I’m glad we got to share some of our ideas together through the hop!
I love how you repurposed that old vase and made it something truly beautiful!
Thank you, Meredith! Such a nice compliment from a very creative crafter! Such a fun blog hop!
I love the texture you created in this, and the arrangement is so pretty!
Thank you so much, Lora! It has been a real treat to get to know you through your blog. I love your creativity! Hopefully, we can “hop” together again sometime soon!
Love this so much Missy! I am a total fan of anything mercury glass so how excited what I to see that you made your own. I tried that last Christmas and it didn’t turn out great but yours looks perfect!!! Love all your final touches like adding the netting and ribbon and all those cute pumpkins out the top. I also saw your lovely comment for my link – you made my day!!! So very happy that we met and got to go to Haven together!
Amazing friendships can be born through blogs! Thank you, dear friend!
Such a great idea Missy. I have not tried this mercury glass treatment yet, I will have to put it on my radar.
Thanks for joining in on the fun today.
Thank YOU, O Fearless Leader! Such a fun blog hop! Thank you for including Sonata Home Design!
This is amazing, Missy! I’
Thank you, my friend!
This is amazing, Missy! I’m a huge fan of anything made of mercury glass! And then add layers and more textures and I’m hooked! This has your signature bold look written all over it, and I’m here for it!
Thank you, Kristy! That means so much to me! Isn’t decorating for Fall so much fun? Thanks for hopping!
I love your pumpkin vase! It came out so cute.
So cute! I haven’t tried the Rustoleum mirror paint, I’ve used the Krylon one on a few projects. I’ll have to look for it because I their paints!
It was a fun product to try! Thanks, Jennifer!
Congratulations Missy, you had a very popular post this week and we will be featuring it on the Fabulous Friday Link Party this week!
Michele, you just made my day! Thank you so much! I enjoy the Fabulous Friday Link Party so much and so this is quite an honor! Thank you! ~Missy
What a COOL project, Missy!! I love how it turned out. The florals that you put in it are so beautiful for fall!!
Thank you so much, Rachel! Fall colors are so beautiful and there are so many floral options. Thanks so much for reading and leaving a comment!
Missy this came out beautiful! I love mercury glass and I’m going to have to try that mirror paint.
Hi Nicolle, The mirror paint was really fun to work with…and so easy! Give it a try!