Easy Checkered Pumpkin DIY To Add Charm to Your Fall Decor
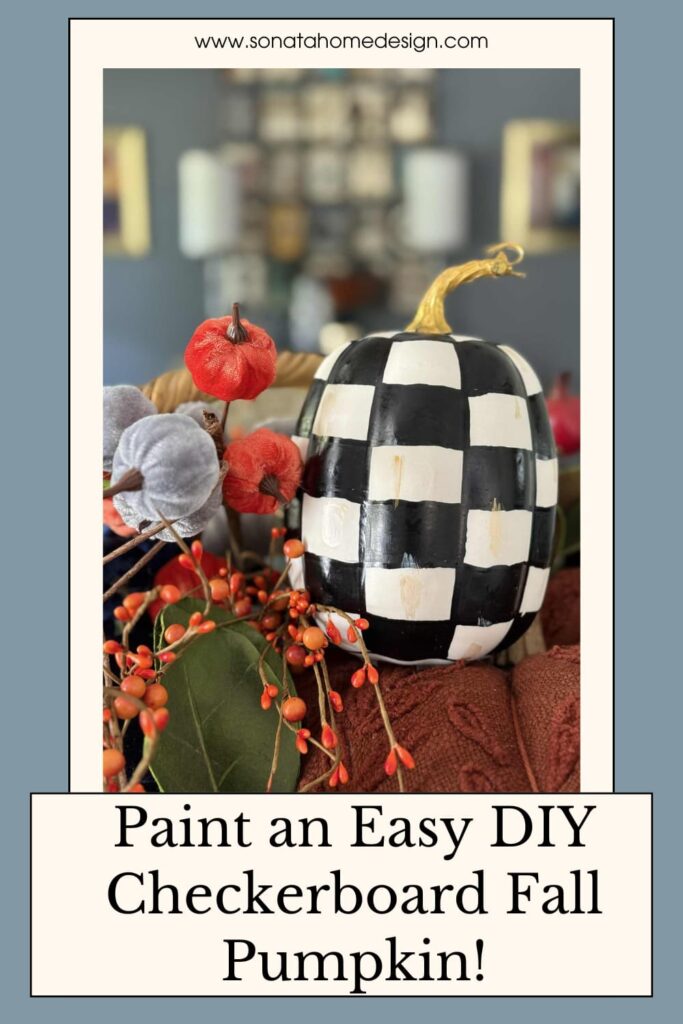
This easy checkered pumpkin DIY is such a fun way to dress up your fall pumpkins. With a little paint and a dash of creativity, you’ll have a playful piece that brings instant charm to your autumn decor.
This blog contains affiliate links. This means a small commission is earned if you make a purchase by using this link. The price you pay will be the same whether you use the affiliate link or go directly to the vendor’s website using a non-affiliate link. As an Amazon Influencer, I earn from qualifying purchases.
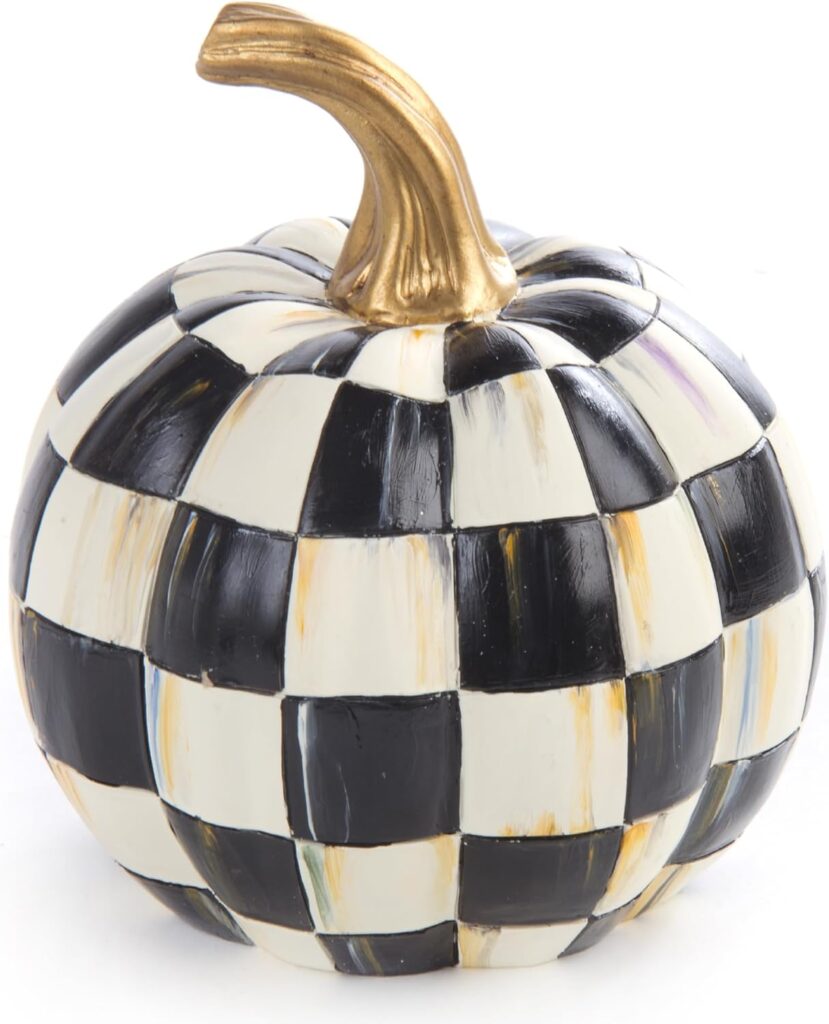
I’ve had a long-standing love affair with the MacKenzie-Childs brand—the colors, the patterns, the pure whimsy!
Their pieces are so vibrant and full of personality that they instantly make a home feel more playful and inviting.
The only catch?
They can be a little on the pricey side.
That’s why I get such a thrill out of creating my own version of those high-end looks.
This easy checkerboard pattern pumpkin DIY gives you all the fun, charm, and seasonal flair without the big price tag, and it’s such a joyful way to bring that same whimsical spirit into your fall decor!
So, grab a pumpkin, some paint, and a little courage. (This is really easy!)
Let’s dive into this checkered pumpkin DIY and make our own bit of fall magic!
How to Make a DIY Checkered Pumpkin
This pumpkin makeover is such a fun fall craft idea! Whether you’re using a real pumpkin or a fake craft pumpkin from your local craft store, this project will give you all the charm of buffalo check pumpkins without the high price tag.
With a little paint and some patience, you’ll have painted pumpkins that look like chic home decor accents.
Supplies You’ll Need
- White pumpkin (real or fake pumpkin)
- White acrylic paint (or spray paint for a smooth base color)
- Black acrylic craft paints
- Paint brush (a flat one works best)
- Ruler or measuring tape
- Pencil (for sketching lines)
- Paper plate or palette for paints
- Damp cloth for quick touch-ups
Step 1: Choose Your Pumpkin
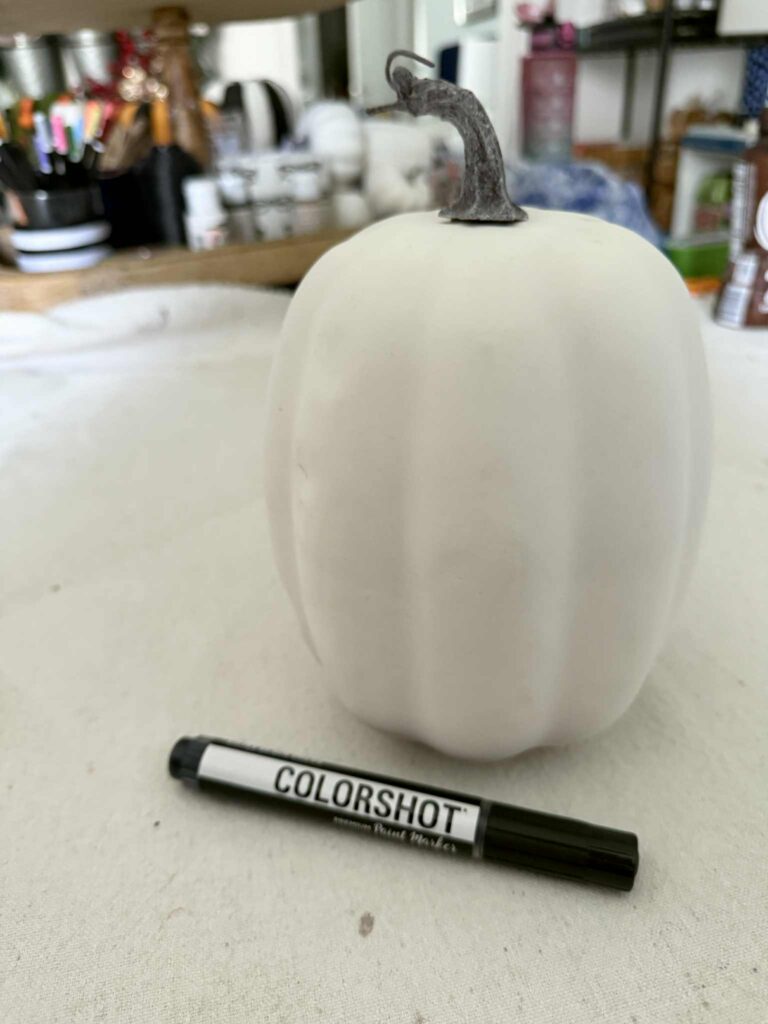
Start with a white pumpkin if you can find one—it saves time!
If your own pumpkin isn’t white, no problem. Just cover the whole pumpkin with white paint or spray paint for your base color.
A craft pumpkin from the local craft store works especially well because it will last for many seasons, but a real pumpkin is just as charming for short-term fall decor.
Step 2: Mark Horizontal Lines
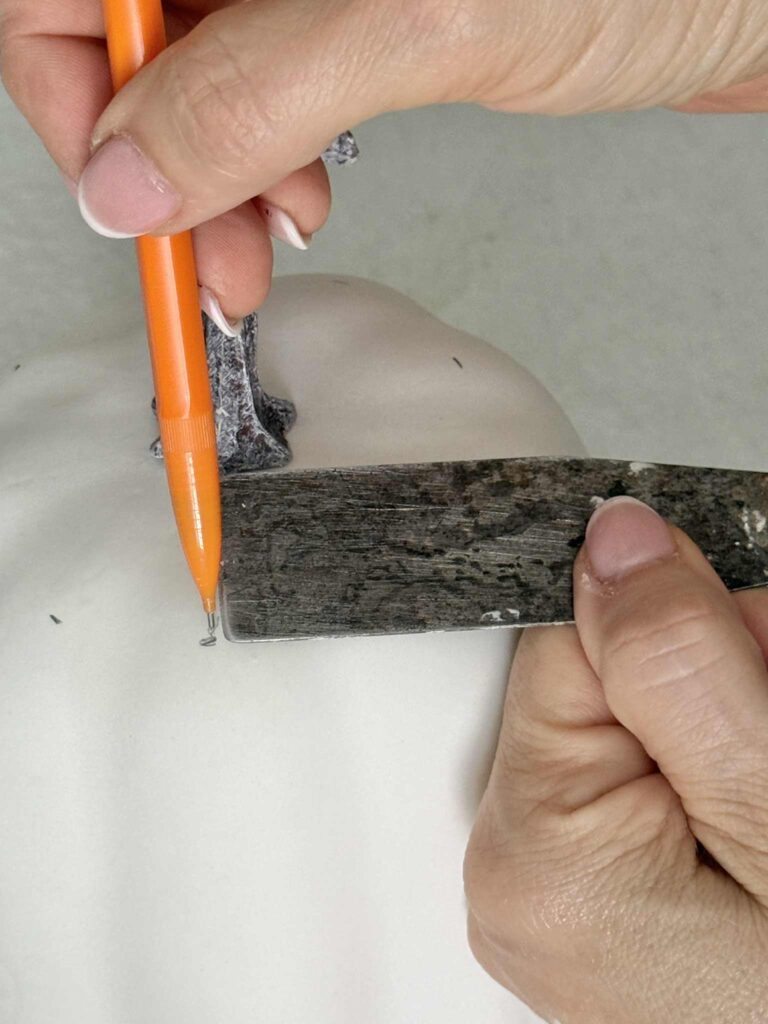
Place your pumpkin on a flat surface and begin measuring from the top of the pumpkin near the pumpkin stem.
I couldn’t find my ruler, so I ended up using a spackle knife as my measuring tool.
Whatever works!
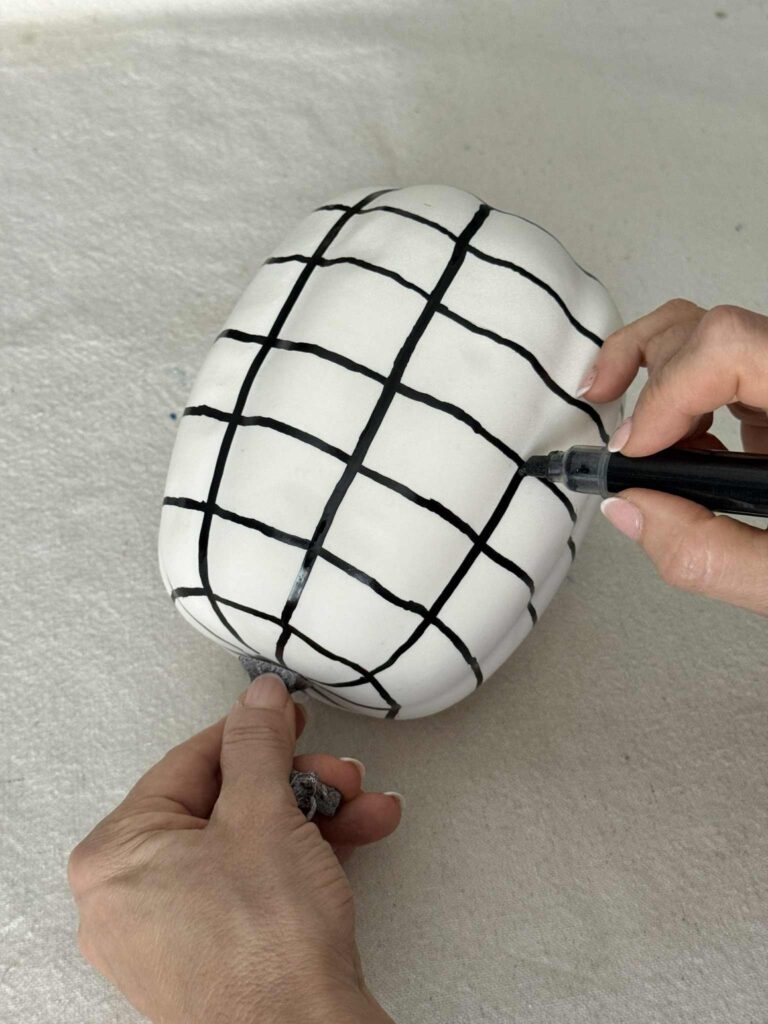
Make small pencil marks equidistant around the pumpkin, then connect the dots to create a horizontal line.
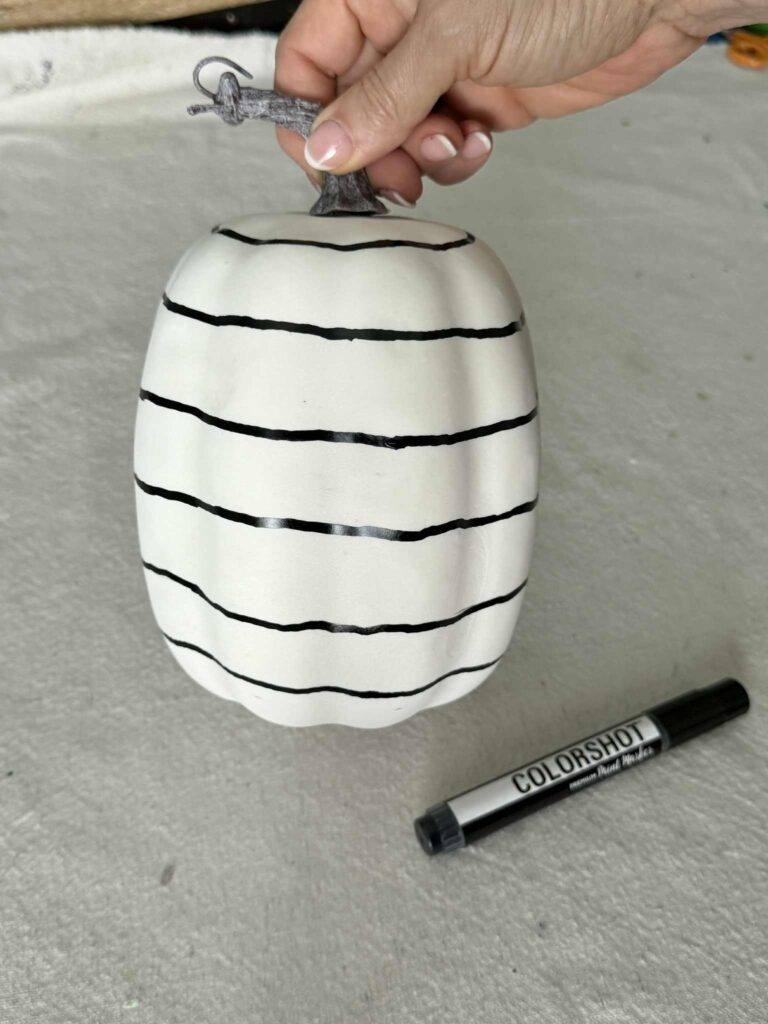
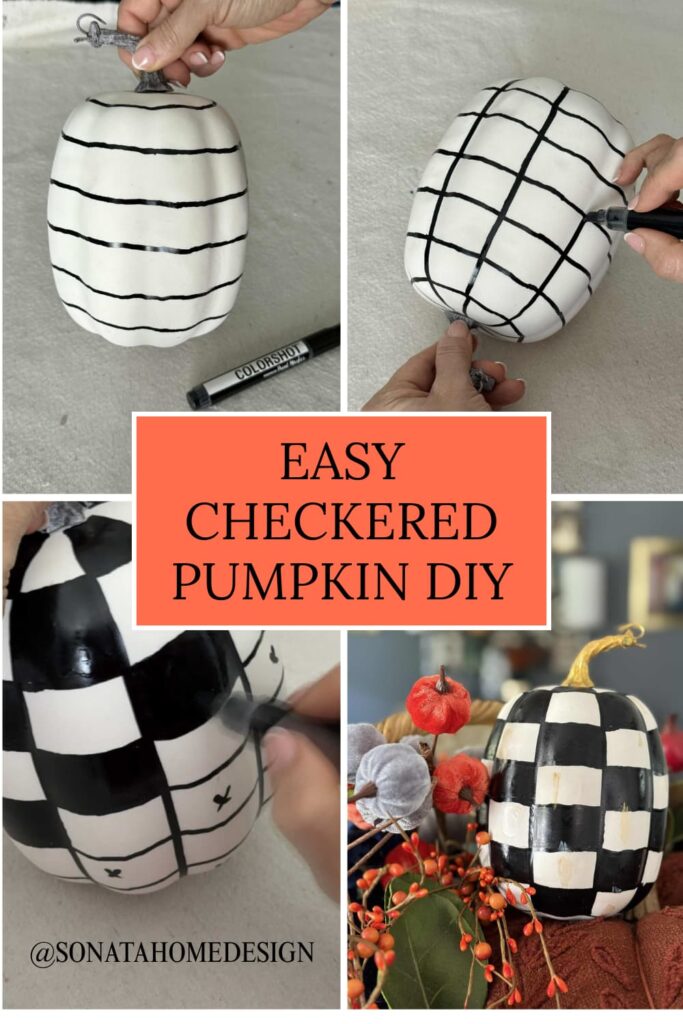
Continue measuring and marking around the whole pumpkin until you’ve drawn evenly spaced horizontal stripes.
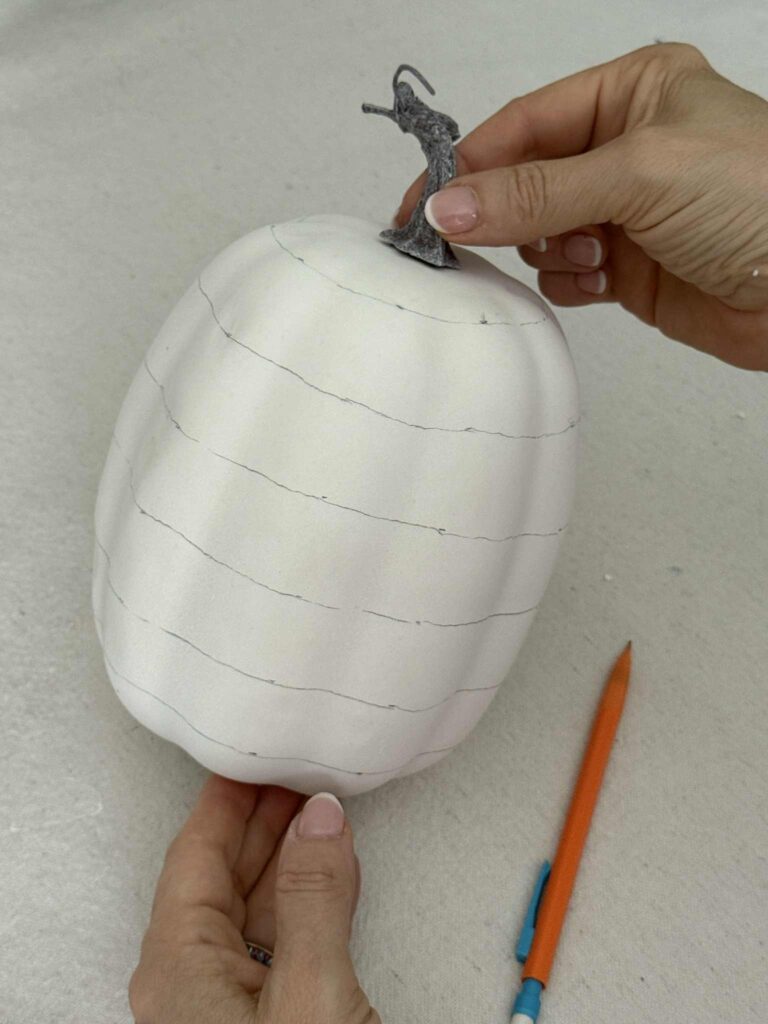
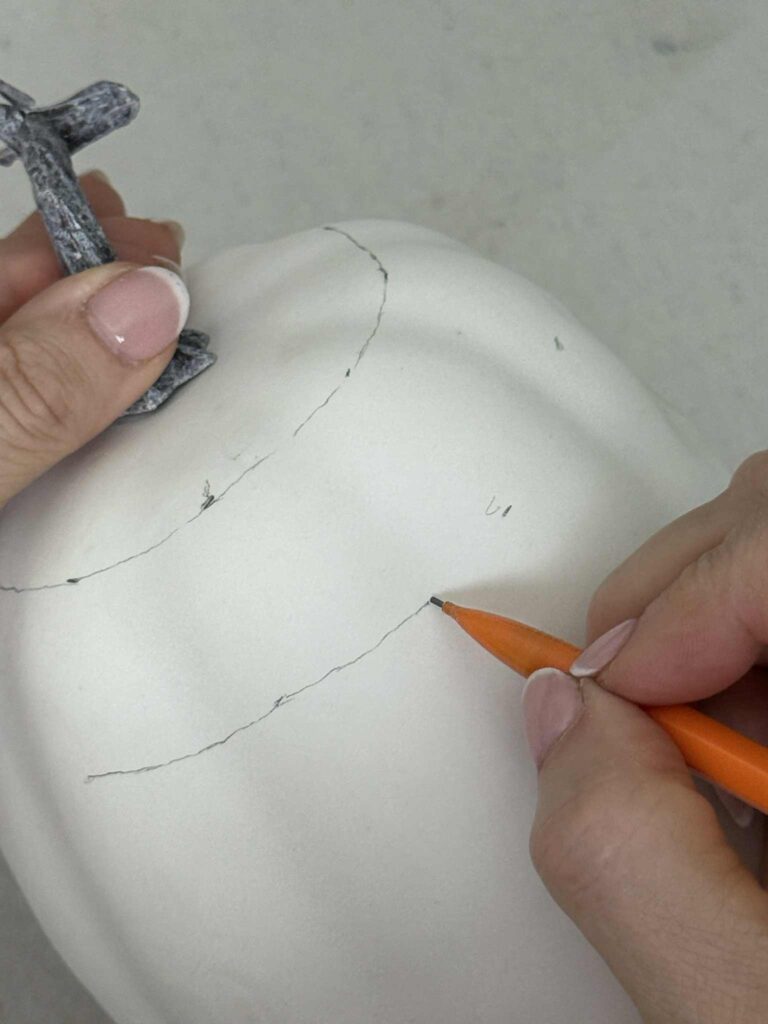
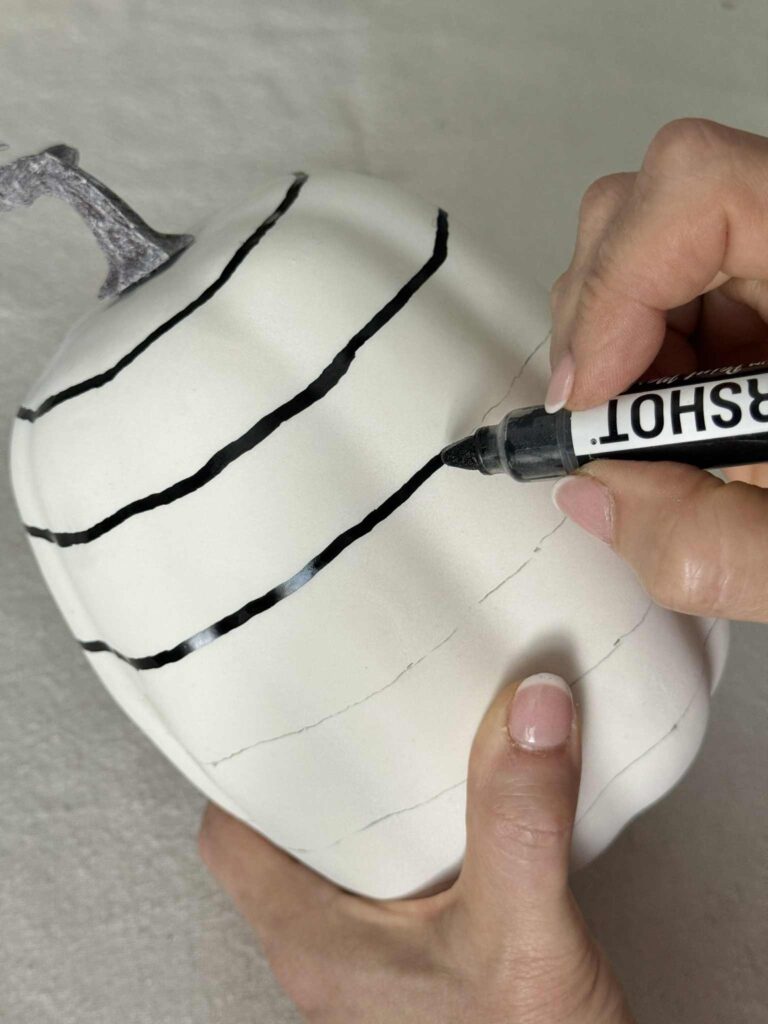
Then outline each stripe with a black paint marker. It’s so easy!
Step 3: Paint Vertical Stripes
Instead of drawing vertical lines, let the pumpkin guide you!
Use the natural vertical indentations on the pumpkin as markers for painting vertical stripes.
This keeps the checkerboard pattern looking even while saving you time with measuring.
Step 4: Paint the Black Squares
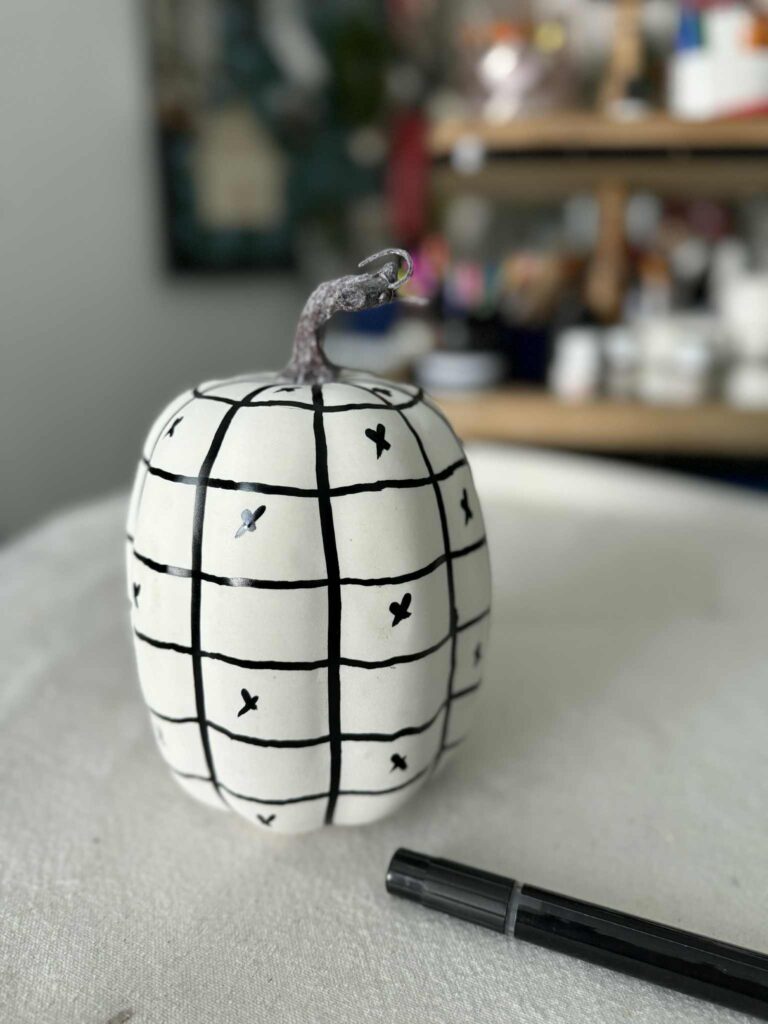
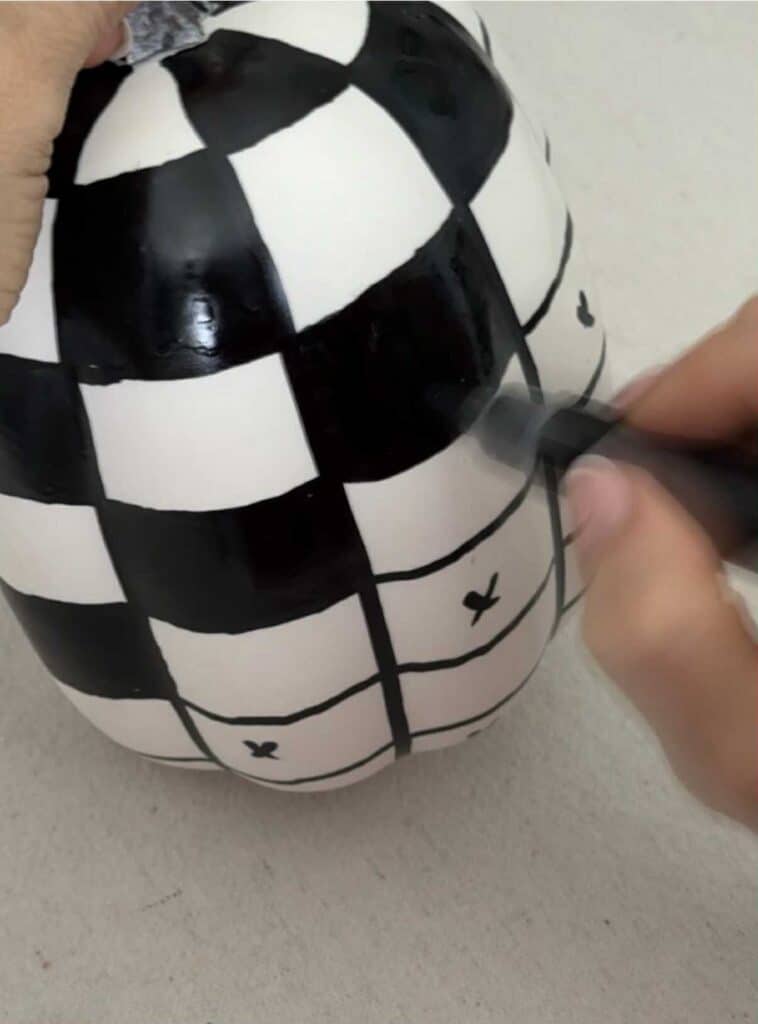
Before you start painting, go around the pumpkin and lightly mark every other square with an “X.” This way, you’ll know exactly which boxes to fill in and won’t lose track as you go.
Using your black paint marker, carefully fill in the marked squares to create the checkerboard pattern. Take your time and be mindful of where the wet paint is on the pumpkin so you don’t accidentally smudge your work.
Step 5: Touch Up and Add Details
Once the black squares are dry, go back with a little white acrylic paint to sharpen the edges and clean up any slips.
If you’d like a softer look, you can lightly brush over the black squares with a touch of white paint to give them a more faded, vintage feel.
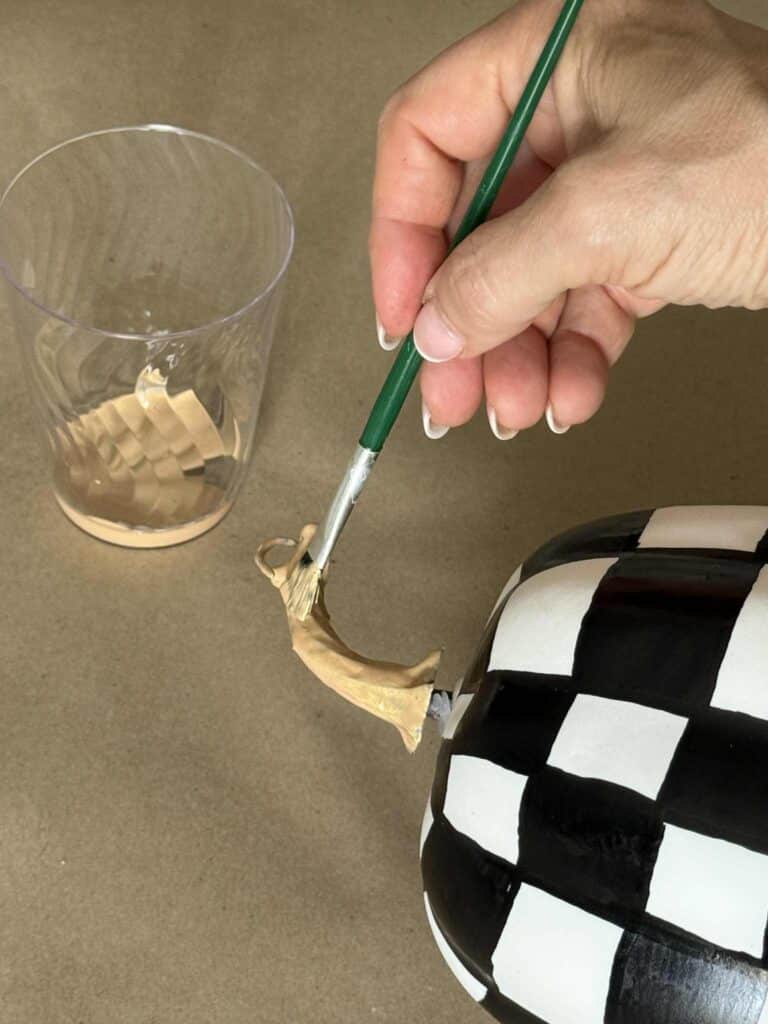
For a finishing touch, paint the pumpkin stem with gold paint—it adds just the right amount of sparkle and polish to your pumpkin makeover.
And true to the MacKenzie-Childs style, I added some faint gold streaks on random squares on the pumpkin.
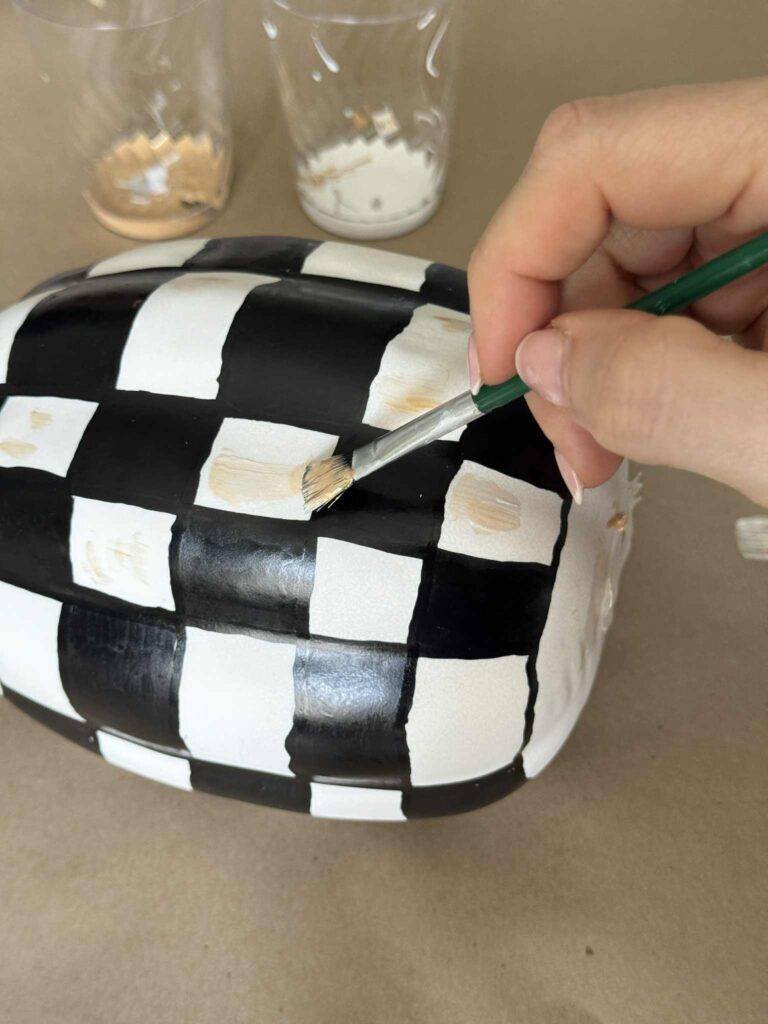
Admire Your Pumpkin Makeover!
And that’s it—you did a great job!
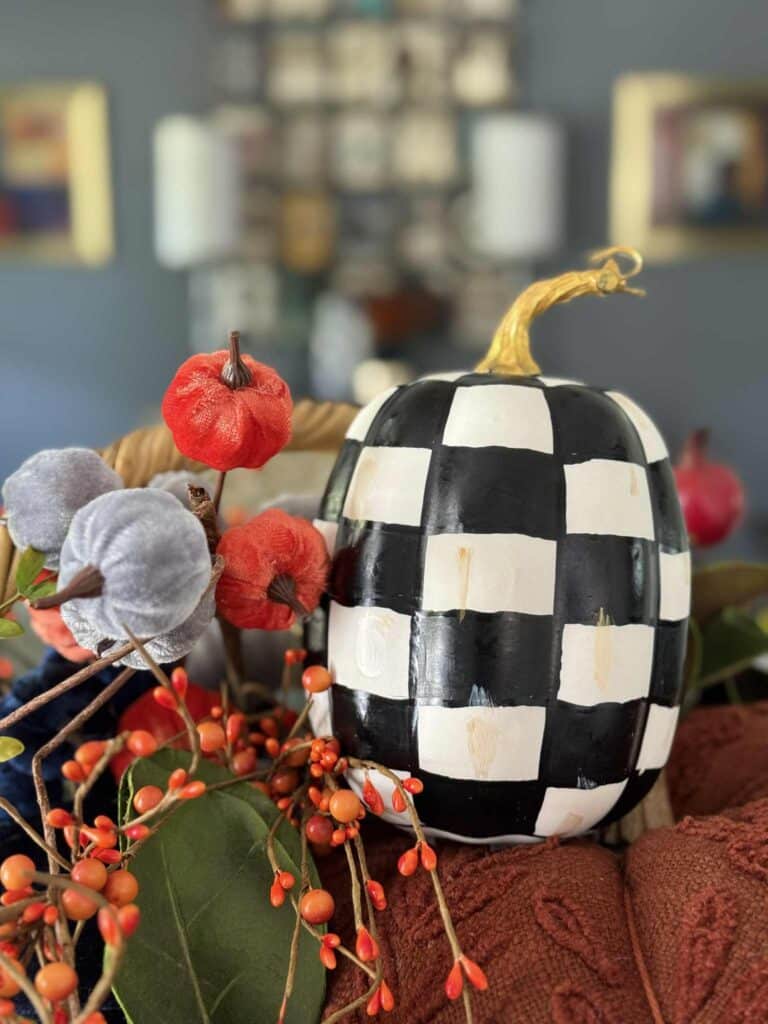
You’ve turned a plain pumpkin into a buffalo check pumpkin that brings whimsy, charm, and style to your fall decor.
Whether displayed on your porch, nestled into a centerpiece, or standing proud on your mantel, this DIY project is sure to become one of your favorite fall pumpkin crafts!
Cheers!

A Little About Me
Hi! I’m missy. So happy to meet you!
“Decorate with Joy! Live with Happiness”
I truly believe that your home should be a reflection of your personality, a space where you feel free to express yourself and create a sanctuary that feels uniquely yours.
I love creating mood boards, hunting down unique home décor treasures, tackling easy DIY projects, and gathering with family and friends. Homes are meant to be enjoyed, filled with laughter, and shared with the people you love!
– cheers –
Don’t Forget to Pin It!
Pin the image below to your boards on Pinterest (just click the Pin button in the top left corner). You can also follow along with me on Pinterest!





Super cute Missy! a perfect fit for your home.
Ohh I love this checkered pumpkin look! The graphics really add a major punch of interest to a fall decor look!
So cute, Missy! I adore black and white for Halloween! That paint marker worked so great! Happy Halloween!
That’s beautiful Missy. it’ll be a feature at Handmade Monday this week.
I appreciate this so much! Thank you!
Such a nice post this is.